Sometimes things don’t go the way you planned. It seems that no matter how careful and attentive you are, things are going to go off the rails with cannabis sometimes. Luckily, most common problems are are easy to diagnose and easy to fix.
Common Nutrient Issues
When your plant is having issues with nutrients, it’s almost impossible to detect until it manifests itself in the leaves. It’s been my experience that practically all nutrient deficiencies are the results of unbalanced pH and then the first step to correcting them is to test the pH near the roots to make sure it’s in range.
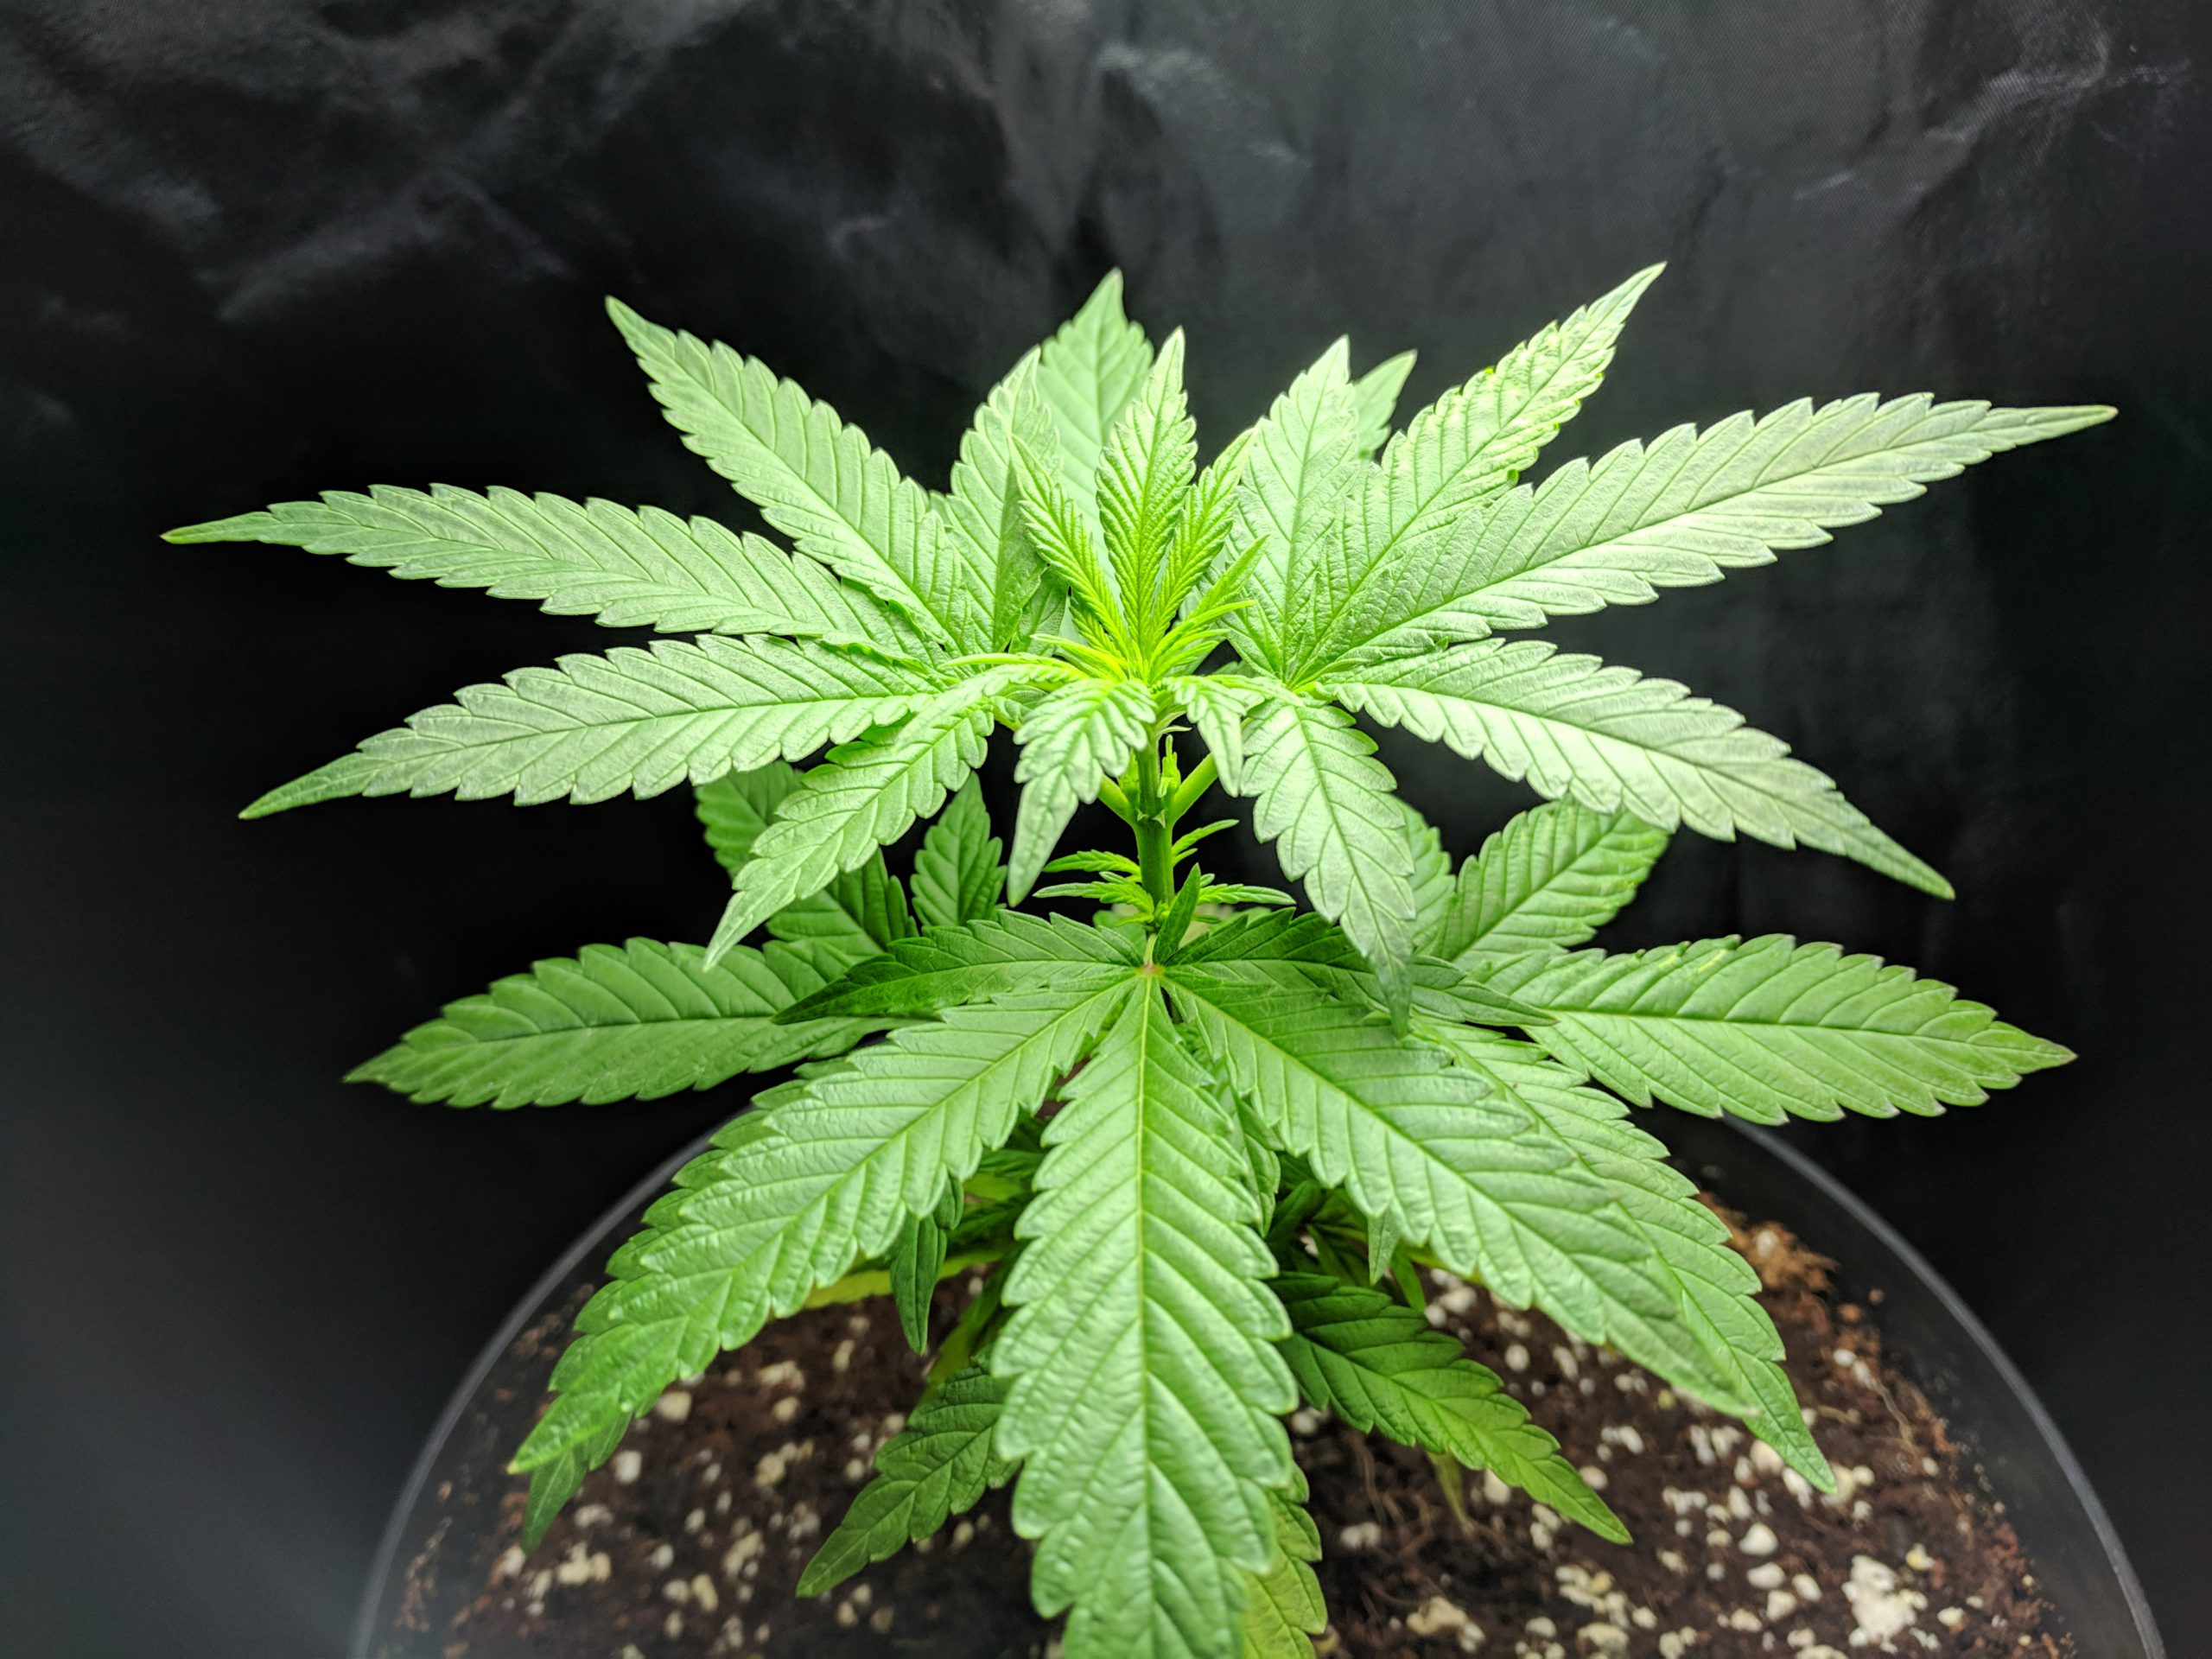
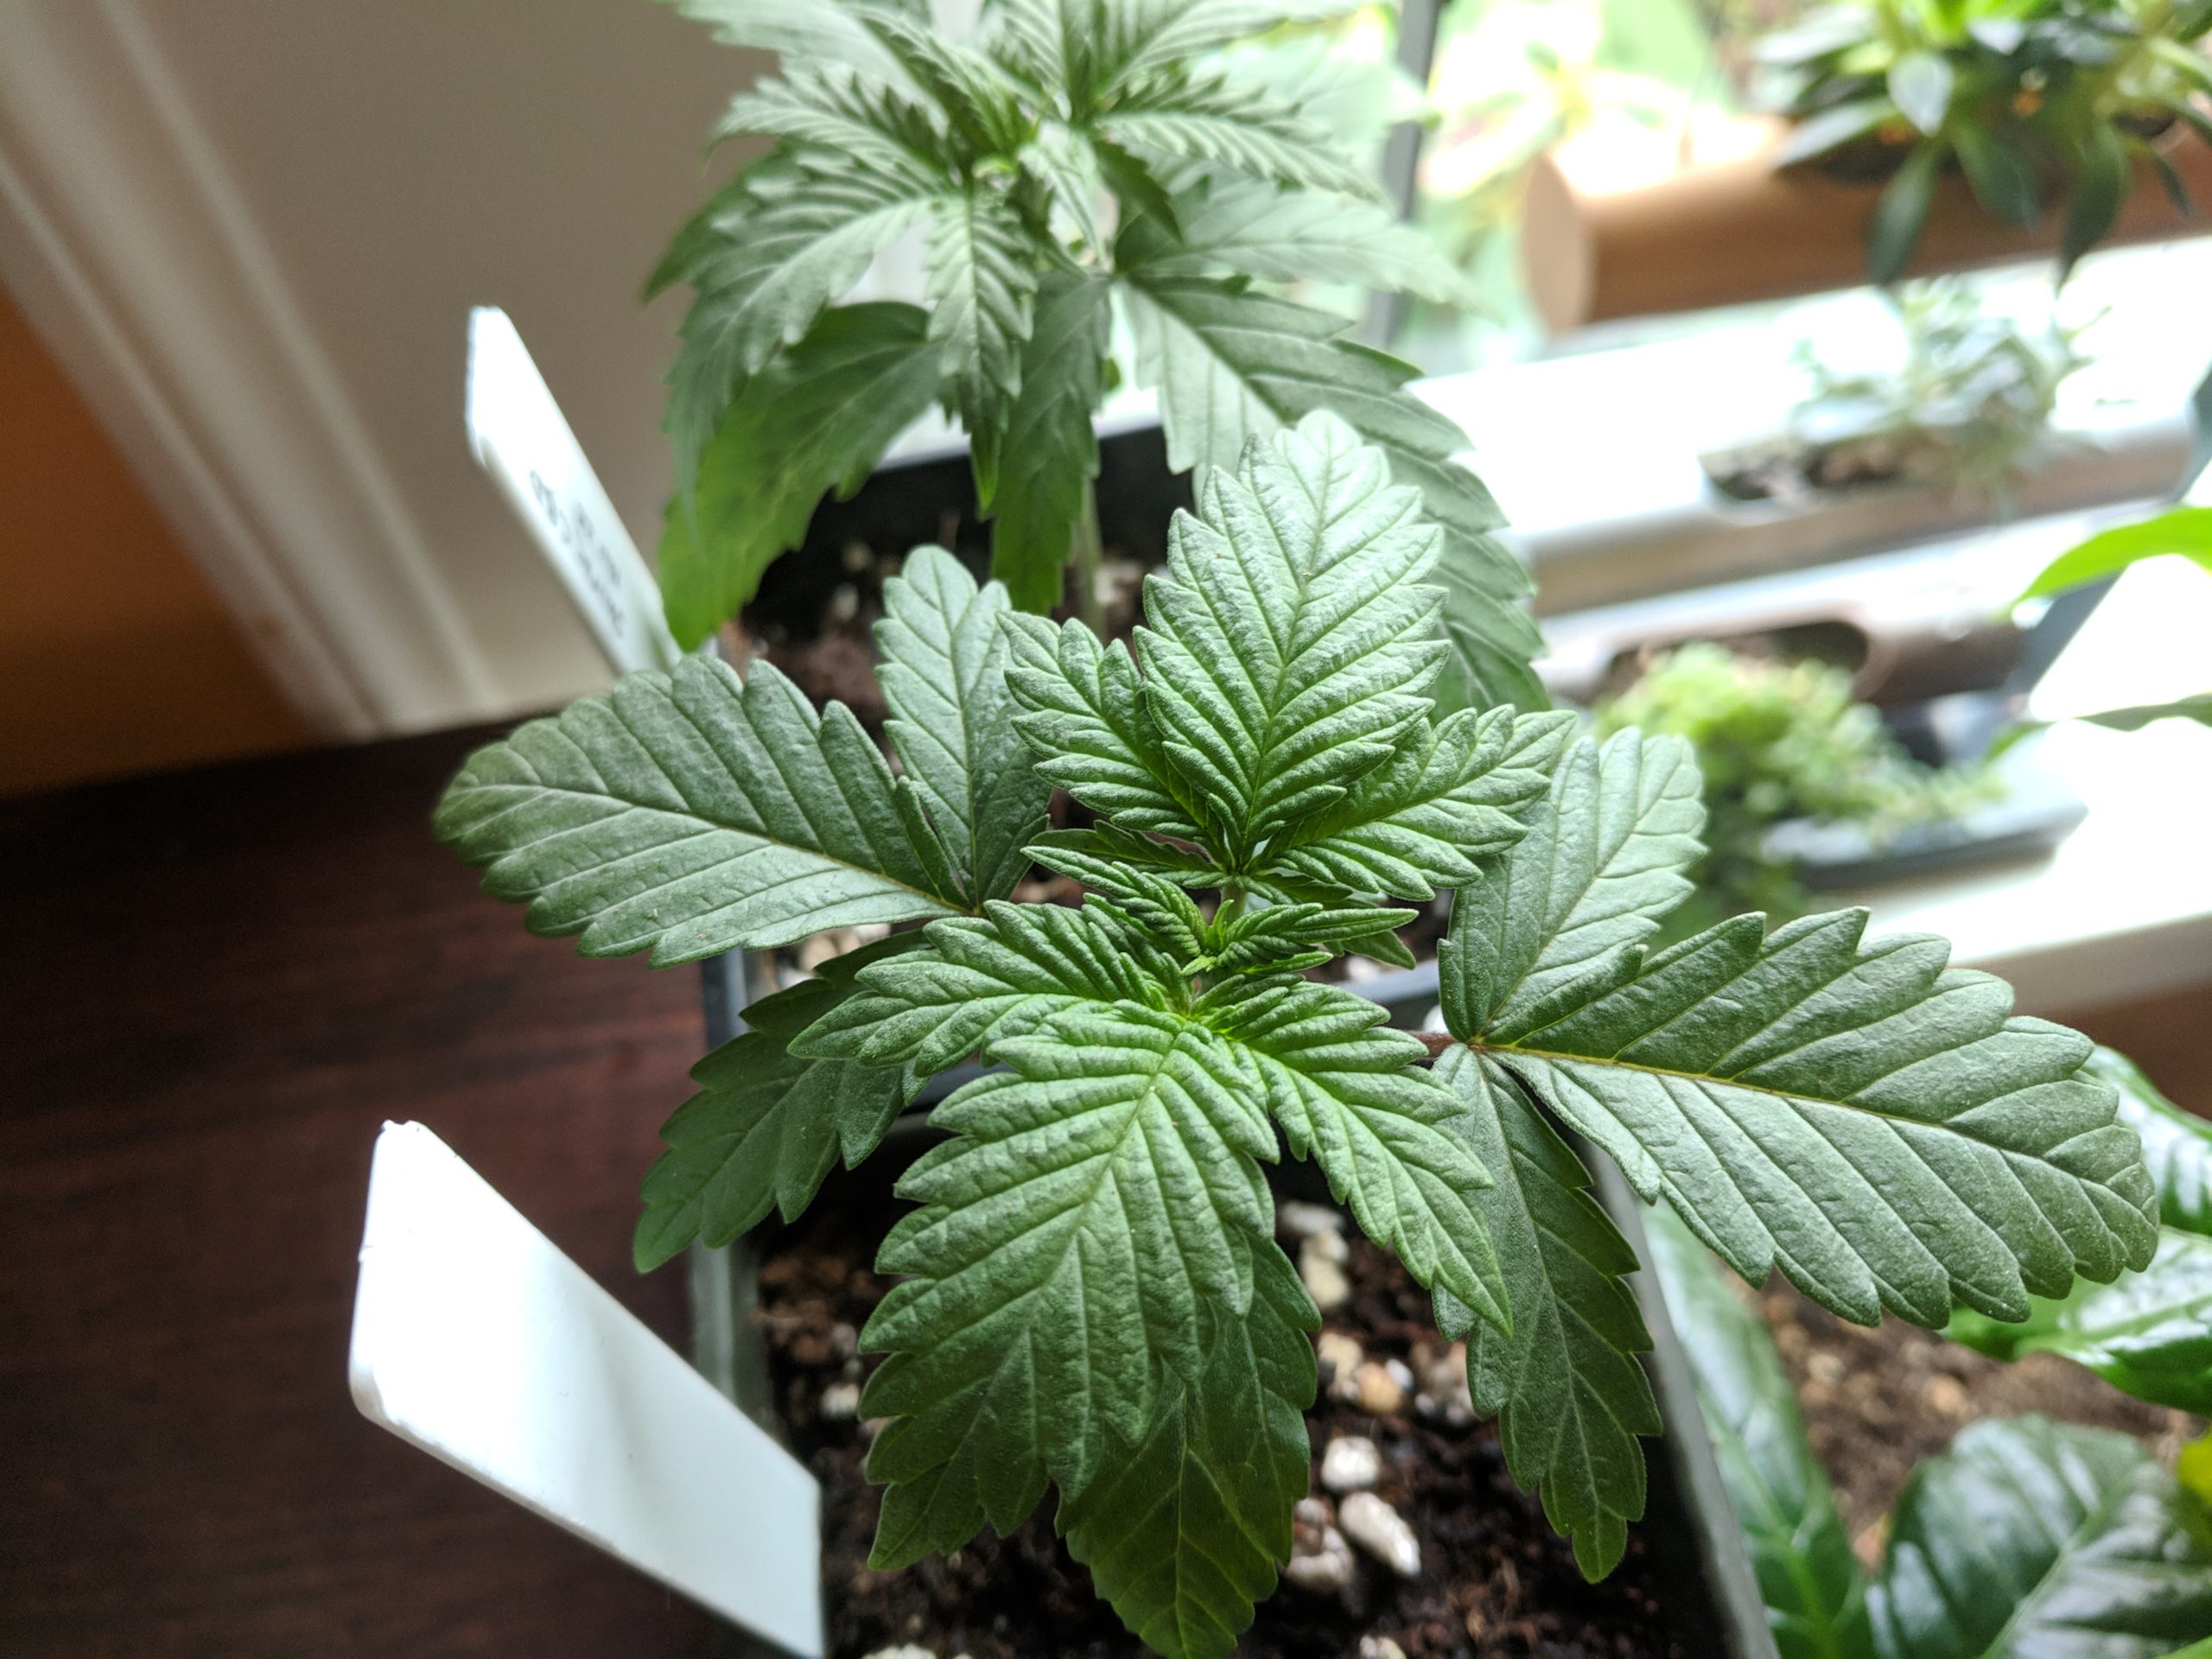
Leaf with Normal Nutrient Levels
Since we are going to use leaves to diagnose issues, we should look at what a healthy leaf looks like.
Lower fan leaves on plants with healthy nutrient levels are dark green in color.
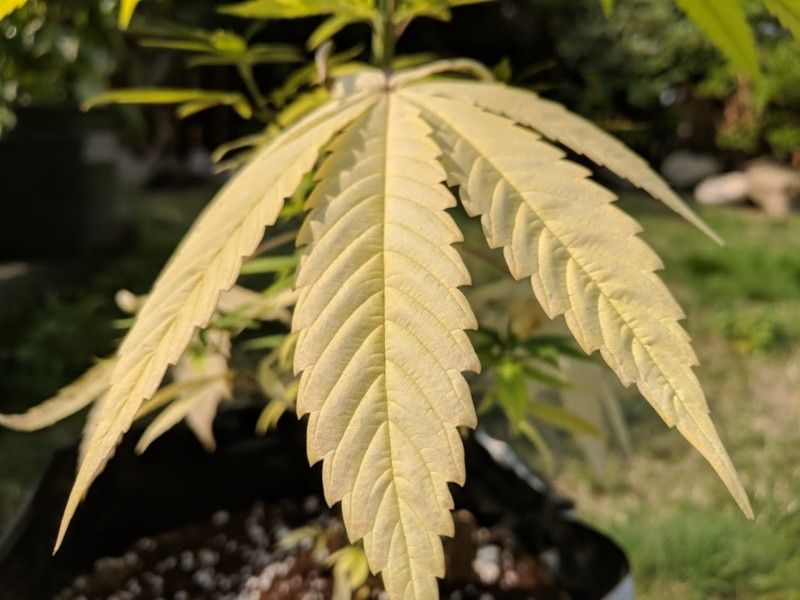
Nitrogen Deficiency
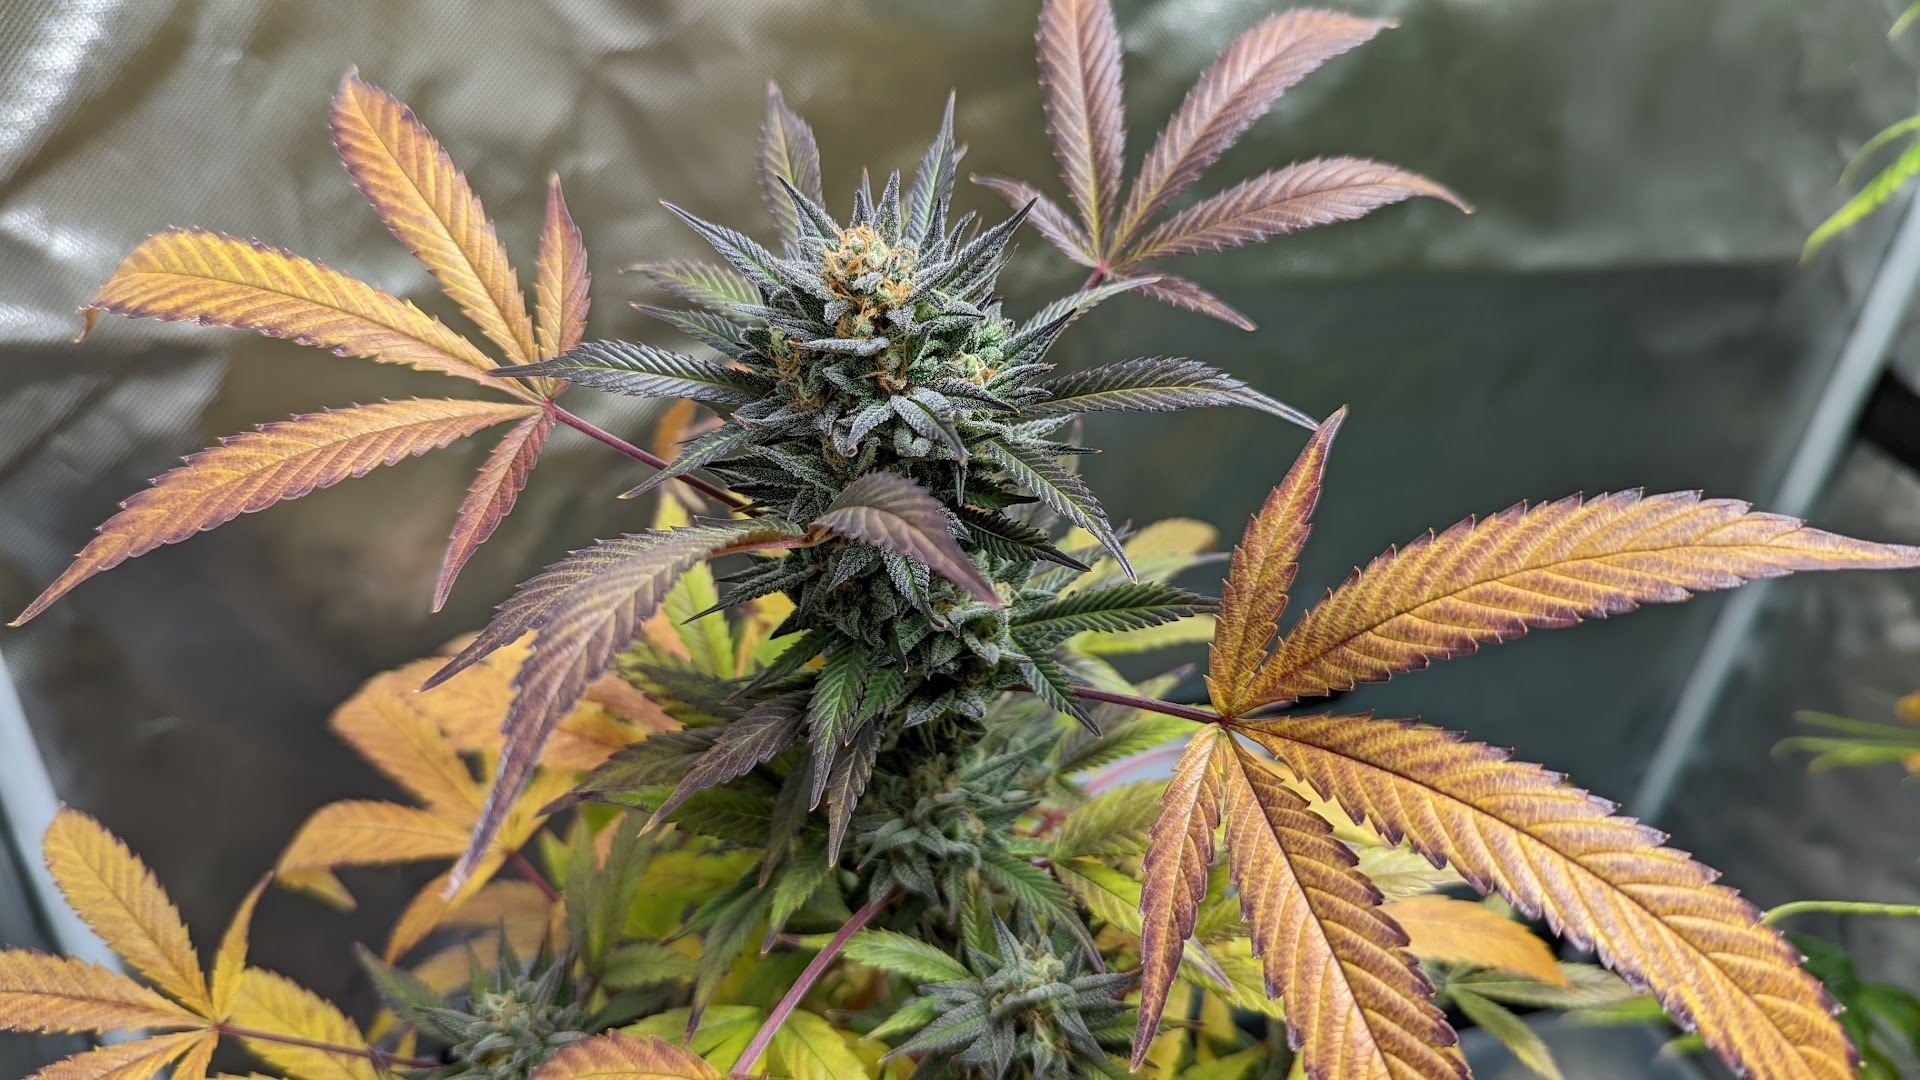
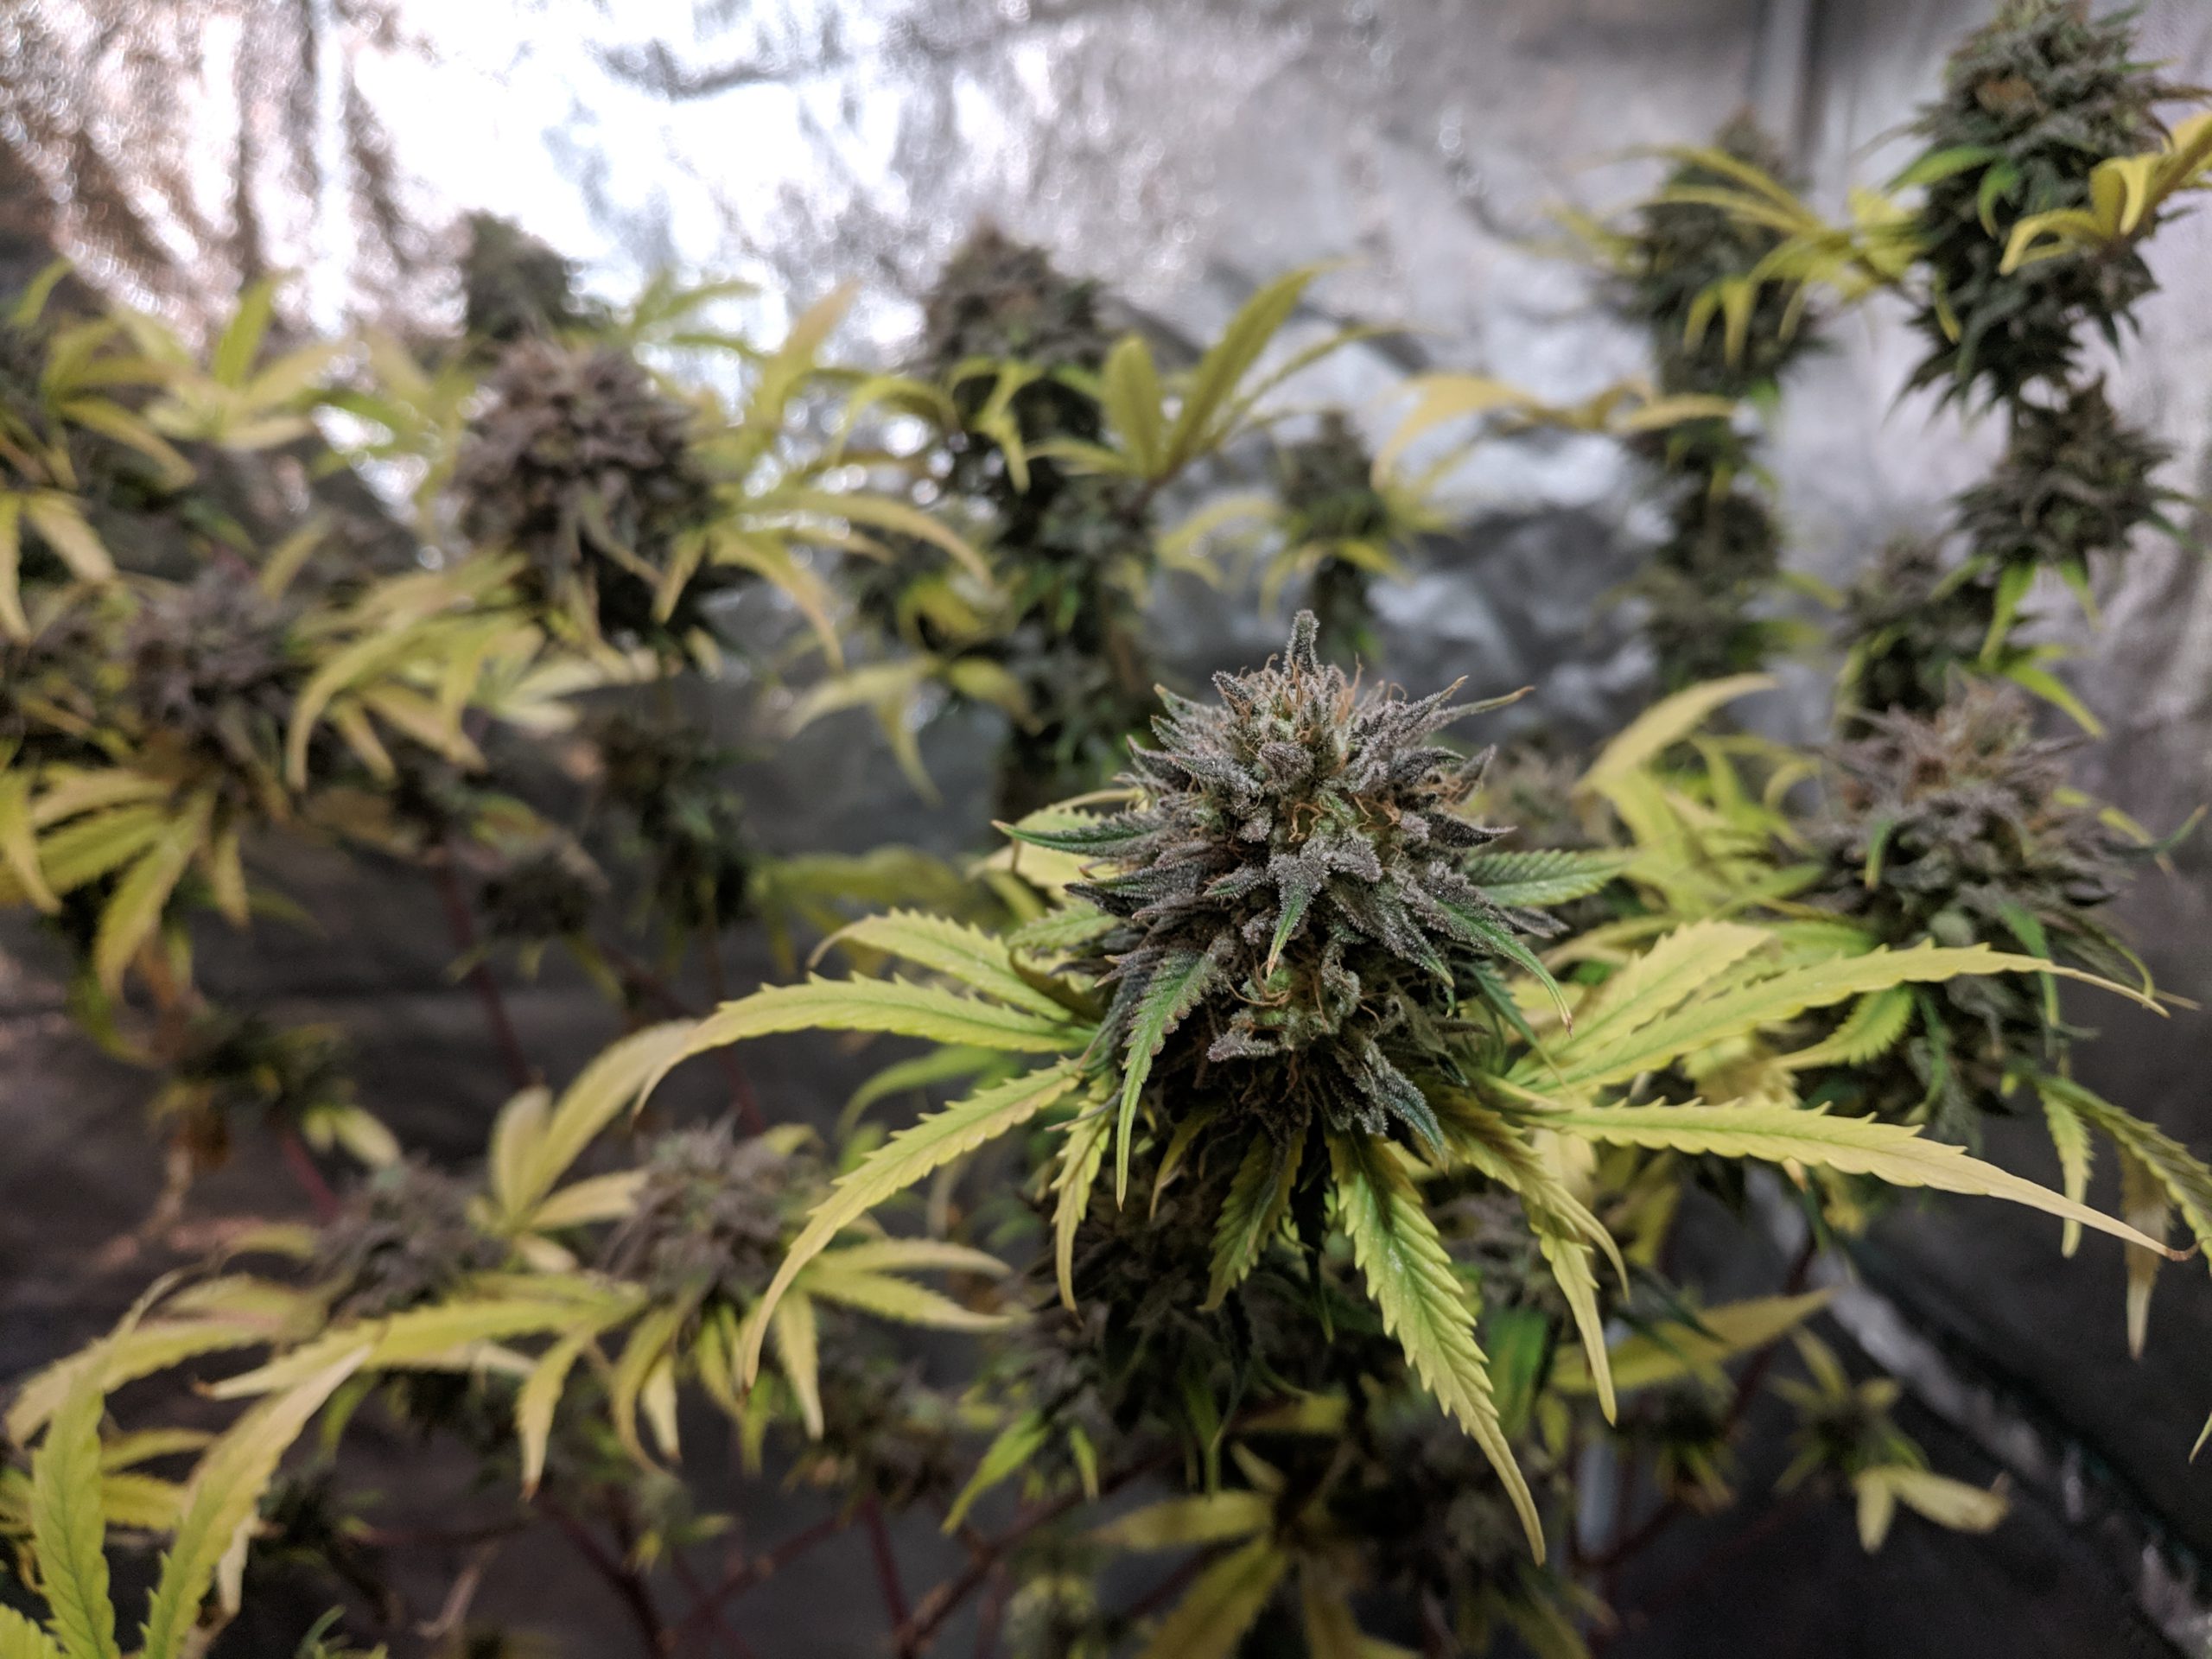
This is one of the most common nutrient issues, and it’s not always a problem. During vegetative growth, the plant needs lots of nitrogen and because it is a basic component in chlorophyll and plant proteins, including DNA and RNA. During flowering, growing marijuana plants need much less nitrogen. Excessive nitrogen can inhibit flower production, so most cannabis feeding schedules reduce nitrogen during the flowering phase. As a result, many cannabis plants appear nitrogen-deficient during the end of the flowering phase. This is normal and not generally a problem, though you should still check to make sure pH problems aren’t causing it.
Leaves on plants with lower levels of nitrogen start to turn yellow from the tips down.
Depleted Nitrogen Levels
Leaves on plants with depleted nitrogen turn completely yellow
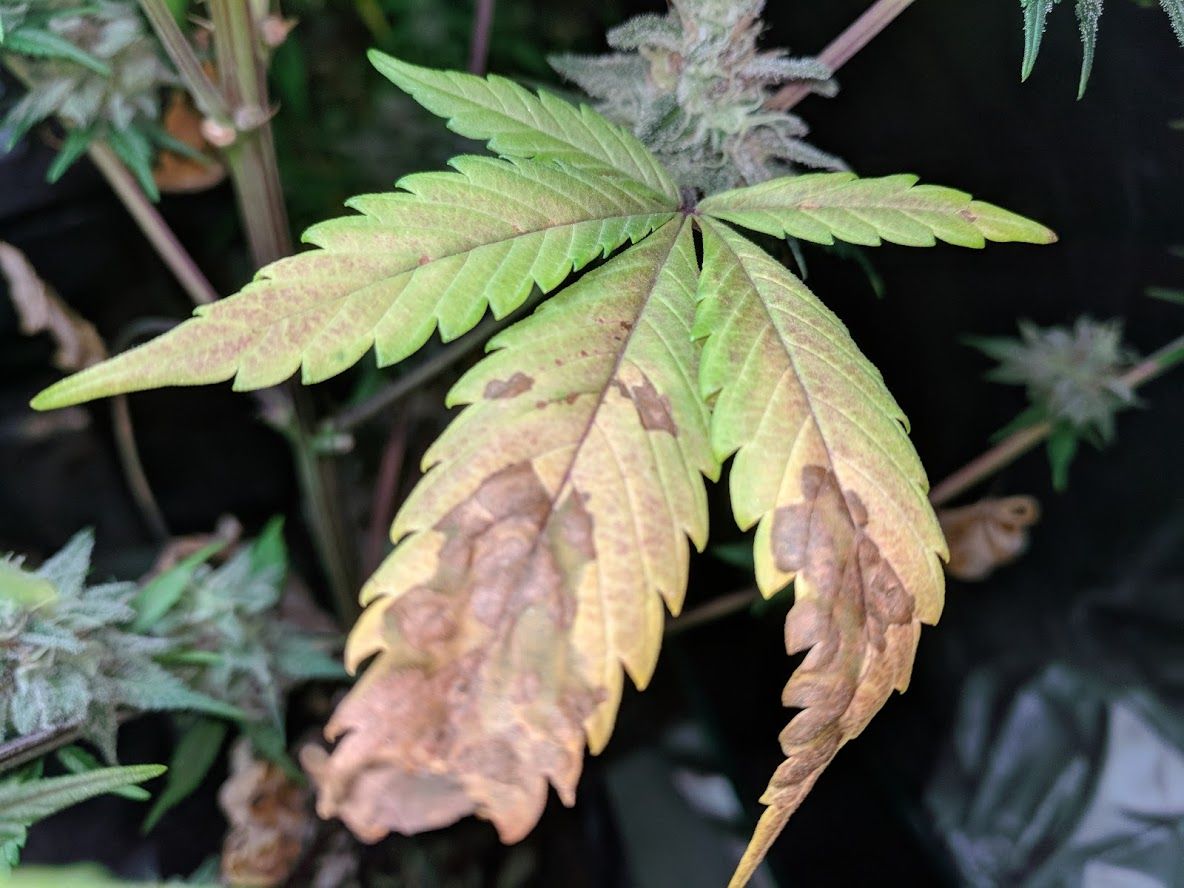
Phosphorus Deficiency
Phosphorus is a critical ingredient in photosynthesis, respiration, energy storage and movement, cell division and growth and almost everything else the plant does. The easiest way to tell if your plant has healthy levels of phosphorus is to look at the older fan leaves at the bottom of the plant. Look for discoloration, spots and dark blemishes that form between the veins. Often the leaves will feel stiff and dry to the touch.
Leaves on plants with lower levels of phosphorus start to darken with even darker blotches and may feel stiff.
Depleted Phosphorus Levels
Leaves on plants with depleted phosphorous develop large blotches and rust spots and may turn yellow or develop a bronze sheen.
Potassium Deficiency
Cannabis is like all living things and requires potassium for normal growth and maturity. It is an important player in photosynthesis and the regulation of plants responses to light through opening and closing of stomata. The easiest way to tell if your plant has healthy levels of potassium is to look at the older fan leaves at the bottom of the plant. Look for leaves that are turning yellow along the edges and at the tips. As the problem progresses, the tips and edges can look burned.
Leaves on plants with lower levels of potassium to turn yellow along the edges and on the tip.
Depleted Potassium Levels
Leaves on plants with depleted potassium develop burned edges.
Nutrient Burn
This is exactly what it sounds like – chemical fertilizers accumulating in the tips of your plant and giving them a ‘burned’ appearance. This is only a problem if you use synthetic nutrients, organic nutrients won’t burn your plants. Nutrient burn isn’t a big problem, but you should correct it quickly to optimize your growth. The best way to correct nutrient burn is to flush your plant with lots of water and then reduce the nutrients at future feedings.
Nutrient burn is an accumulation of excess nutrients pushed to the tips of the leaves.
Common Pest Issues
An ounce of prevention is worth a pound of cure and most common pest issues have the same simple set of solutions:
Improve ventilation and temperature control. Mites, molds, and fungus all have one thing in common: they prefer warm damp spaces too well ventilated and dry spaces.
Keep your grow area clean and free of clutter and disinfect between every grow
Use neem oil regularly! Learn all about the organic wonder solution and how it can help control pests in your garden in this guide.
Spider mites are tiny bugs that are barely visible with the naked eye, but they leave behind plenty of signs to show where they’ve been. Early stage spider mite infestations are noticeable by small, light-colored, specks on the tops of the leaves. As the infestation proceeds, the mites will spin large webs over the leaves and buds.
Spider mites eating cannabis leaves cause light colored specks.
White Powdery Mildew
Scientifically speaking, white powdery mildew is white mildew that looks like, well, powder on your plant’s leaves. Often developing in circular patterns, this mild annoyance can become a big issue if not addressed. The best way to prevent mildew is through humidity control. The best way to address mildew growing on your plant is to carefully clean the mold off and then use a topical treatment, like neem oil.
Spider mites eating cannabis leaves cause light colored specks.
To handle almost all pest problems, use neem oil regularly. Learn all about the organic wonder solution and how it can help control pests in your garden in this guide.
Neem oil is impressive stuff, and in this article, we’ll teach you how to mix the perfect solution for almost all cannabis pest problems. Neem oil won’t completely get rid of your pests, and you shouldn’t believe anyone who tells you their solution will. What neem oil will do is help you keep the pest population’s impact to a minimum without harming the beneficial organisms. That way, you can keep a balanced ecosystem in your farm.
What is neem oil?
Neem oil is derived from the Neem tree. It has been used in India for centuries and has become the de-facto treatment for organic farmers all over the world. Made by pressing the oil out of the seeds and fruits of the Neem tree, this stuff is a pure vegetable oil that has all the advantage of the tree’s natural pest resistance.
What does neem oil treat?
Neem oil can impact a wide variety of pests, over 400 different insect varieties as well as most fungus. The best part is, it protects against the neem tree’s natural enemies but doesn’t seem to harm more beneficial organisms!
Protects Against Pests
Spider Mites
White Flies
Aphids
Thrips
Fungus, Molds & Mildews
Caterpillars & Moth larvae
Snails & slugs
Doesn’t Harm Beneficial Organisms
Ladybugs
Bees
Butterflies
Earthworms
Birds
Mammals
You
How does neem oil work?
Neem oil doesn’t directly kill pests, like most chemical-based pesticides. Instead, applying it creates a hostile environment for reproduction and depletes the population over time. The oil enters the insects and interferes with insects reproductive system and the oily coating on the leaves impacts egg viability. The whole environment becomes toxic to the pests, and after a few generations of low birth rates, the population collapses.
Neem oil leaves a beautiful shine on your plants leaves
How long does it take to work?
You should start seeing improvements after the first application, but it generally takes several applications over a few weeks to get the problem completely under control.
Will neem oil completely get rid of my pests?
No. These pests have evolved over millennia to be diverse and resistant. The most costly and caustic commercial chemical treatments won’t completely eradicate a pest and neither will neem oil. If it can’t safely be done, then maybe complete eradication shouldn’t be the goal of a pest treatment, but instead, we should strive for achieving a balance.
Neem oil won’t completely get rid of your pests, and you shouldn’t believe anyone who tells you their solution will. What neem oil will do is help you keep the pest populations impact to a minimum without harming the beneficial organisms. That way, you can keep a balanced ecosystem in your farm.
How do you use neem oil?
Neem oil is typically applied as a topical foliar spray that is a mixture of warm water, oil, and soap as an emulsifier. Coating as much of the surface as possible is essential. For mites and other insects, it is doubly important to cover the underside of the leaf, since that’s where they hang out. It’s almost impossible for them to attach an egg sac to the oily surface.
You can apply any time of day, but I like to apply just before light out so that the oil can sit on the leaves longer.
How often do you use neem oil?
Spraying your plant once a week is a great way to prevent pests. If you have an active pest problem, you should spray once every other day until the population is under control.
2.5ml Soap: Oil and water don’t mix, so you need soap to bind the spray together. I use Dr. Bronner’s mint soap since it’s organic and the strong mint brings its own beneficial anti-pest properties. Any liquid dish soap will work as an emulsifier.
1 Liter Hot Water: You will need to keep the spray warm while using since the solution will separate as it cools.
1 Liter Spray Bottle: Any clean spray bottle will work.
These ratios are for pure, cold-pressed neem oil, Consult your neem oil label for exact proportions for your product.
Step 1: Warm the neem oil
Neem oil is so thick that it’s almost solid at room temperature so you will need to warm it before use. Run hot water over the sealed container or put in a bucket of hot water until it is warm enough to pour.
Step 2: Mix together
Fill the spray bottle with hot water and, once the neem oil is pourable, add neem oil and soap, Replace the spray bottle lid and shake vigorously for a full minute.
Step 3: Apply
Spray all surfaces of the plant until they are dripping with oil. Pay special attention to the undersides of leaves and at the base of the stems.
You can use neem throughout flowering, but it’s a good idea to stop treatments a few weeks before harvest as long as there isn’t an active infestation.
Is there something stronger?
If the infestation is particularly severe or you want to take a more aggressive approach, there are very effective ‘kill-on-contact’ organic solutions out there. These are generally made with a combination of neem, rosemary, mint, and other oils. We recommend that you only use products that are specifically formulated and tested on cannabis, as we’ve documented some bad results with commercial household organic solutions.
We have had success with Bonide Mite-X spray treatment. It’s an organic solution made of botanical cottonseed, clove, and garlic extracts and works like a broad-spectrum pesticide that eliminates a wide range of insects including spider mites, aphids thrips, broad mites, russet mites, and whiteflies. Unlike with neem oil alone, spider mites die on contact. Eggs are suffocated within 12-24 hours.
We recommend you check out this list of products to find the best organic solution for your garden.
Can I get a premade spray?
If you want to buy something, you can bet that someone wants to sell it to you, and this is no exception. There are some good organic solutions, but they can be a bit more costly than mixing your own.
Where can I get neem oil?
We recommend Dyna Gro’s pure, cold-pressed oil, but any cold-pressed neem oil with work great. You can find neem oil at your local gardening center or online.
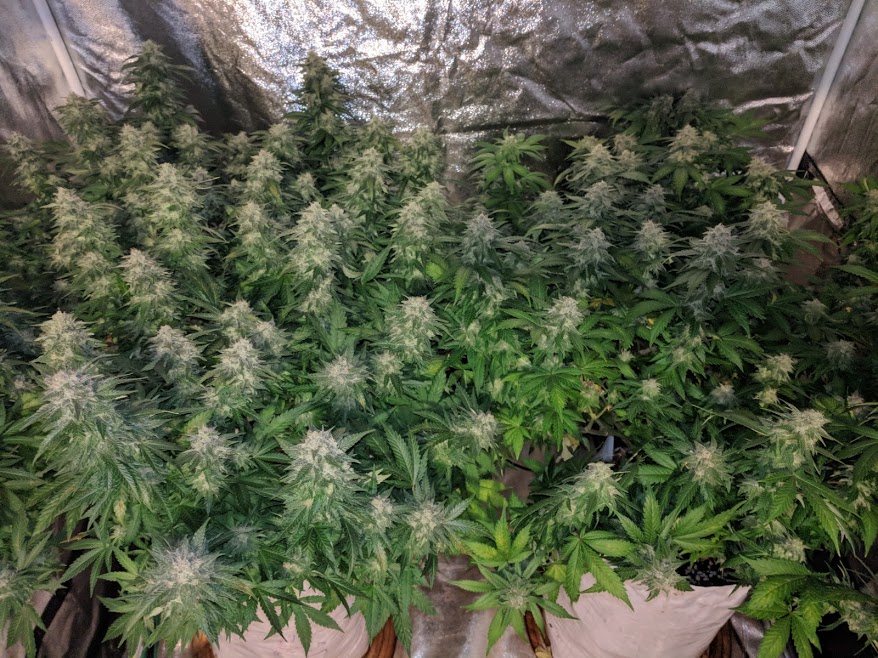
In this article, we’ll show you the basic screen-of-green (SCROG) process in 5 simple steps and then follow that up with examples from a full-sized tent and one from a cabinet SCROG.
Why Screen of Green?
If left to grow naturally, cannabis will grow with the shape of a traditional Christmas tree. This structure is very efficient for capturing sunlight, where the light is large and far away. In a grow tent though, we use much smaller lights that are much closer, so the cannabis plants natural structure doesn’t work as well.
The image below illustrates the effect: the plant’s cola is bathed in light, but the bottom branches remain in shadow.
Natural cannabis growth doesn’t make efficient use of grow lights because the bottom of the plant is left in shadows.
The purpose of a SCROG setup is to provide your plant with a horizontal lattice ( the screen) to grow against so that the plant does not take its natural Christmas tree form, but is manipulated into a flat canopy that receives even lighting in your tent.
Step 1: Ready the Plant(s)
You’ll want to begin you SCROG with one or more adult plants that have been topped at least once and are still in the vegetative state.
Depending on the size and shape of your grow-space and how long you vegetate, you can grow a single plant or multiple plants in each screen. One of the advantages of SCROG technique is that a single plant can stretch out to optimally use a very large space over time.
During the vegetative state, plants can be manipulated more easily and easily recover from injuries. Plants that are in flower become more woody and difficult to train and there is no time to recover from any injuries.
To allow your plant to cover the most surface area, it will be best if your plant has been topped multiple times. Topping the plant breaks apical dominance by removing the top growth tip, causing the plant to divert all of that energy into side branching. Effectively, topping results in forking the plant’s main growth stem into two, which will allow the plant to get better horizontal coverage after you put it under the screen.
Step 2: Build screen structure
The goal when building a screen is to provide a flat latticed structure that will even out the plant growth. The type of structure that you build will be dependent on your setup.
If you are dedicating an entire tent to your SCROG, the easiest solution is to make a frame of PVC pipe that can be anchored to the tent’s upright poles. After the frame is anchored, just stretch plant netting over the frame. You can also use wire or stiff rope in place of the PVC frame.
If you are only using part of your tent, you can use the same approach, but add PVC legs to support the frame. In any case, make your screen easy to raise and lower to help with the next step.
If you are using the whole tent, use the tent uprights to anchor the frame.
Step 3: Put It Together
This part can be a little tricky, but you will want to be careful to not hurt the plant. If you try to put theThe best approach is to raise the netting and then put the plant in place before lowering the netting, being careful to not let the netting fall on the plant. For best results, lower the netting a few inches shorter than the plant and then pull longer branches under the screen to start with a flattened look.
Lower the screen to below plant height and carefully pull longer branches under the screen.
Step 4: Vegetate
Now we wait for the plant to cover the entire horizontal area. You can help this process along by training the plant as it grows. As stems stretch up towards the light, redirect them under the screen towards areas that don’t have as much growth. In this way, you can get that even layer of growth that makes the SCROG process worthwhile. You can learn more about topping and training here.
At the end of vegetative state, you want a flat canopy with even light coverage.
Step 5: Flower
All the hard work has been done and you should have flat growth that can be evenly covered by your grow lights. For now, kick back and let the fruit ripen!
In most strains, the plant will stretch towards the lights when first put into flower. In the final stage, treat the plant the same way you would in any other flowering plants and training should end once flowering begins in earnest. The plant will become woody in later flowering and branches will snap if you try to adjust them too much.
Example Grow 1 – Full Sized Tent
In this example, we start off with two vegging Accupulco Gold females that were 8 weeks old and had been topped multiple times to provide a ‘bush’ effect.
For this grow, we used a simple rope lattice that we purchased at a hardware store attached to the tent-uprights. This worked well enough, but in retrospect, it would have been better to attach it to a rigid frame to keep the right levels of tension on the upward growth.
By the time we put it into flower, it had great coverage across the whole space.
For the final harvest, we did much better than if we had left the plant to grow a single large cola in a Christmas tree shape.
Overall, the SCROG approach was very effective and maximized the potential for these plants.
Example Grow 2: Cabinet Mini-SCROG
For this grow, we used a very small cabinet and 4 Sweet Soma females all planted in a single container. The cabinet is only 18″x18″ and 36″ tall, so we put the plants into flower after only two weeks.
They started growing so fast that it became clear that the plants would outgrow the cabinet if we didn’t take action. Despite the risk of high-stress training, we FIM’d the plants to slow the vertical growth. It sure didn’t hurt the plant, because they already were hitting the lights a few weeks later!
We tied the plants down using coated gardening wire and that helped with the height a bit, but in the end, that wouldn’t be enough either. Rather than abandon the high-density experiment, we added a wire screen to hold the plants down.
In almost no time, the plants adapted to the screen and grew between the openings nicely.
The way these girls kept growing shows that without the screen, we would never have been able to keep the grow contained to the small cabinet without the screen.
After the initial flowering stretch, the girls settled in nicely, turning a nice color due to the cold winter evenings.
The view from the underside shows how the plants were manipulated to address height and to fill in all the spaces.
When we removed it from the cabinet, you can see that the canopy formed a mass of buds.
We had to cut the buds away from the screen, they were so tightly packed. In the end, we harvested 2 ounces of dried bud from the small cabinet.
While you can grow from seed to finish in one large pot, there are great arguments in favor of transplanting the plant into appropriately sized containers as it grows.
If the plant is too small for the pot, the roots don’t reach much of the container, and the plant does not drink a lot. Overwatering becomes more likely in this scenario and leads to root and nutrient problems. If the plant is in a container that is too large, do not saturate the entire pot. Instead, water in a ring around the plant that is roughly along the perimeter of the canopy.
If the plant is too small for the pot, it will need to be watered frequently and will be prone to drying out. Eventually, the roots will become tangled and matted (rootbound), and will no longer be able to uptake nutrients and water – resulting in significant problems for the plant.
The act of transplanting can be shocking to the plant for a short time if not done correctly. When done correctly, transplanting promotes a rapid growth explosion as it gives an opportunity to unmat and untangle roots before seating the plant in new soil.
For the best results, start in a small pot after germination (8 to 16 ounces/ .2 to .4 liters) and work up as the plant transitions through its growth phases. Flowering plants generally need at least 2 gallon pots if they spent little time vegetating and more like 5 to 10 for large plants.
When Should I Transplant Marijuana
The short answer is that you should transplant marijuana plants before the roots overgrow and become bound in their current container. The longer answer depends on what phase your cannabis is in and the type of container your using.
Germination Phase
This is your first transplant, and when and how will depend on your seed starting method.
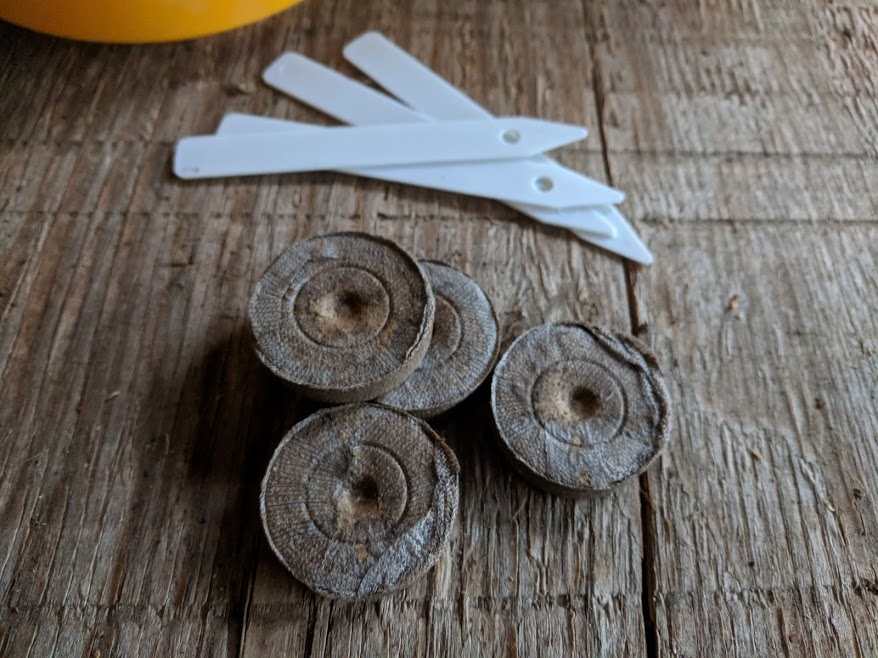
Method: Starter Plugs If you germinate in peat moss or other starter plug, transplant seedlings when the roots begin emerging from the plug. See our Peat Moss Plug Germination Guide for more details.
Method: Paper Towels If you germinated using the wet paper-towel method, transplant your seedling as soon as they have a root structure.
Method: In Soil You can also germinate directly in the growing medium or soil. In this case, transplanting is not required.
Transplant To:
For best results, transplant into a solo cup or 8-16 ounces (.2 to .4 liters) tradepot to support the plant throughout the seedling phase. Alternatively, you can choose to skip ahead to a 1/2 or 1 gallon (1.9 – 3.7 liter) tradepot or plastic grow bag that will last into the vegging phase, but these will be more susceptible to over-watering.
Seedling Phase
The seedling phase begins when the young plant first emerges from the seed and extends for the first few weeks of life. Within the first days, it will start forming its first true leaves and will begin to build a root structure in the growing medium rapidly. For more information on caring for seedlings, see our seedling care guide.
Method 1: Watch the roots If your container has drainage holes (like trade pots, solo cups and grow bags), you can monitor the drainage holes for roots. Once you see roots at the bottom of the container, you know that they’ll soon turn inward and become matted at the bottom of the pot. Once you see roots at the bottom, you will want to transplant within the next week.
Method 2: Watch the canopy Once the leaf edges have reached the sides of the container and are overhanging, it’s time to start looking for the next container.
These seedlings are hanging far over their containers and need to be transplanted.
Transplant To:
For best results, transplant into a 1 gallon (~2 liters) trade pot or plastic grow bag. Alternatively, you can choose to skip ahead to the final container size of 2-5 gallons (~4-19 liters) that will support the plant through flowering but will be more susceptible to over-watering.
Vegetative Phase
The vegetative stage begins as the young seedling begins putting on adult leaves, and continues until the plant is put into flowering. For more information on caring for vegging marijuana plants, see our vegetative care guide.
Important: Since it can slow flower development to transplant a flowering plant, you will want to have your plant in its final container by the end of the vegetative phase.
Method 1: Watch the roots If your container has drainage holes (like trade pots, solo cups, and grow bags), you can monitor the drainage holes for roots. Once you see roots at the bottom of the pot, you know that they’ll soon turn inward and become matted at the bottom of the container. Once you see roots at the bottom, you will want to transplant within the next week.
Method 2: Watch the canopy For seedlings, you want to transplant once the leaf edges have reached the sides of the container and are overhanging. This is not as clear-cut with vegging plants though, since they can be affected by training, topping, and pruning. You can still use this method, but give more tolerance for overhang before transplanting.
Method 3: Watch the height If you transplanted seedlings at the right time, you could use height gain to gauge when it’s time to transplant generally.
These cannabis pants are too big for their 1 gallon (~4 liters) containers. They need to be transplanted,
Method 4: Watch the water Vegetative plants that are getting too large for their containers will dry out more quickly. If you find that your plants need watering more than twice a week, it’s probably time for a larger pot.
Transplant To:
For best results, you should at least double the size of the container with each transplant in the vegging phase. If you started vegging in a 1-gallon container, you would want to move to a 2 gallon, then 4 gallons, and so on. For the final transplant before the flowering begins, make sure that the container is your desired final size since you should not transplant a cannabis plant in flower.
Flowering Phase
You should always avoid transplanting in the flowering phase if at all possible. Transplanting can disrupt flowering (lowering production for up to a week), and flowering plants are more rigid and less resistant to damage.
What size do I need for the final container?
Unless you know what you are doing, flowering plants need a minimum of 2 gallons to have healthy flower production. More than 4 gallons (15 liters) is ideal for growing larger plants and allowing them to stretch in flower. If you are space constrained, you can use smaller final containers to restrict the plant’s size.
Get your destination container ready – it should be at least twice the size of the current container. Fill it with medium up to the point where the bottom of the rootball sitting on top of the dirt will bring the base of the plant stalk to the top of the new container.
Step 2 – Remove the plant from the old container
In this step, we want to get the plant out of the old container. If using a trade pot, squeeze the sides of the pot to free the rootball. Hold the plant at the base of the stalk and gently lift it from the ground, then gently push down on the pot to make it slip off the root ball. Wetting the soil before removing the plant can help free it from the container. If you are using a cloth or plastic bag, pull the bag off the rootball like a sock off of a foot.
If it is difficult to remove the container from the rootball, you should cut the container off instead of forcing it. This is where plastic grow bags excel.
Step 3 – Work the roots
This step depends on how rootbound the plant is, and what kind of container you are using. If the roots have filled the bottom of the container and are starting to tangle and matt, you can use your hands to loosen the roots. If you know what you’re doing, you can also use shears to cut the roots back.
If roots have become tangled and matted, gently remove the matted roots.
If you’re moving from a fabric container, this should not be an issue since the roots will have been air-sheared.
Step 4 – Put in the new container
We filled a base layer of the medium at the right height in Step 1. Still holding it by the stalk base, lower the rootball into the new container. You want the base of the stalk (top of the rootball) to be slightly lower than the top of the new container.
Step 5 – Fill with Medium
Lightly pack medium into the container, making sure that there are no void spaces under the rootball or along the sides. Only fill to the top of the old rootball (to the base of the stalk).
Step 6 – Water
If you are planting into a commercial soil with nutrients, you should not use nutrients for the first few weeks after you transplant. If you are in coco or another inert medium, use a light nutrient feeding (like a compost tea) with your first watering. Give a full watering (water until ~20% has run off).
Does it matter what time of day I transplant?
This question comes up on lots of forums, but the science isn’t clear. While you should generally water in the morning, since drying throughout the day helps prevent mold, mildew, and rot, on the other hand, general gardening shows that transplanting on cloudy days or before night gives the plant a better chance of avoiding shock. The reasoning is that it provides the plant with some time to adjust before being subjected to heat and a strain caused by bright lights. Based on that, I generally perform all stressful activities just before lights out – including transplanting, topping, pruning, and training.
What size container should I transplant cannabis into?
It depends on what stage of growth your plant is in: seedlings can be transplanted into quart-sized containers but a mature plant will need several gallons. A general rule of thumb is that if you are going to transplant, the container you transplant into should be twice the size of the container you are transplanting from.
Cloning cannabis is widely used for propagating cannabis, and while the name might make the process sound complicated, cloning is essentially just another name for taking a cutting from the plant and allowing it to grow roots. In this guide, we will cover cloning and show you an easy way to make your own clones.
What is Cloning?
Cloning simply means to make a copy of a living things genetic code into another living thing. Cloning animals is a very complicated process – remember the triumph that Dolly the Sheep was? With plants though, it can be very simple. You have probably cloned a plant before, or have seen others do it.
Cloning a plant is as simple as cutting a small branch off the plant and then putting it into water, dirt or some other wet medium to grow roots. This is a very common practice with household plants like geraniums.When the cutting grows roots, it becomes a genetic copy of the parent
Why Clone?
When choosing starters for your cannabis crops, there are only really 2 options: start from seed or start from clone. While seeds have their own advantages, there are a number of reasons why you would choose to start with clones.
Cost: Cloning is much cheaper than growing from seeds because you can start with one plant and end up with hundreds of clones. Time: Cloning can be faster than growing from seed if conditions are right for the clone. Uniformity of size: Since they share genetics, if clones grown in similar conditions will grow in a similar structure. If all the plants in your tent are clones of the same plant, you will get more uniform growth which will allow you to optimize light and space. Uniformity of effects: Due to shared genetics again, clone’s flowers will produce similar effects. With seeds, THC and CBD may vary considerably across a strain, while clones are more likely to have very similar makeup. Seeds Are Not Always an Option: There are some important strains in cannabis history that have only existed as clones, like the original God, Bubba Kush and Amnesia strains. While these examples were eventually recreated as breedable versions, they originally were only propagated through clones.
Overall, when growing multiple plants from seeds of the same strain, you are much more likely to see broad variations in size, quality and output than in clones. On the downside though, this means that they also have the same vulnerabilities. If the mother plant was prone to mold, so will the clones.
How Do I Make A Clone?
There are a lot of techniques for caring for clones, but at the basic level, it is always some variation of the following:
Cut a branch with at least 3 nodes on it
Put the branch into growing medium
Keep the plant in humid conditions until it grows roots
Once the clone reenters vegetative growth, grow it like any plant
We will show you a method that is very simple and leads to great results. Over time, you can refine it to work better for you.
Step 1 – Prepare your Mother Plant
There are a few considerations on picking the right mother plant. First off, make sure it’s a plant you like, because you are about to make copies of it. You’ll also want to make sure that it’s big enough to take the clones from.
Topping an unruly plant is a great opportunity to take clones, since you are cutting them off the plant anyway. For this guide, we used an adult female plant that had grown lopsided and needed a hard cutback anyway.
You can take cuttings from adult plants in any stage of life, but it takes much longer to root cuttings that are taken out of flowering. The resulting plant also has crazy bushy structures, making the process of cloning be known as ‘Monster Cropping’. For beginners, we recommend taking cuttings from adult plants in the vegetative state.
Topping an unruly plant is the perfect opportunity to get clones.
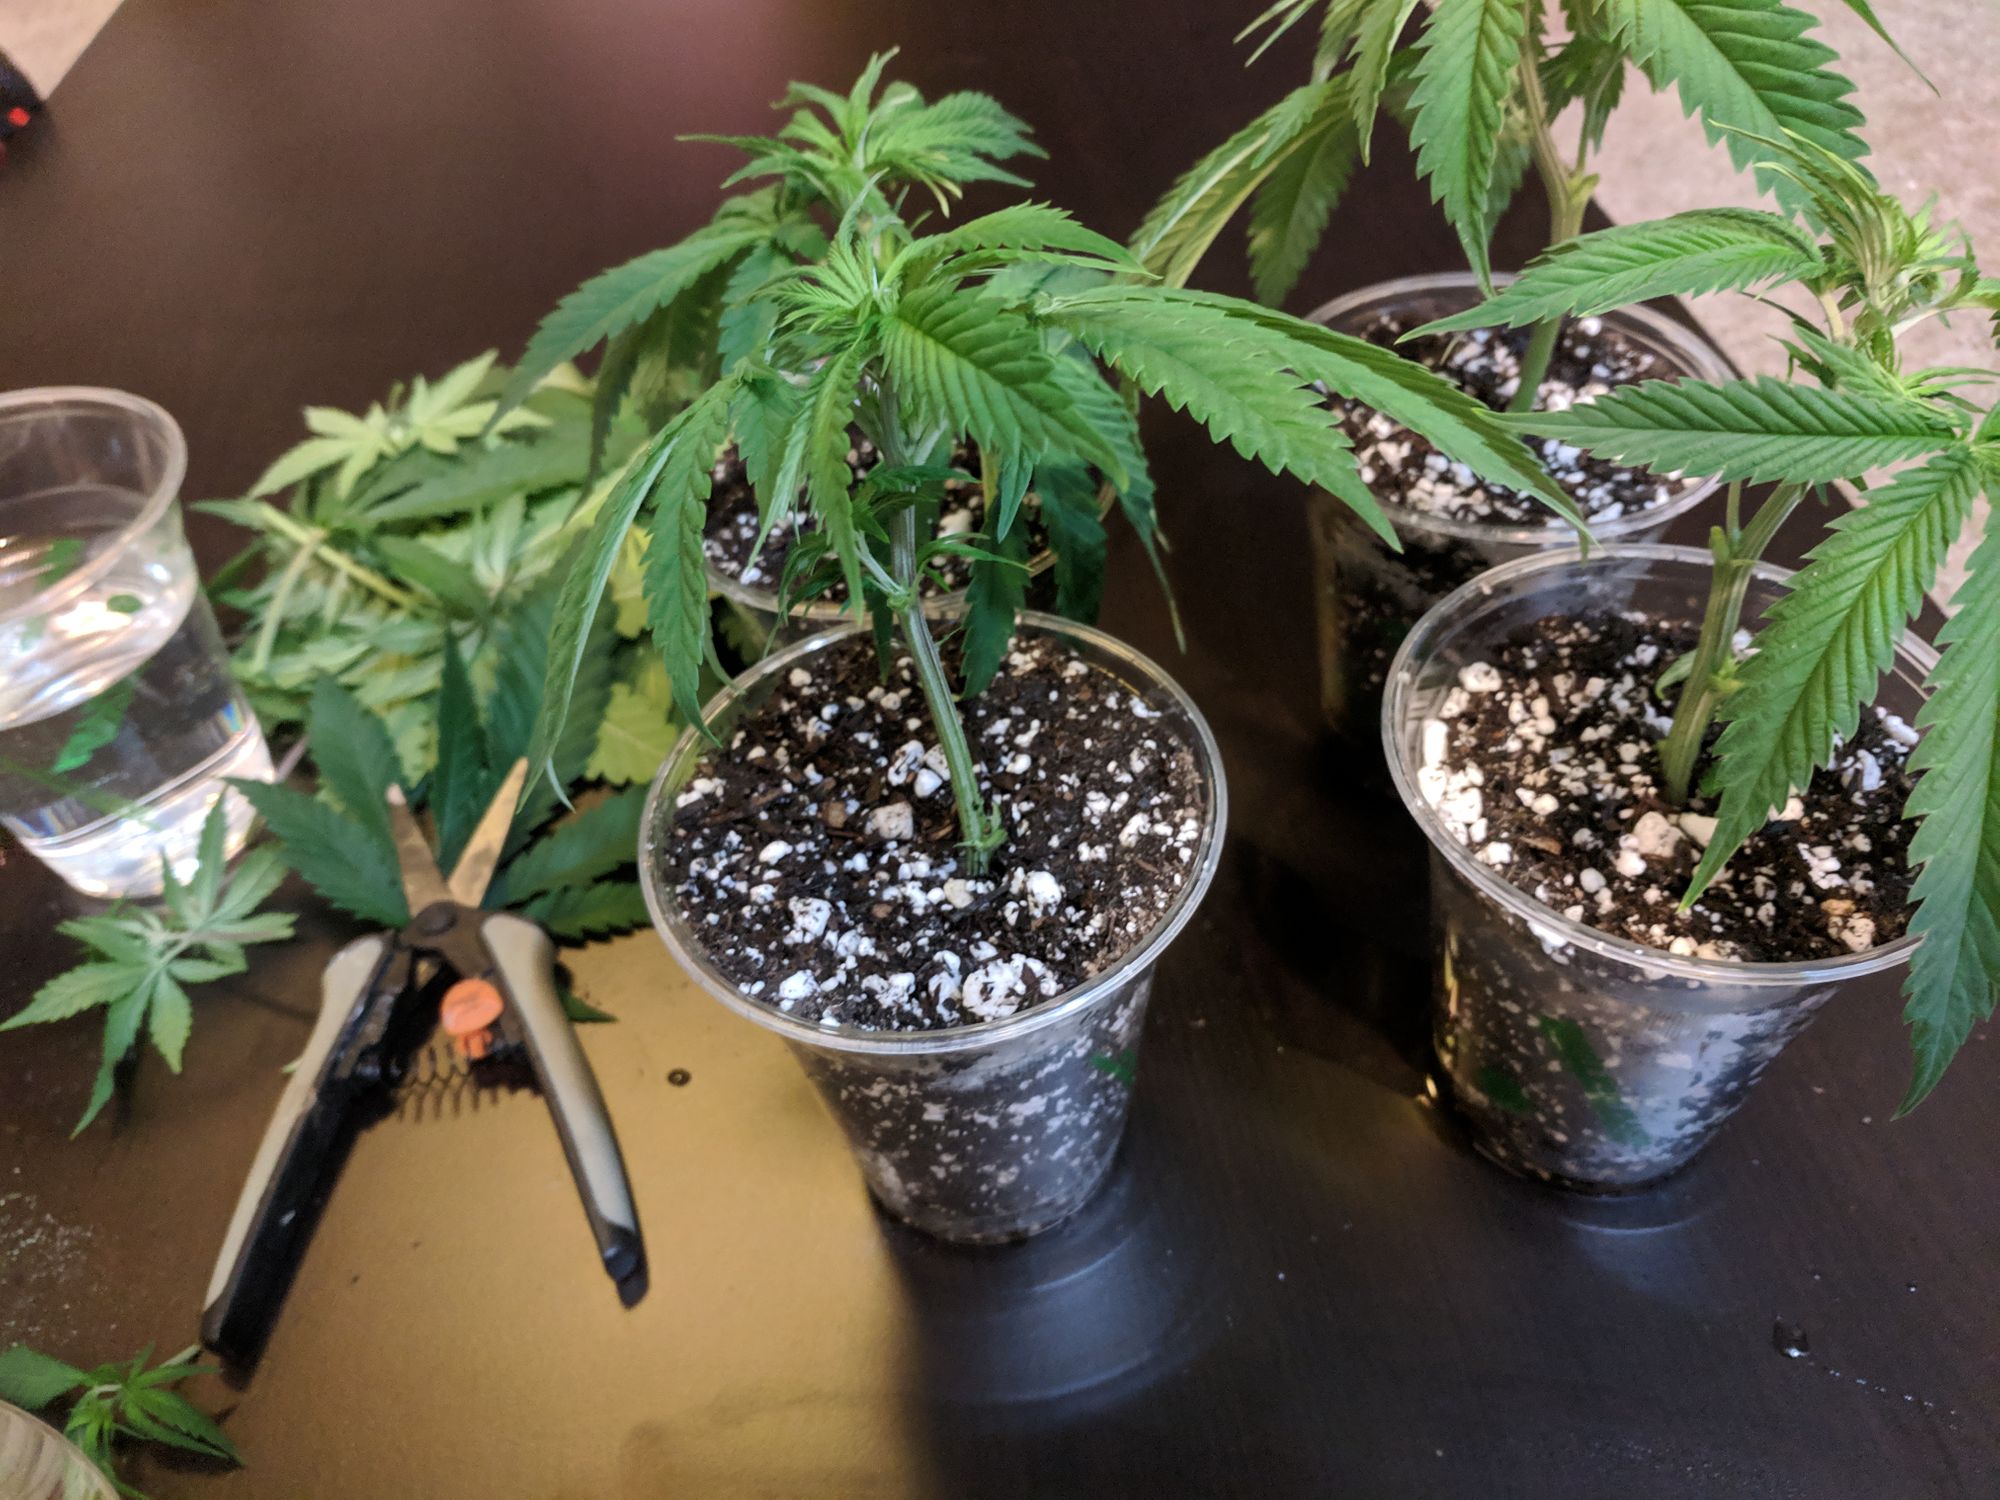
Step 2 – Prepare the Containers
Use a solo cup sized or smaller container for clones. We use clear plastic drinking cups with holes in the bottom. After planting the clone, we will put the clear cup inside a regular solo cup to block light, and then pull it out to check on root growth. You don’t have to do this, but it is handy to know when it’s time to transplant.
Fill the cups with growing medium and water it to be fairly saturated. We use a coco and perlite mix for clones, but you can also grow them in soil just fine. Get a glass of water ready to, you will want to put the clones in water immediately after cutting.
Use clean equipment when taking cannabis cuttings.
Step 3 – Take the Cuttings
For best results, take cuttings that are at least 4 inches (10 cm) long. Since first roots form in the cut area of the clone, cut at a 45 degree angle to maximize this root growth surface area. Make sure you use sterilized and sharp equipment to cut so that you don’t pass disease to the mother or the clone. Put the cutting into water immediately after cutting, or air bubbles can get into the plant and prevent root growth.
Before planting them in their containers, cut lower leaves off while the cutting is still in the water. Minimize the amount of time that the plant spends in open air.
Rooting hormones can speed up root growth drastically in clones. They are available at most gardening stores and come in a powder form. If you want to use rooting hormones, pour the powder onto a clean surface and then roll the cut end in the powder before sticking it into the moist soil. Put the cutting about half way down into the container.
Step 4 – Keep them Warm & Humid
After being cut and stuck into a growing medium, the new clones will be in shock and take a number of days to start developing roots. After a week or so, it should start developing roots that can help sustain it, but in the meantime, it won’t be able to draw moisture and nutrients from the soil. Instead, you will need to provide water and nutrients to the plant through the air. To accomplish this, we need to keep the clones in a high humidity environment so that water is available in the air. We will also use a foliar feeding spray to get them nutrients.
You can buy humidity domes for cloning cannabis, but we just use two plastic bins – one on the bottom and one placed upside down on the top to form a lid. Then we place the homemade dome on a plant heating pad and keep it between 80F-85F (26.6C-29.4C). Using the heating pad under the bins to generate heat will encourage the roots downward growth. Spray the plants frequently with a fine mist that they can absorb through the leaves. This will also increase the humidity in the dome, which will make more water available to them for consumption through the leaves.
Clones need humid, warm environments to sustain and encourage root development
After a few days of seeming stasis, with droopy leaves and stems, the clones should begin coming back to life. The leaves and stems should become more turgid, showing that they are consuming water through the leaves and maybe even developing small roots. The overall color should become more green, showing that photosynthesis is happening. Once you are sure that the roots have grown enough to help with the plant’s intake needs, lower the humidity levels over time to encourage more root growth.
For lighting, start with fairly low levels of light (like a compact fluorescent) and then ramp up as the plants develop roots. Without roots, they can not keep up with the water and respiration that heavy photosynthesis requires.
Step 5: Transplant
If you use the clear cup method, it will be clear (pun intended) when it’s time to transplant them: you will be able to see the roots encircle the cup and begin forming a root ball. It can take anywhere from 10 days after the cutting to a full month before you reach this state. Using a humidity dome and heating pad will make sure you stay on the lower edge of this timeline.
This clone has formed a root ball and is ready to transplant.
At this point, the plant itself should be growing new nodes and new leaves. You will see bright green in the new growth, while the older growth keeps the dark green colors. The plants below took about 14 days to reach this state from new cuttings.
The clones have started new growth and are ready for transplanting.
Transplant them the same way you would any plant – we have a guide to help with that. Once transplanted, you can treat and care for them like any plant in the vegetative stage – which means that you can top them and train them like any plant. Its been my experience that clones have a bushier growth pattern than seed-grown plants, which can help with sea-of-green, SCRoG and other training methods.
Transplanted clones can be cared for like any plant in the vegetative stage.
Cloning Produces Results
There are lots of reasons to use clones, in fact, many commercial grow operations use cloning exclusively. Luckily, the process is fairly simple and easy to be successful at. The end result gives a uniformity of plants that allow you to optimize your indoor grow space and produce predictable and repeatable harvests. The four clones we took for this guide ended up filling the whole tent in a Screen-of-Green grow.
Clones tend to grow uniformly to one-another – allowing you to use your space and light effectively.
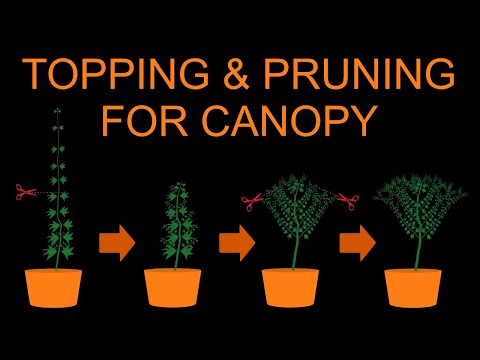
In this guide, we’ll walk through the steps for topping your marijuana plants to improve yield. Apical dominance is a tendency, found in many plants, to put the majority of their energy into the top-most growth. In natural settings, it helps them reach precious sunlight in crowded environments. It’s also what gives cannabis its natural Christmas tree shape, with one large bud growing at the top (the cola) and much smaller buds on the side branches. The problem with this is that plants can grow very tall and the shape does not make good use of indoor lighting.
Since cannabis naturally puts most of its growth into the top cola due to apical dominance, If you want to control the height or spread growth energy, you need to alter this natural tendency. One way to break apical dominance would be to pull the growing tip down so that it’s no longer the top-most growth. This causes the plant to distribute energy more evenly across the side branches, as illustrated below.
What is topping?
Topping uses a different technique to accomplish this. Topping is simply the act of cutting or pinching off the main growth point with the goal of breaking the apical dominance and encouraging side branching. Repeating the process will encourage the plant to spread energy across even more bud sites. It will start to branch out and take on a bush form. We made this animated video to explain how topping and pruning are used to create a flat canopy for larger yields:
The final goal of topping in most cases is to get bushy growth that makes the best use of available light and space.
This Jack Herer would have grown into a tall Christmas tree shape, but topping kept its height manageable.
Why should I top?
Topping does take some effort and care, but in many cases it is the right move – especially for the indoor grower. The primary reasons to top your cannabis is for height control and increased yields.
Cannabis is too tall!
Many cannabis strains naturally grow taller than your ceiling – topping reduces vertical growth and encourages horizontal branching.
We want more bud!
If left to grow naturally, marijuana plants produce only one main cola – topping improves yield, since branching causes the plant to produce multiple large colas. Each cola won’t be as large as the single cola would have been, but the overall yield can be considerably larger.
Grow lights aren’t the sun!
Left to grow naturally, marijuana plants will take the shape of a Christmas tree. This shape works well with the sun, a large light source that’s far away. The entire exterior of the plant can be coated in sunlight. This doesn’t work as well with grow lights since penetration and power fall off rapidly from a small light source, leaving the bottom of the tree without enough light to fully develop. Topping and training your plant to have a flat canopy will make better use of indoor grow lights.
Cannabis’s Christmas tree shape works great in sunlight, but doesn’t make efficient use of indoor lighting.
Should I always top?
There are a couple of circumstances where topping isn’t the best option:
You want one big bud: If you are looking to grow a single large bud for bragging rights and don’t mind an overall decreased yield, you shouldn’t top. For this, just let the plant keep its apical dominance to focus energy on the main cola.
You’re doing 12/12 from seed: If you’re skipping straight from seedling to flower, you won’t have time to top before it’s in flower, and you should never top a plant in flower.
You’re growing a fast auto-flower: Autoflowering plants are on a timer from germination to flowering, and many are specially tuned to have a very short vegetation stage. Since topping can be traumatic to the plant and slow growth, autos that mature in less than 90 days can be stunted and reduce production. For fast-autos, you should skip topping altogether. If you have some experience, you might try FIM’ing since it is less traumatic for the plant.
Step 1 – Break Apical Dominance
Count up five leaf nodes, and then cut or pinch the growth tip. Cutting the growth tip will cause the side branches to increase growth, balancing more evenly across the plant.
Step 2 – Repeat and Train for a Flat Canopy
Use low-stress training to pull down the highest growth tips continually. Keeping growth tips, horizontal growth spread evenly across the plant, while encouraging a flat canopy to make better use of indoor lighting. Visit the Low-Stress Training Guide and learn a technique to combine topping, training, and pruning to maximize yields.
Why do the stems change after topping?
In normal cannabis growth, the main stem is tapered all the way up, since the plant has a single primary channel to direct water and nutrients up the center of the plant towards the primary cola. After you top, the plant morphs to distribute water and nutrients to the side branches. The plant will need more nutrients and water to support two colas, so the plant will beef up the stem joints significantly, developing bulges, or knuckles, at the joints. This morphing action allows the cannabis plant to direct the additional nutrients and water to side branches, ultimately swelling the buds to create multiple colas.
After topping, the plant will form bulges at the joints to increase water and nutrients to the side branches.
When do I top?
Top after the plant is a few weeks old and has at least five leaf nodes. Only top when the plant is in the vegetative stage – do not top when plants after they have transitioned to flower.
Where do I cut to top?
Count up five nodes and cut the growth tip just above the 5th node, like in the illustration below. You can also cut after the 6th or 7th node if you want, but you should not cut before the 4th node or the plant may not recover.
Cut about 1/4 inch (0.6 cm) above the 5th node
What’s the difference between topping and FIM’ing?
FIM stands for ‘Fuck, I missed’ and is similar to topping, except rather than cut below the growth tip, you pinch the actual growth tip itself. While topping causes the plant to branch in two, FIM can create 2-4 branches. While FIM’ing is less traumatic and can lead to even better results, it isn’t as reliable as a topping and can result in no branching.
This fast auto (Afghan Mass from 00 Seeds) was FIM’ed and is producing three main colas
What should I use to cut?
Any sharp scissors or small pruning shears will do. Make sure that you clean and sterilize the blades so the plant can heal quickly. We like this set by Vivosun, because they are super sharp and super cheap.
Where do I pinch to FiM?
After the plant has grown at least five modes, pinch the growth tip as shown in the illustration below.
Pinch the middle of the growth tip to FiM
Can I top or FIM Side Branches?
Yes. Cutting or pinching side branches will cause them to fork just like it does to the cola. The overall effect will be a bushier plant with even more bud sites. This is an important part of training to a flat canopy, since you want the side branches will catch up to the top in height.
How do I top or FIM multiple times?
Topping is a continuous process while the plant is in vegetation. After the branches or any growth tip has at least four nodes, just cut or pinch off the growth tip to create a new branch. Only take a few each day, so the plant doesn’t go into shock.
Visit the Low-Stress Training Guide and learn a technique to combine topping, training, and pruning to maximize yields.
Combine topping, training, and pruning to produce a flat canopy full of fat buds!
These LSD plant (left) and Acapulco Gold (right) – both strains by seed breeder Barney’s Farm – have been topped multiple times, and were trained to produce a flat canopy with many large colas each. These plants produced 6 ounces each of high-quality bud after 60 days vegging and 65 days of flowering. Learn how to do this yourself in our Low-Stress Training Guide.
In this guide, we’ll look at how low stress training (LST) is used to increase flower production in cannabis. Then we’ll show you step by step how to combine topping, training and pruning to maximize your yield. This is a must-know for farmers who want to grow more weed.
Its an exciting time! You’ve spent tons of time and energy into growing your crop and its finally getting close to harvest time and its tempting to claim victory and get busy reaping the rewards. There are 3 steps left though:
Harvest the plant
Dry the flowers
Cure the bud
You’ve invested too much time and energy to rush past the last steps. Harvesting too early can drastically decrease potency, since the THC has not finished maturing. If the buds aren’t dried enough, they can grow mold. Don’t cure for long enough and your bud will taste like hay and may make you anxious or paranoid. In this guide, we will cover when to harvest, how to dry and cure your bud for the best results.
When is the best time to harvest?
The amount of time spent in flowering varies by strain, but generally, your buds will be ready to harvest 8-12 weeks after flowering starts. There are two simple methods for determining when your cannabis plants are ready for harvest that will optimize potency, and give the best-finished product overall.
Most Precise: After a percentage of trichomes have turned milky or cloudy Simplest: After a portion of pistils have darkened in color.
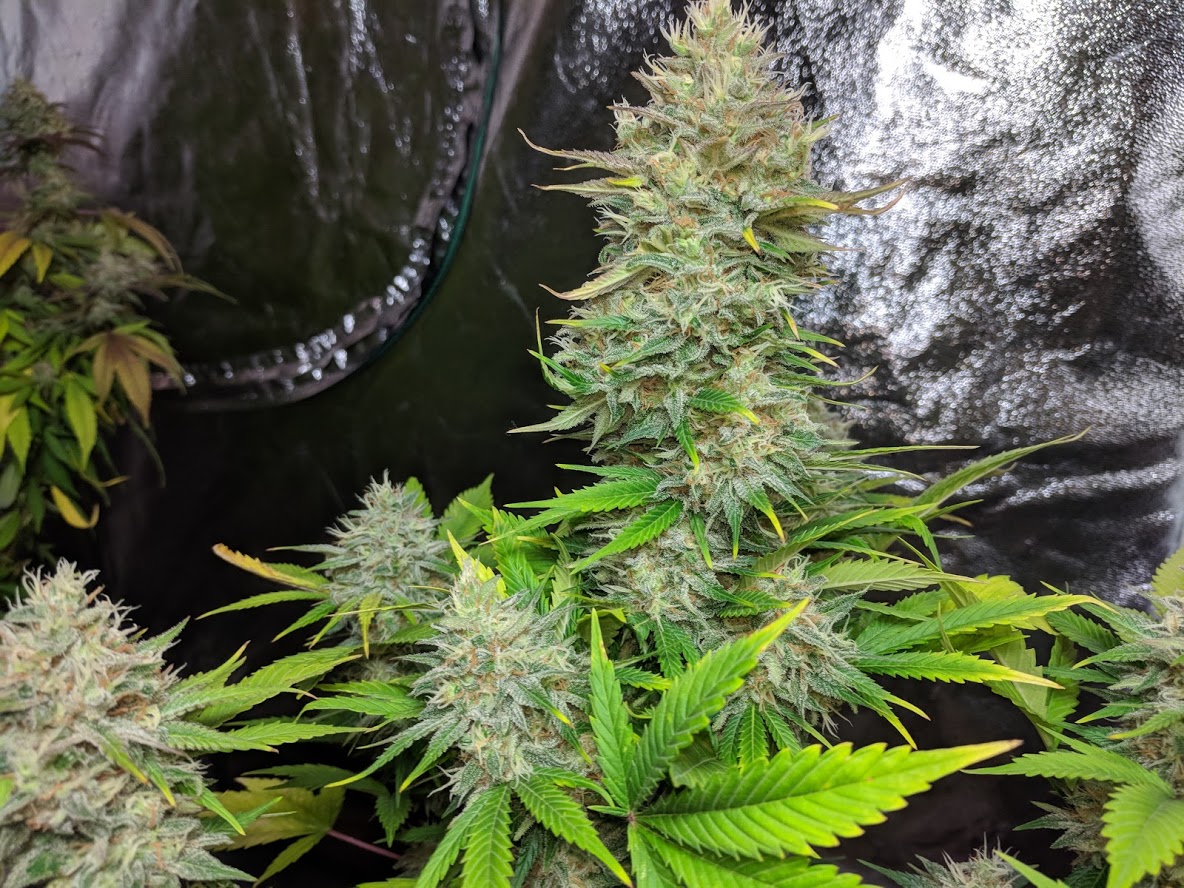
This buds look close to harvest, but you’ll need to look closer to harvest at the perfect time.
Using Trichome Color
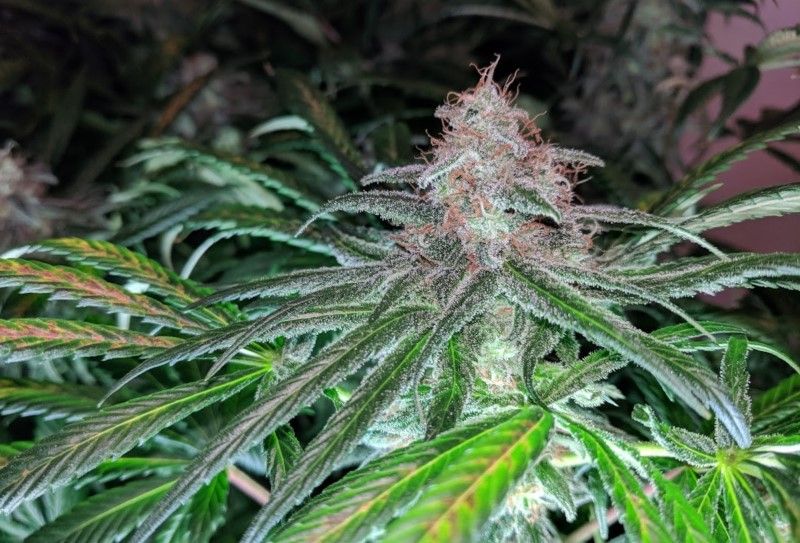
Trichomes are mushroom looking structures that form the crystal structures on flowers – often referred to as resin – that contain the cannabinoid compounds we all love. To the naked eye, trichomes appear as the white dust that forms on the flowers and sugar leaves growing out of the bud structure. The ‘Fruity Jack’ from Philosopher Seeds above shows extreme trichome growth.
Young trichomes are clear when they first form and turn milky white as they mature. Trichomes that have just turned white are higher in the psychoactive compounds (like THC) that create cerebral effects. Fully mature trichomes turn amber and are higher in compounds like CBD and lower in THC, thus causing sedating or ‘couch-lock’ type effects. Counting the percentage of trichomes that have turned amber will let you know exactly when to harvest.
White
Amber
Effect
100%
0%
Highest psychoactive
80%
20%
High psychoactive effect
50%
50%
Balanced effect
20%
80%
Raised sedative and lowered psychoactive
0%
100%
Most sedative
The images below show trichome development as the plant matures.
While not as precise as looking at the trichomes, this is the simplest method since it requires no additional equipment. The white hairs growing out of young marijuana buds are called pistils. As the flowers mature, the pistils darken into brown or red colors.
Light Pistils
Dark Pistols
Effect
50%
50%
High psychoactive & milder sedative
25%
75%
Balanced
10%
90%
Raised sedative & lowered psychoactive
You can observe pistil color with your eye alone. Measure the percent light versus percent dark on several buds, and take the average. The pistils in the ‘Purp Pac’ below show that it is almost ready to provide a balanced effect.
This plant is ready, with almost all dark pistils, resulting in an increased sedation effect.
Getting Ready
As your plants are getting closer to harvest, there are a few things you’ll want to do to get ready.
Flush
Cannabis nutrients can leave behind salts and other trace residues that can negatively impact the smell, taste, and overall quality of the final buds. You can clean most of these from your plants a week or so before harvest with a nutrient flush.
To flush, use large amounts of water (or optionally with a flushing solution) to remove leftover nutrients and salts from the soil. Use at least an equal quantity of water to the size of the container. Flushing two weeks before harvest and using only organic nutrients for the rest of flowering can improve the buds flavor and make it smoke cleaner.
Prune Fan Leaves
It’s often easier to remove fan leaves while the plant is still standing, so many farmers snap them off in the weeks before harvest. To do this safely, grab the leaf stalk at the base and pull upwards while snapping the stalk. If you don’t pull upwards, the stalk will pull bark off the stem, and cause extra stress to the plant.
Extended Darkness
Many farmers believe that extending hours of darkness near harvest can improve resin production as the plant believes that the season is almost over, and kicks growth into overdrive. While the science behind this isn’t clear, it doesn’t seem to hurt.
Harvest
This one is easy: cut the plant at the base of the stalk.
Dry
To dry the plant, hang it up. You can hang the entire plant or cut off individual branches. You will remove and manicure the individual buds from the branches AFTER they are dried.
Keep the relative humidity between 30% & 60% and the temperature between 65F & 80F (18C & 26C). Avoid too much airflow to keep the plant from drying too fast.
You can dry right in your tent – hang your plants between 3 and seven days.
If drying takes less than three days, you are drying too fast and want to increase humidity, decrease air-flow, or decrease temperature next time. If drying takes more than seven days, you are drying too slow and will want to reduce humidity, increase air-flow and temperature next time.
When is it dry?
Dry cannabis flowers have the following properties:
The outside of the bud is crispy and dry.
The inside is still moist and supple.
When you press it, it should retake its shape.
The small stems are crispy and snap easily.
The large stems do not yet snap.
What if I let it dry too much?
This is recoverable during the curing phase in most cases, as the cannabis will reabsorb moisture from humidity packs.
What if I I didn’t let it dry enough?
Just let it finish drying. Weed that is packaged wet will always have a funky smell, might grow mold, will smoke poorly, and will generally not be a great experience. Just put these back out to dry.
Is it ready to smoke now?
Kind of. Dried cannabis is technically smokable, but won’t burn as clean, flagrantly, or as smooth as it will after curing. Uncured cannabis can also cause increased anxiety and uncomfortable feelings. Curing your weed correctly will make sure that you get the most out of the time, energy and money you’ve invested in your garden.
Is there an easier way to dry and cure?
Professionally made equipment, including drying racks and curing containers can help. Check out this list for more information.
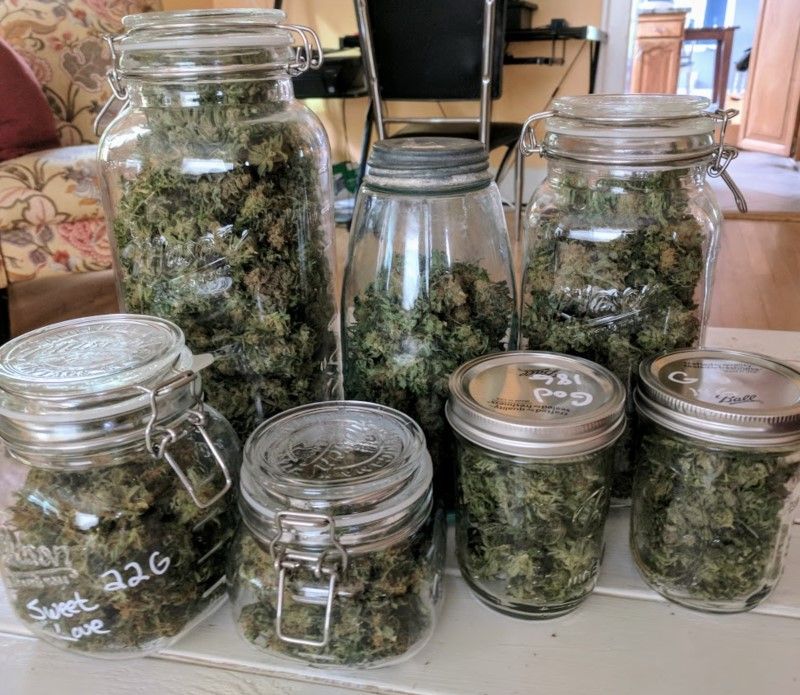
Cure
The curing phase is when your cannabis will improve its flavor profile and increase potency over a series of natural processes. During this time, you want to keep a stable humidity between 50% and 60% with reduced airflow.
Step 1: Remove and manicure buds from stem.
This is a messy step and your hands will get sticky! Using scissors or shears, cut the buds off the stems and then manicure sugar leaves. How much you focus on making the buds look pretty is up to you. Just make sure you save the shake (stuff you cut off) since it can be used to make edibles and extracts.
Step 2: Put in glass jars.
Put the cannabis into glass jars (1 qt/liter jars work the best). Just drop the manicured buds in, do not pack them into the jar or they will become overly compressed and not cure. Drop a humidity pack in the middle of the jar, and then close the lid.
Step 3: Wait.
Cannabis benefits heavily from curing for the first 6 weeks, and then has diminishing returns. For the first couple of weeks, open the container once or twice a day to let it breath for 5-10 minutes.
Step 4: Smoke!
After curing for at least a few weeks minimum, your cannabis is ready to smoke! Enjoy, you’ve earned it.
How important is the curing step?
Very. If you skip it, your pot will be less potent and more likely to cause anxiety and negative feelings. The temptation to sample is high when the buds look and smell so amazing, but it’s worth the wait. We recommend a full six weeks, but there’s no law against sampling a little along the way.
In this guide, we’ll walk through caring for your marijuana plants during the flowering stage. The flowering stage is the final stage of the plant’s life and begins after darkness lasts longer than 12 hours for photoperiod strains or after a set amount of time for auto-flowering strains. During this phase, the plant will produce sexual organs in an attempt to procreate before dying. Females produce the flowers that we all like to smoke and male plants produce pollen sacs, which aren’t good for anything other than causing the females to produce seeds. If you are growing bud to smoke, you want to remove any males as soon as you identify them.
Primary Objective: The objective during this phase is for your plants produce flowers or buds. At the beginning of flowering, most strains will put on rapid vertical growth that often causes them to double in height.
Optimal Environment: Think late summer and early fall, with cooling temperatures and decreasing humidity. Along the edge of the forests, the adult plants will rustle in the gentle winds as they reach toward the waning sun that shines for less than 12 hours a day. Rains come frequently but with time to dry the soil between. Building large bud structures requires nutrients high in phosphorus and potassium.
Flowering Care
Grow Space
Most strains tend to stretch at the beginning of flower, often doubling in height. Make sure you have ample vertical grow space to account for this.
If you are growing photoperiod strain, you will need to make sure that your grow space can be completely dark for over 12 hours per day. Even a quick flash of light can be enough to interrupt the flowering cycle. Grow tents are ideal for light control, but cabinets or closets work well too.
Provide ample bright lights for under 12 hours per day. Photoperiod plants require at least 12 hours of uninterrupted darkness per day to flower. If the darkness is interrupted often, the plant will leave the flowering and revert to vegging. High powered LEDs or HPS are recommended for the most productive grow. During flowering, you can place the lights closer to the plants than in vegetative growth, but generally keep LEDs at least 12 inches (30cm) away. Learn more about lighting options and schedules here.
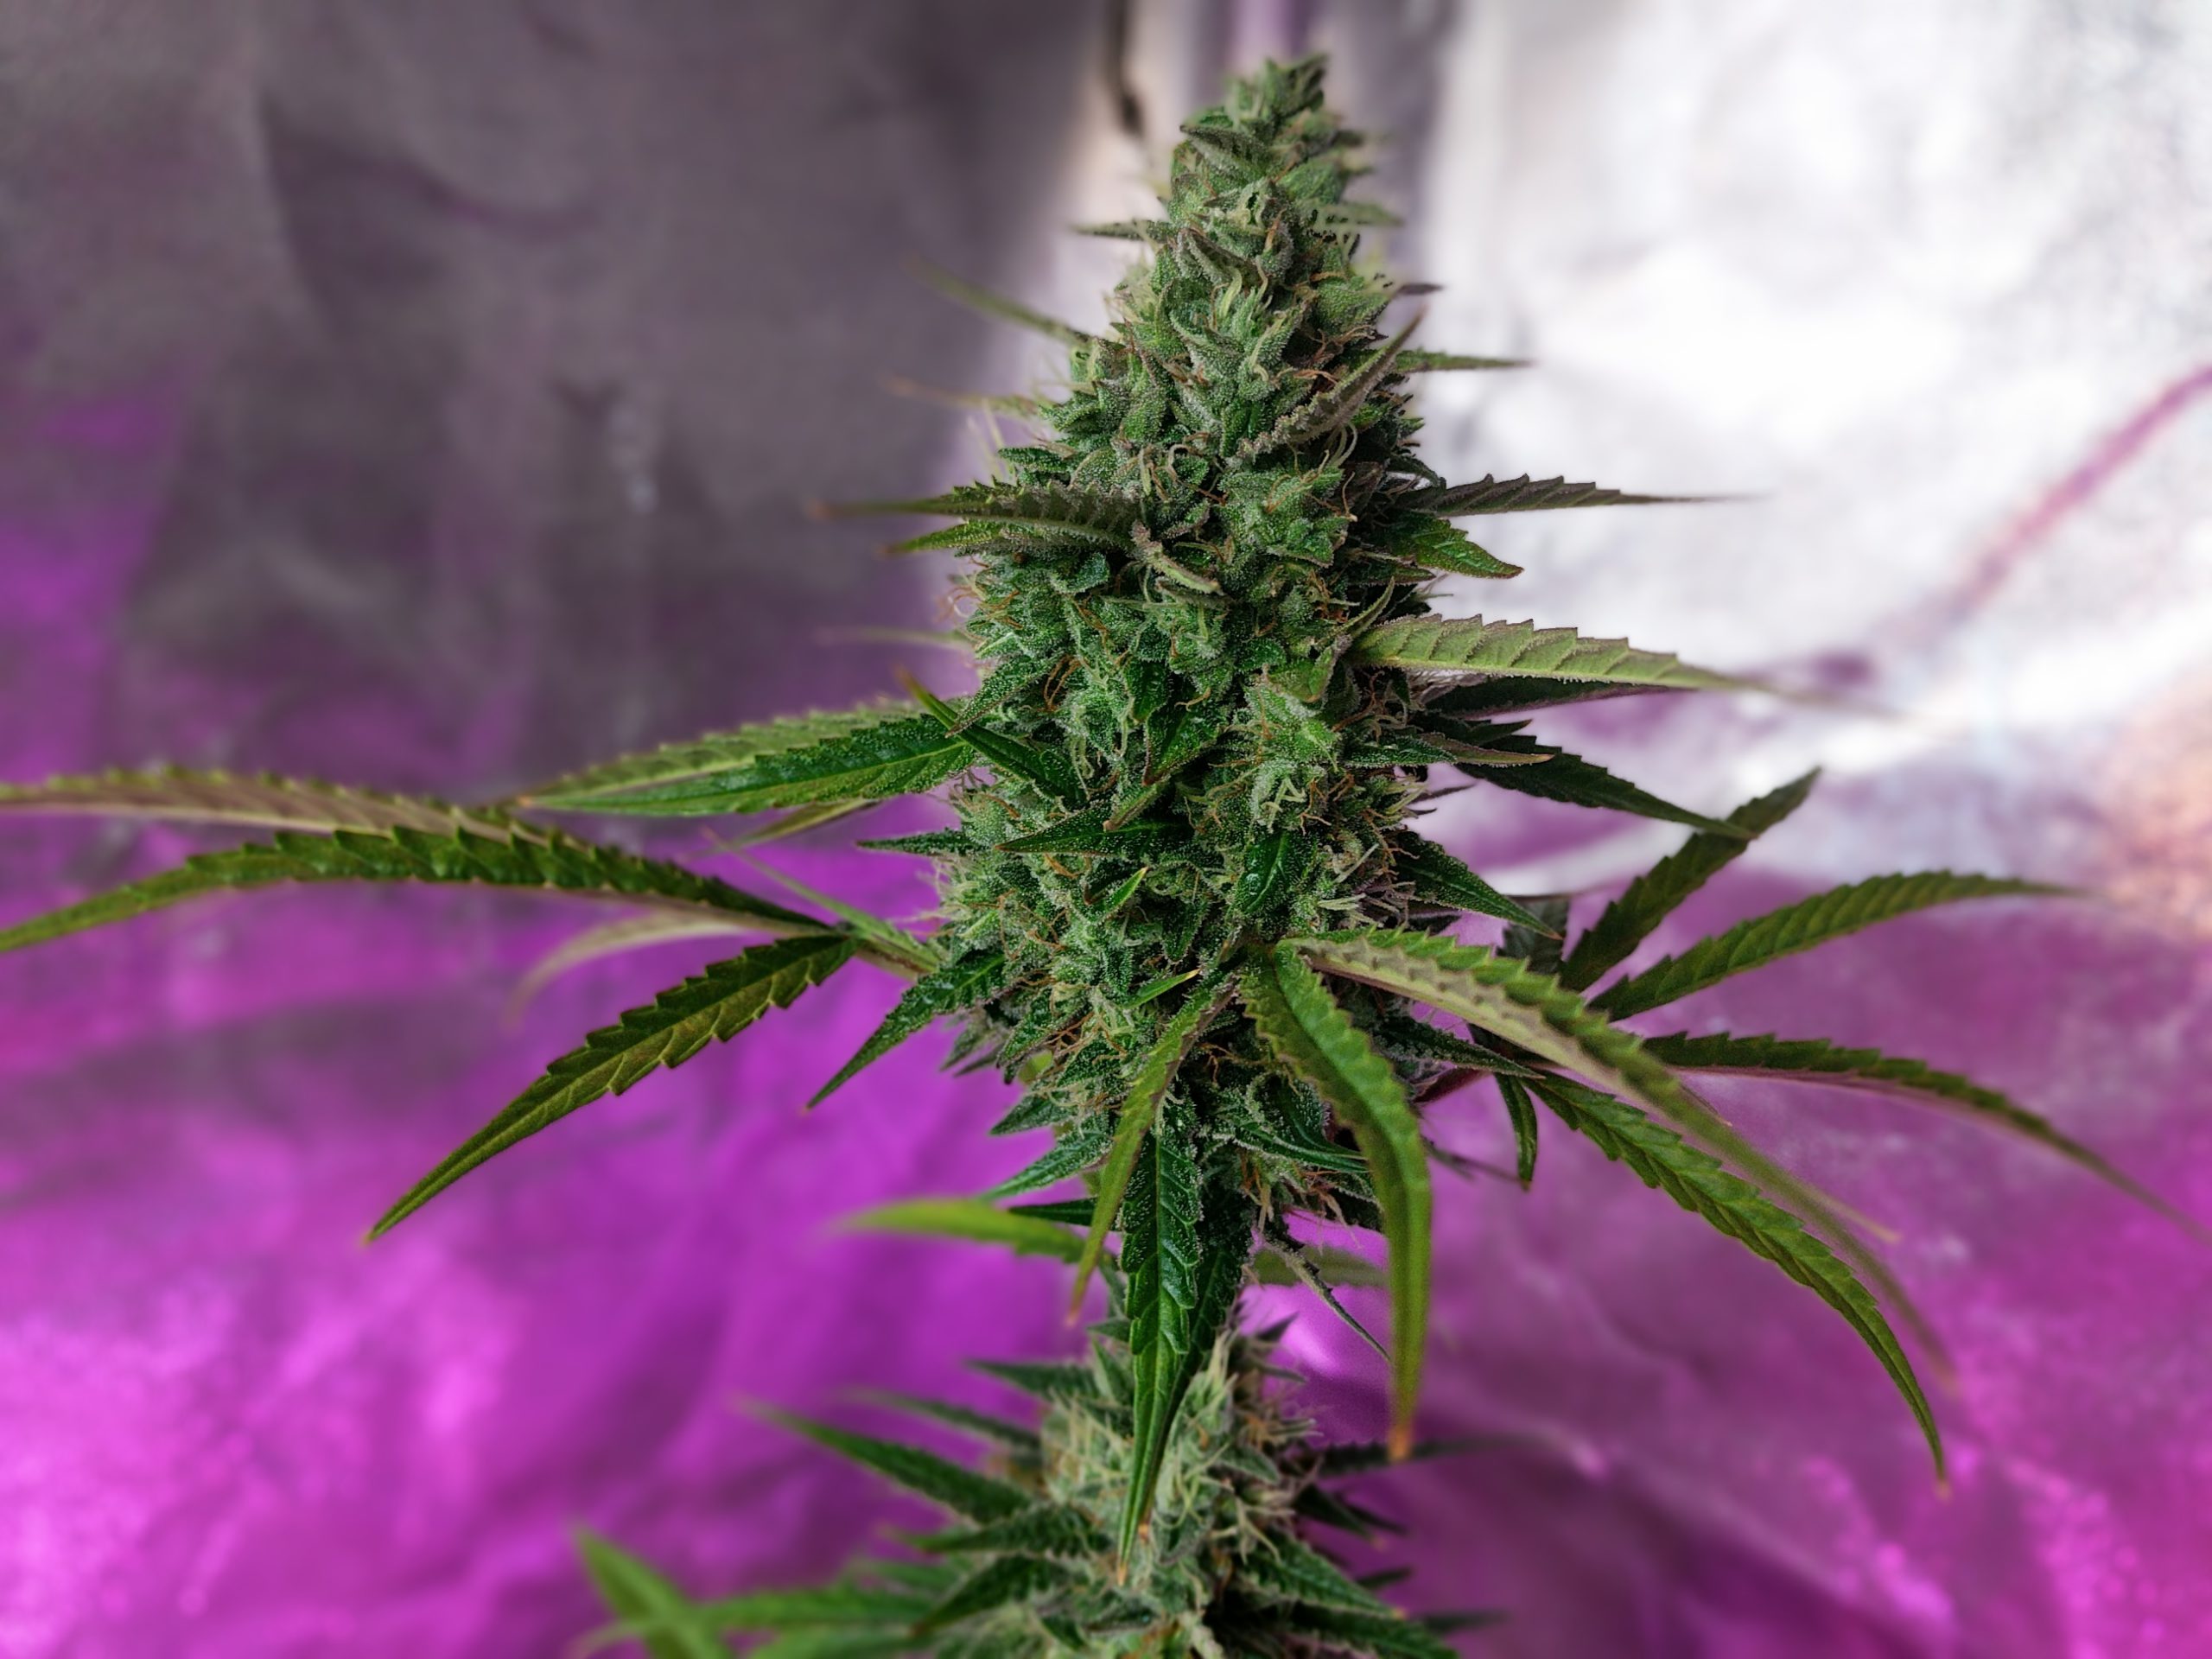
Fruity Jack from Philosopher Seeds under LED lights.
Temperature/Humidity
With flowering plants, we are trying to replicate late summer and fall conditions. Ideal temperatures are between 70 and 85F (21C-30C) and should not go above 90F (32C) or below 60F (15C). Flowering plants need less humidity than seedlings or vegging plants. Increased humidity runs the risk of mold, rot, and pests, so keep the relative humidity around 40-45%.
Water/Nutrients
For watering, flowering plants follow the same rule as all other phases: DO keep the soil warm and moist throughout the vegetation phase. DO NOT flood or saturate the medium, since this will prevent the roots from getting enough oxygen. Too much water and the seedling will suffer root and nutrient problems and will eventually fail. Flowering plants are not as resistant to over watering and under watering as vegetating plants.
Flowering plants also need macronutrients for basic building blocks in the budding process. Unlike the vegetation phase, plants in flower do not need as much nitrogen (too much can slow production) but need increased phosphorus and potassium. Flowering plants need micronutrients also, like iron, calcium, zinc, etc. Too many micronutrients can block macro-nutrients. Most nutrients are only available to the plant at specific pH ranges. Using balanced multi-part nutrient systems are the best mechanism to assure your plants get what they need.
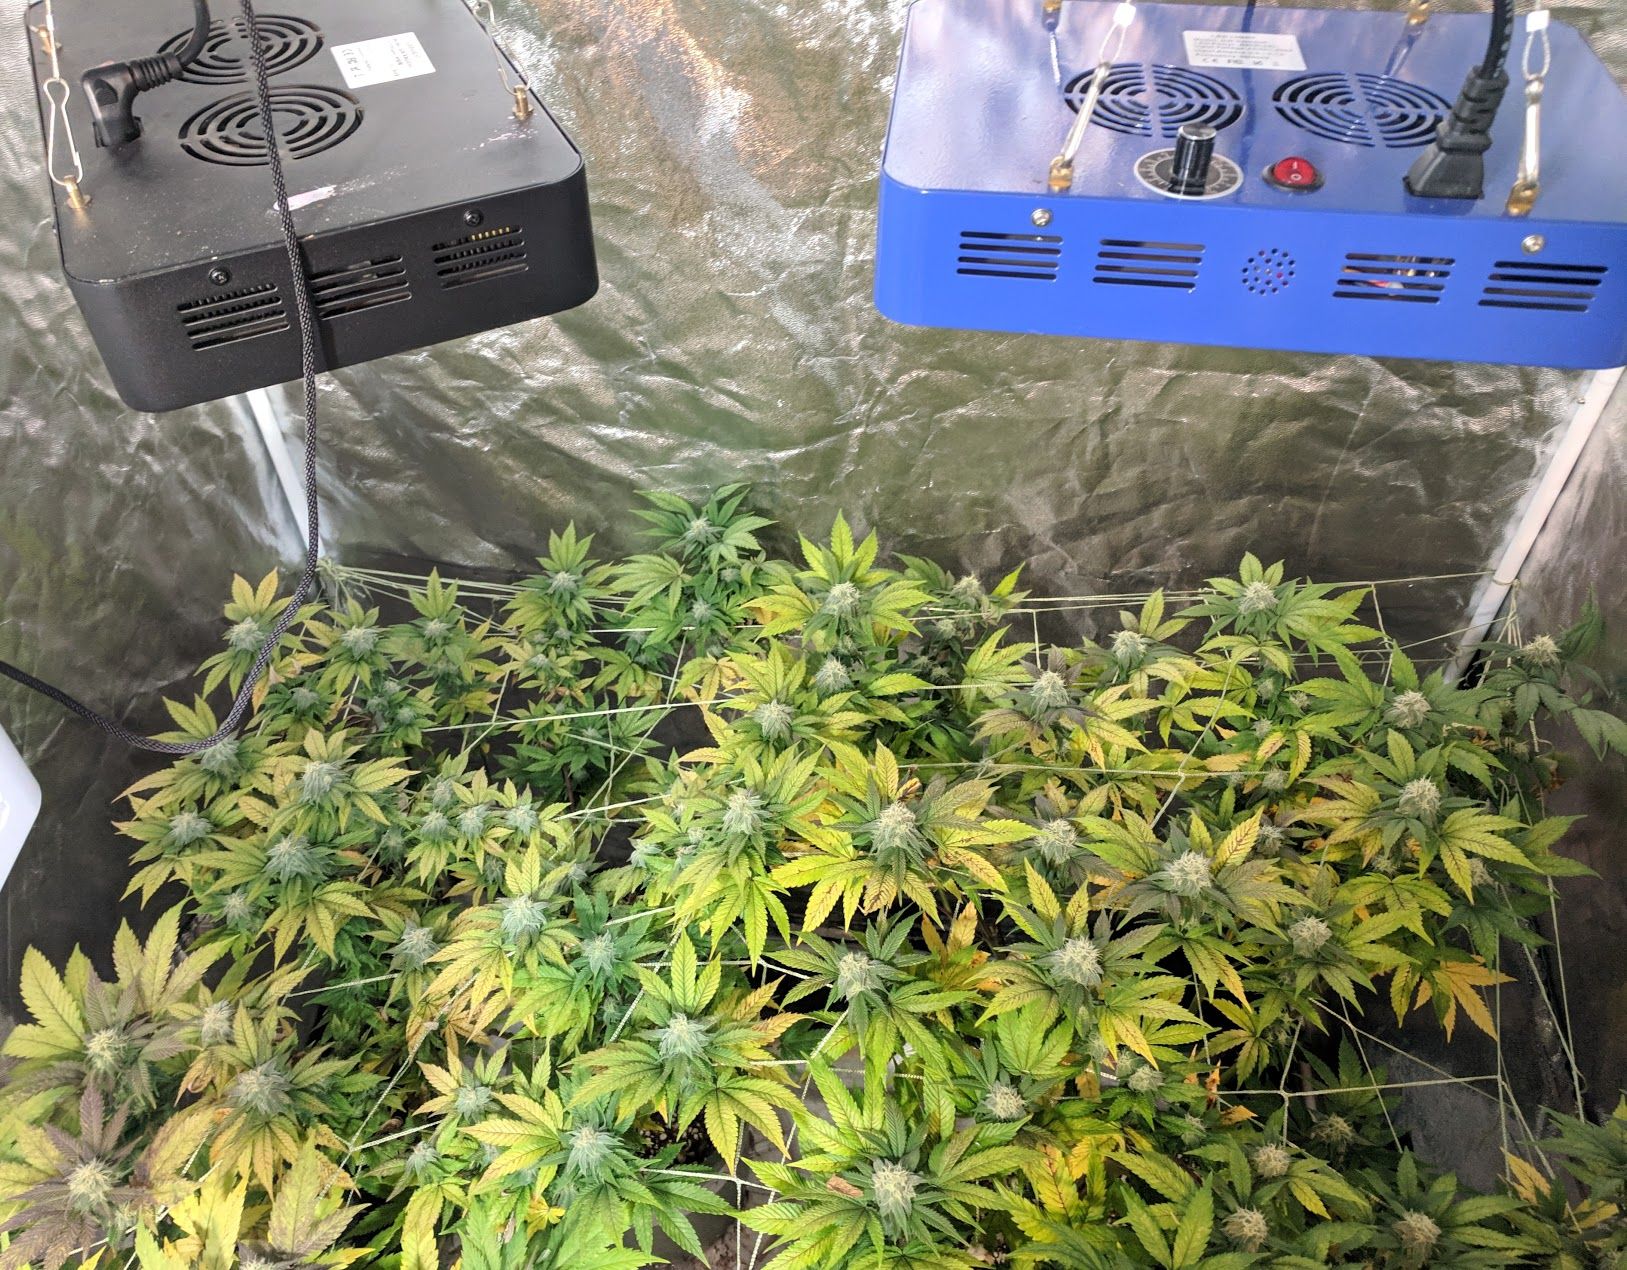
Leaves often turn yellow in late flower as the plant diverts energy to the flower
Pest Control
Plants in the flowering phase don’t recover from pest outbreaks as easily as vegetating plants, so the key to effective pest control is to be proactive before there is an outbreak. Pests thrive in the same conditions as your plants, so it is inevitable that they will find your crop if you don’t take steps to prevent them from establishing a foothold in the first place. Whether it’s mites, mold or whiteflies, there are a few preventative measures that can help you keep your crops safe:
Keep it clean; don’t leave litter, rotting leaves or standing water in your grow space since this provides excellent hiding spots and food sources.
Don’t spray the plants right before lights out; water droplets left on the leaves can encourage mold and mildew.
Keep proper temperature and humidity; too warm and humid and pests will thrive.
Use neem oil treatments at least once a week to make it more difficult for pests to gain a foothold.
Treat outbreaks aggressively
It’s safe to spray neem onto the bud sites. Neem has a strong fragrance, so you might want to avoid using it for the last weeks before harvest.
Cannabis plants should not be transplanted in flower if it can be avoided. Since transplanting is stressful, you should make every effort to have the plant in its final container before starting flowering. If transplanting cannot be avoided, use extreme care in transplanting to minimize stress and damage.
Training & Pruning
Vegetating cannabis grows rapidly and is extremely robust to both high and low-stress training. During the flowering phase though, your plant becomes less robust to stress and any injury can slow growth. As a general rule, you should not cut, injure or perform any other high-stress activity on your flowering plant. After a few weeks in flowering, the plant will become rigid and vertical growth will slow – at which point even low stress training techniques should no longer be used.
Prune your flowering plants selectively. Removing small bud sites from the understory can focus growth on the big buds up top. You can also pull fan leaves that are damaged or excess fan leaves for additional airflow. Always be gentle with your flowering plant and never take too much at one time.
This LSD from Barney’s Farm seeds had multiple toppings and low-stress training before being put into flower.
Is my plant male or female?
Cannabis plants are dioecious plants, which means that each plant (almost) always has either male or female organs. This is important when you’re growing cannabis to smoke because you only want the flowers of the female plant and you don’t want them to be pollinated by male plants. Pollinated flowers produce seeds, which drastically reduces potency and flower yield.
You can tell the sex of a cannabis plant 5 to 14 days after flowering starts by inspecting the growth tips near the plant’s nodes. Female plants begin growing white hairs, or pistols, out of pointy calyx that will eventually form the bud structures.
Male plants will form tiny grapes like pollen sacs, like in the picture below. These should be removed from your garden as soon as possible to avoid pollinating female plants. Male plants almost never produce substantial amounts of THC.
This Cooley from Cizzle is a male – notice the grape-like sacs forming.
When is the flowering phase over?
The flowering phase is over when your buds are ready to harvest. It varies by strain, but generally, your buds will be ready to harvest between 8 to 10 weeks after flowering starts. There are two simple methods for determining when your cannabis plants are ready for harvest:
Most Precise: After a certain percentage of trichomes have turned milky or cloudy Simplest: After a certain percentage of pistils have darkened
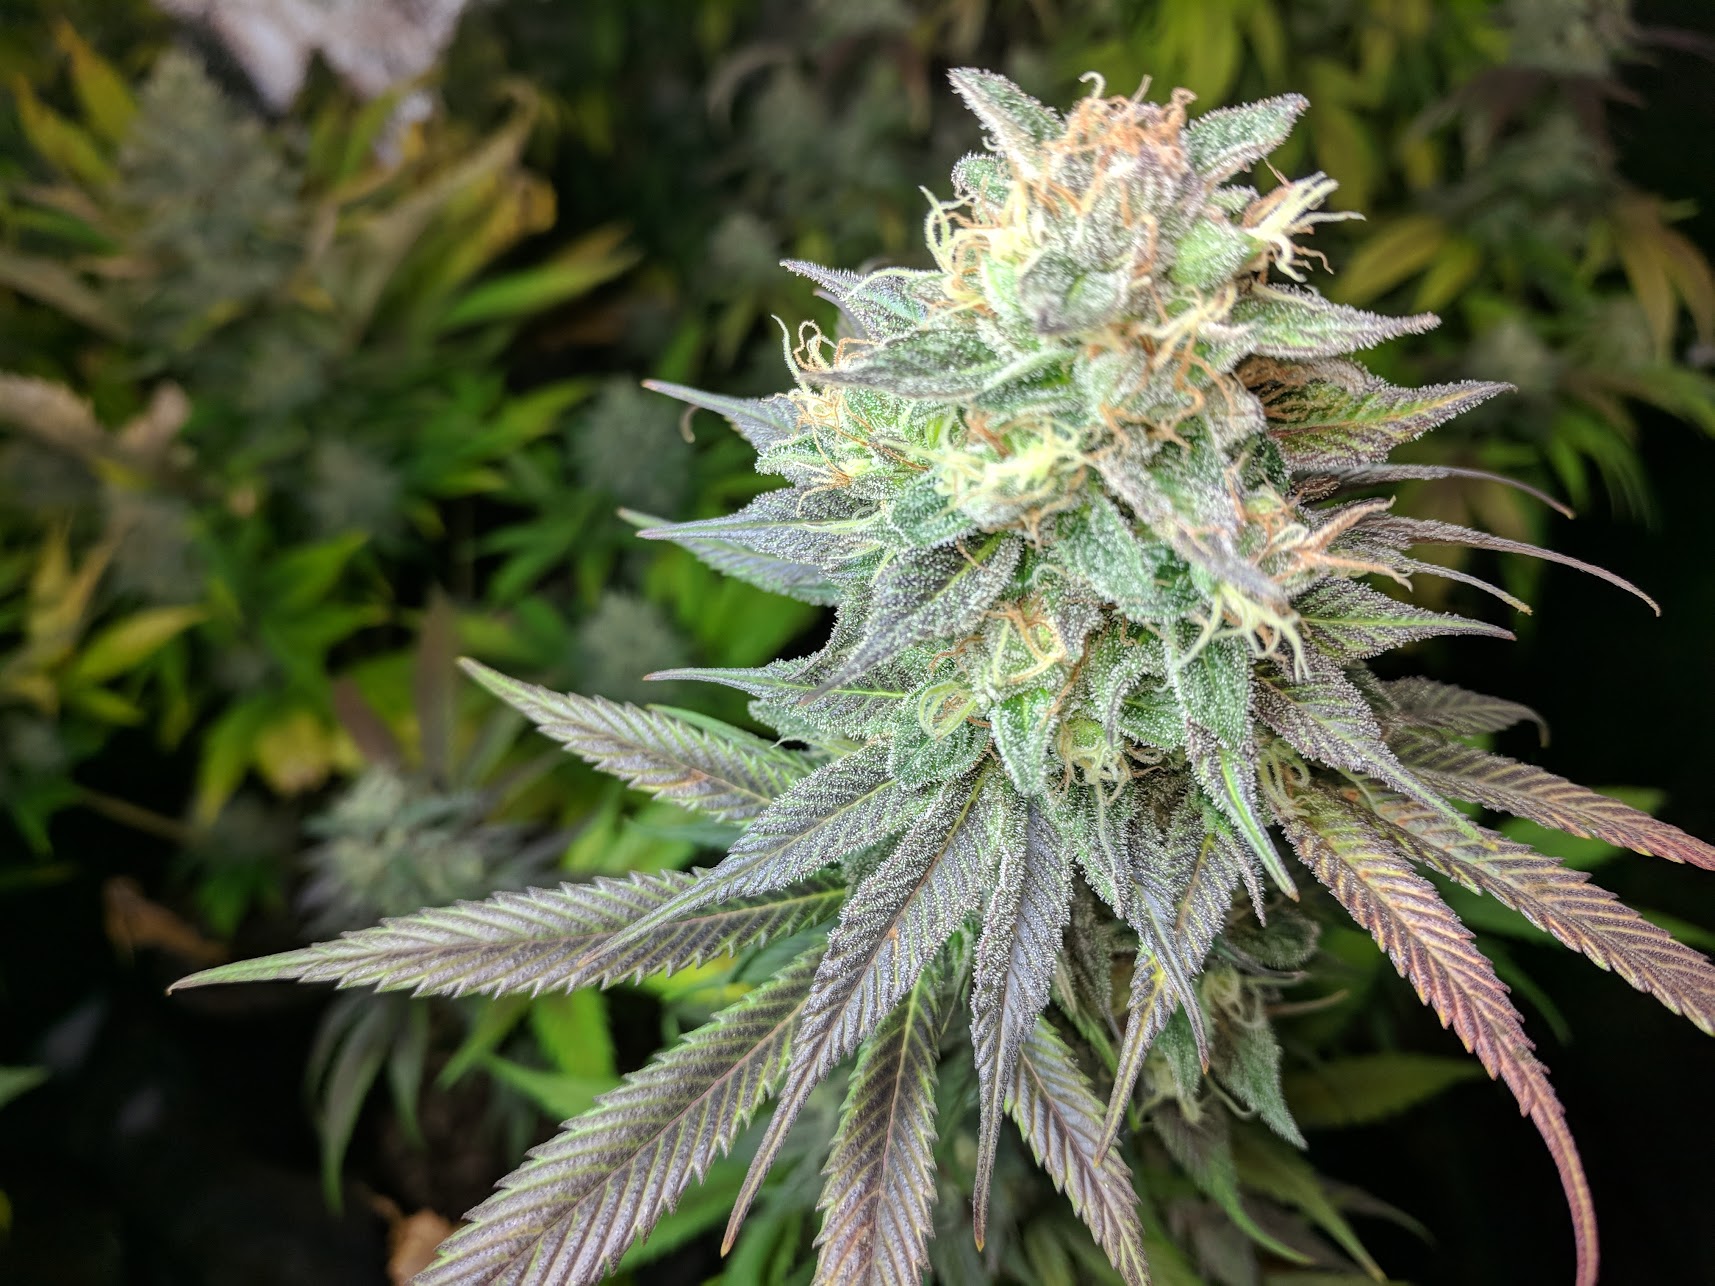
Most common problems can be diagnosed by inspecting the leaves.
What’s wrong with my plant?
Sometimes things don’t go the way you planned, and it seems that no matter how careful you are, things are going to go off the rails with cannabis sometimes. Unfortunately, there isn’t a lot of time to correct issues. Mite, mold and other pests can also wreak havoc on your crops, so you need to act quickly.
Nutrient deficiencies are common in flowering plants. Nitrogen deficiency is even normal, as the plant needs much less nitrogen during flowering. Other deficiencies are often caused by pH balancing problems, and not a lack of nutrients in the medium. These are simple to diagnose and easy to correct, but need to be addressed quickly in flowering plants.
In this guide, we’ll walk through caring for your marijuana plants during the vegetative stage. The arrival of the fully formed seven-point leaves found in mature plants marks the beginning of this phase. The first leaves of a newly-sprouted seedling will have a single point; the next three, then five points; before finally producing the iconic seven-point leaf, which signifies the beginning of the vegetative stage. This phase is where your plant will do a lot of its growth, both vertically and horizontally.
Primary Objective: The objective during this phase is to put on as much plant mass and create as many bud sites as possible while training the plant into the final growth shape before entering flowering. We do this through training, topping and selective pruning. Cannabis plants in the vegetative states are incredibly robust and quickly regenerate from injuries, pests and nutrient deficiencies. Once a plant enters the flowering stage, it becomes much less pliable and robust to manipulation, so use the vegetative state to position your plant to make the most out of flowering.
Optimal Environment: Think late spring through summer, with warming temperatures but decreasing humidity. Along the edge of the forests, the young plants will rustle in the gentle winds as they reach toward the bright sun that shines for 16 to 24 hours a day. Rains come frequently but with time to dry the soil between wettings. The explosive growth needs strong roots to pull nutrients from the fertile soil.
Vegetative Care
Grow Space
There are lots of options for where you grow, and your selection will depend on your goals and constraints.
Outside – Cannabis can spend their vegetative cycle outside during the summer months. Space Bucket – These are self-contained environment-in-a-bucket are perfect for single plant stealth grows. Grow Box – They are a great option for small and stealthy grows for single plant production. You can pick these up premade or make your own or repurpose an old piece of furniture. Closet – A spare closet can make an ideal grow space because they offer good height and are good at keeping light contained. You will need a fan for ventilation in most closets. Grow Tent – Grow tents range in size, from 2’x2′ (.6m x .6m) on up and are great options for all phases on cannabis life. Tents have great ventilation, reflective walls to make efficient use of lighting and they keep light contained to keep your grow stealthy.
Vegetative phase begins after the plant start producing adult leaves.
Lights
Photoperiod strains will enter flowering if dark periods exceed 12 hours, so nights must be kept shorter than 12 hours to keep the plants in vegetative growth. Auto-flowering strains, on the other hand, go into flower a set amount of time after germination.
Farmers describe light cycles as a ratio of light/dark hours. Standard options are 18/6 (18 hours of light followed by 6 hours of dark), 20/4 (20 hours of light followed by 4 hours of dark) and even 24 hours of light without darkness.
While the general rule of thumb is that more hours of light means more photosynthesis which means more growth potential, there are indications that dark periods are essential in plant development – particularly in root growth.
Lighting Options
Sunlight – Vegging your plant in sunlight is a great option – particularly if supplemented with an artificial option. Fluorescent Compact Fluorescent Lights (CFL) and fluorescent tube lights can be great options for vegging plants. They are cheap, burn relatively cool and are readily available. LED – Over the past years, LEDs have overtaken almost all other lighting types for home grows. They are relatively inexpensive to purchase and operate and burn very cool compared to traditional grow lights. In nearly all cases, we recommend LED lighting to other sources. HPS – High-Pressure Sodium lights are incredibly effective lights and have been successfully used to grow amazing buds for decades. They do burn hotter than LEDs, which can cause temperature problems in tents and other confined spaces.
These vegetating plants have been topped several times to make them bushy
Temperature/Humidity
With vegging plants, we are trying to replicate summer conditions. Ideal temperatures are between 70 and 85F (21C-30C) and should not go above 90F (32C) or below 60F (15C). Vegetating plants need less humidity than seedlings since their mature roots can pull ample moisture from the soil. Increased humidity runs the risk of mold, rot, and pests, so keep the relative humidity around 50%. For optimal conditions, start vegging at 60% and lower to 45-50% through vegetation.
Water/Nutrients
For watering, vegetating plants follow the same rule as all other phases: DO keep the soil warm and moist throughout the vegetation phase. DO NOT flood or saturate the medium, since this will prevent the roots from getting enough oxygen. Too much water and the seedling will suffer root and nutrient problems and eventually fail.
A good rule of thumb is to wait until the top two inches of medium (knuckle deep) is dry before watering again. Another method is to gage from the weight of the bag. If you see the leaves start wilting, you’ve waited too long. Have no fear though; young cannabis plants are amazingly robust.
Vegetating plants need macro-nutrients for basic building blocks in its rapid growth process. During the vegetation phase, nitrogen is essential and phosphorous is less critical – though those roles reverse during flowering. Vegetating plants need micro-nutrients too, like iron, calcium, zinc, etc. Too many micro-nutrients can block macro-nutrients. Most nutrients are only available to the plant at specific pH ranges. Using balanced multi-part nutrient systems are the best mechanism to assure your plants get what they need.
Since nutrient requirements and tolerance can vary by plant, it’s a good idea to calibrate the needs of each plant. Start off with around 1/4th recommended dosage and then gradually increase until you hit the right level. The bottom leaves will begin to yellow if there aren’t enough nitrogen and leaf tips will burn if there are too many nutrients.
The key to effective pest control is to be proactive before there is an outbreak. Pests thrive in the same conditions as your plants, so it is inevitable that they will find your crop if you don’t take steps to prevent them from establishing a foothold in the first place. Whether it’s mites, mold or whiteflies, there are a few preventative measures that can help you keep your crops safe:
Keep it clean; don’t leave litter, rotting leaves or standing water in your grow space since this provides excellent hiding spots and food sources.
Don’t spray the plants right before lights out; water droplets left on the leaves can encourage mold and mildew.
Keep proper temperature and humidity; too warm and humid and pests will thrive.
Use neem oil treatments at least once a week to make it more difficult for pests to gain a foothold.
Treat outbreaks aggressively
Plants in the vegetative state heal faster than plants in the flowering stage, so it’s a good idea to make sure you have pests under control before transitioning to flower.
A small plant in a big pot causes problems because it is difficult to get the correct mixture of water and air for the roots. A large plant in a small pot with drastically slow growth. Start plants in an appropriately sized container and then transplant vegging plants as they outgrow their current container. Make sure that they are in their final container before starting to flower.
Vegetating cannabis grows rapidly; we call it weed for a reason! Since our primary objective in the vegetative state is to get into the desired shape, this is the time to get the plant into a shape that will best take advantage of your grow space. There are a variety of techniques available to manipulate vegetating plants.
Why do I want to train and prune?
Cannabis plants naturally grow into a shape similar to a Christmas tree. Some cannabis strains can grow 20 feet (6 meters) in just a few months. Growing plants that size won’t work for most home grows, so we use a variety of techniques to shape the plant to optimize for the space available.
Topping and training during the vegetative phase produces many large buds to increase yield and make better use of indoor lights during flower.
Low-Stress Training (LST): A mechanism for engineering cannabis growth by gentle and persistent manipulation of growing shoots through bending and shaping. It does not involve cutting, breaking, damaging or performing other stressful activities to the plant. The goal of LST is to develop the plant for optimal flower production later in life by continually pulling the tallest vertical branches and securing them to grow horizontally. Training the plant’s side branches to grow horizontally produces a flat canopy to make efficient use of indoor lighting.
Topping & FIM’ing: A mechanism that involves cutting or pinching the growing tips of the cannabis plant to break apical dominance and encourage branching. Apical dominance is when the principal, central stem of the plant is dominant over other side stems. Apical dominance causes cannabis to naturally grow in the traditional Christmas Tree shape with one large bud at the cola and smaller buds on side branches. Its an excellent form for growing cannabis under the sun (large light source far away) but does not work well for indoor lights (a small light source close up). Breaking this dominance allows multiple large colas and a flatter surface area for more massive indoor production. Since topping can stress to the plant, it can slow growth for a few days.
If you are growing an auto-flower with a short veg cycle, you will probably want to skip topping and rely on LST techniques.
Super-cropping: Another HST technique that increases yield and potency and encourages bushier growth. With super-cropping, the main stem is twisted and damaged in a specific way, so that when the plant regenerates it with improve vascular capabilities and some theorize that the stress can cause the plant to produce additional THC as a defense mechanism.
Pruning: Pruning is a hotly debated topic in cannabis circles. Some people claim that it harms the plant to remove fan leaves, and you should instead remove bud sites that aren’t getting enough light instead. We have found that both are helpful: Pruning excess leaves can reduce humidity and improve airflow Pruning branches and bud sites from lower on the plant, where they receive less light and would never develop past the pop-corn size anyway, divert resources back to buds on the top.
If you choose to prune, try to avoid mass pruning as that can cause stress and even shock that will slow the plant’s growth. Instead, remove a few leaves or bud-sites at a time. Look at it as a continuous process throughout the veg state.
When Is The Vegetative Phase Over?
In photoperiod strains, the vegetative stage lasts as long as the plant gets less than 12 hours of uninterrupted darkness per day. In nature, this continues from spring to early fall. Plants will begin the flowering stage after nights lengthen to 12 hours of continuous darkness. Indoor growers can end the vegetative stage and start flowering by setting the light schedule to 12/12 (12 hours of light followed by 12 hours of uninterrupted darkness). Controlling the light cycle allows you to decide, based on space and goals, to determine how long to vegetate your plants.
Autoflowering strains, on the other hand, begin flowering after a set number of days from germination regardless of the lighting schedule. The advantage is that you don’t have to worry about lighting schedules as much, but you also lose some control.
Most common problems can be diagnosed by inspecting the leaves.
What’s wrong with my plant?
Sometimes things don’t go the way you planned, and it seems that no matter how careful you are, things are going to go off the rails with cannabis sometimes. Luckily, vegetating plants are very robust and most common problems are are easy to diagnose and simple to fix.
Nutrient deficiencies are common in vegging plants, especially nitrogen deficiencies. Often caused by pH balancing problems, and not a lack of nutrients in the medium, these are simple to diagnose and easy to correct.
Mite, mold and other pests can also wreak havoc on your crops. Luckily, these are easy to treat in the vegetative state, and there is plenty of time for your plant to recover before you put it into flower – unless it’s an auto-flower.