Posts

Seedling Guide

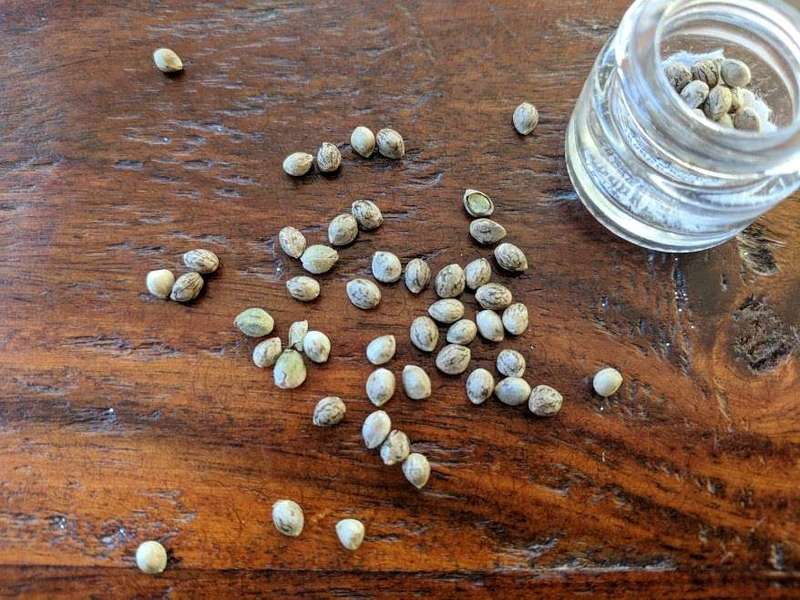
In this chapter, we’ll cover caring for your cannabis seedlings. The seedling phase begins when the young plant first emerges from the seed and extends for the first few weeks of life. Seedlings are born with a pair of small round leaves called ‘embryonic cotyledons,’ that formed inside the seed. The young seedling uses these leaves to bootstrap photosynthesis and growth processes through the seedling phase, which ends after the plant starts growing adult leaves with 5 and 7 points.

Primary Objective: During the seedling phase, the primary objective is to allow the plant to develop hearty leaves for photosynthesis, healthy roots to slurp water and nutrients and a sturdy stem to support it all. It’s best to let the seedling do its job with minimum disturbance from the grower.

Optimal Environment: Think warm spring days in a humid understory, at the edge of a clearing. The light would be bright, but not too intense, and would shine between 12 and 16 hours a day. The soil would be mostly dry between rains, and temperatures would be between 70°F-80°F (21°C-26°C) with 60-80% humidity. In this environment, the young plant would spend the first weeks of her life developing its first sets of true leaves. The first sets will have one point, the second will have 3 points, the next 5 points, before finally producing the iconic 7-point leaf. Under the soil, the roots will begin spreading throughout the medium, looking to establish a solid base in the thick understory.

Seedlings do well in small containers.

How do I care for a seedling?


Lights

Provide ample light, but not too bright, for over 12 hours per day. Compact fluorescent light, low powered LED, or a window sill would all be ideal sources. There are indications that continuous light, without periods of darkness, can harm the vascular systems of young cannabis plants, so we recommend between 16 and 18 hours of light per day for seedlings.

Temperature/Humidity

With seedlings, we are trying to replicate warm spring conditions. Ideal temperatures are between 70°F and 80°F, and should never drop below 60°F. Seedlings benefit from higher air humidities while the root structures are forming, between 60% and 70% being ideal.

Water/Nutrients

Water should be pH balanced between 5.5 and 6.5. Watering seedlings are simple if you follow these two basic rules:

DO keep the soil warm and moist throughout the seedling phase.

DO NOT flood or saturate the soil, since this will prevent the roots from getting enough oxygen. Too much water and the seedling will ‘damp out’ and will fail.

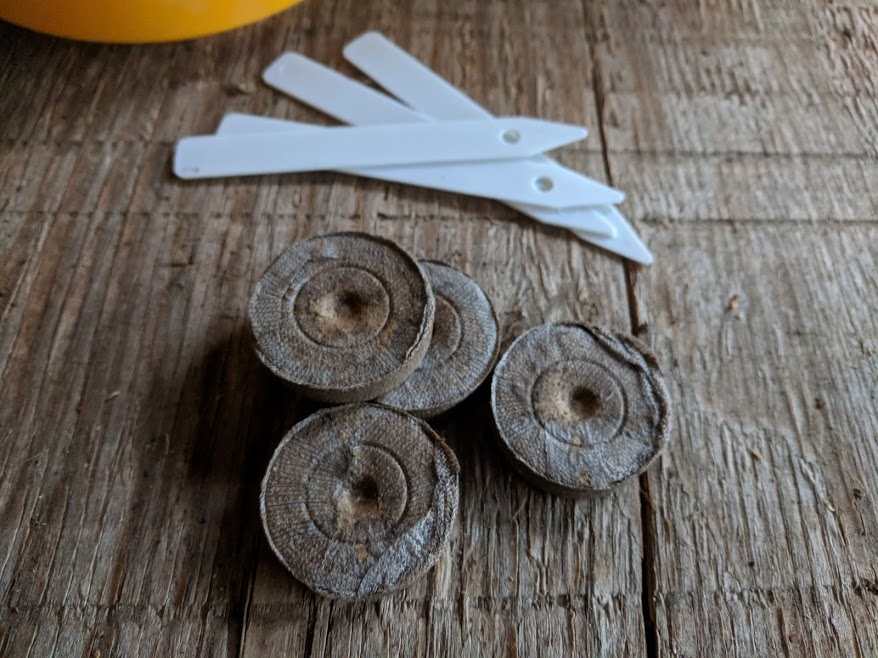
Young pot seedlings do not need very many nutrients and nutritional content in the growing medium that is high will ‘burn’ their young leaves. Peat plugs have almost no nutrient content, making them ideal mediums for young seedlings. After the first few weeks, you may begin to notice lower leaves yellowing slightly; this is the plant asking for nitrogen. Start off with a light compost tea, or diluted nutrients at ~25% of the recommended dose; then ramp up over the coming weeks. Remember though, if the leaf tips begin to burn that this is a sign that nutrient levels are too high, and to back off a little. Tolerance – or need – for nutrients varies by strains, and even by the individual plant, so you’ll need to use trial and error to find the happy medium.

Pest Control

Seedlings are fairly tender, so avoid using even neem oil on them – never mind strong chemical treatments. For the first weeks, pests should not be a major problem for your seedlings if you follow a few preventative measures that can help you keep your seedlings safe:

  • Always start your seedlings in a clean, pest-free environment
  • Keep it clean; don’t leave litter, rotting leaves or standing water in your grow space since this provides pests with hiding spots and food sources.
  • Don’t spray the plants right before lights out; water droplets left on the leaves can encourage mold and mildew.
  • Keep proper temperature and humidity; too warm and humid and pests will thrive.

You can learn more about a balanced approach to handling pests here. If you do have pests in your seedlings, remove them from the infected area and try a light neem treatment. Learn more about using neem oil to safely treat cannabis.

This seedling is almost ready to transplant because the leaves are hanging over the pots edges.

Transplanting

It is best practice to keep plants in a suitably sized container for its current stage. If the container is too big, the plant can’t drink up all the water and will tend to damp out from oxygen deprivation. If the container is too small, the plant can become root bound and stop growing. Start off with small containers for small plants, and transplant up as the plants’ root system fills the container.

Training/Pruning

Young seedlings are tender and under rapid development and shouldn’t be trained or pruned. Droopy seedlings can be propped up with a stake, but otherwise the seedling should be left to grow.

When Is The Seedling Phase Done?

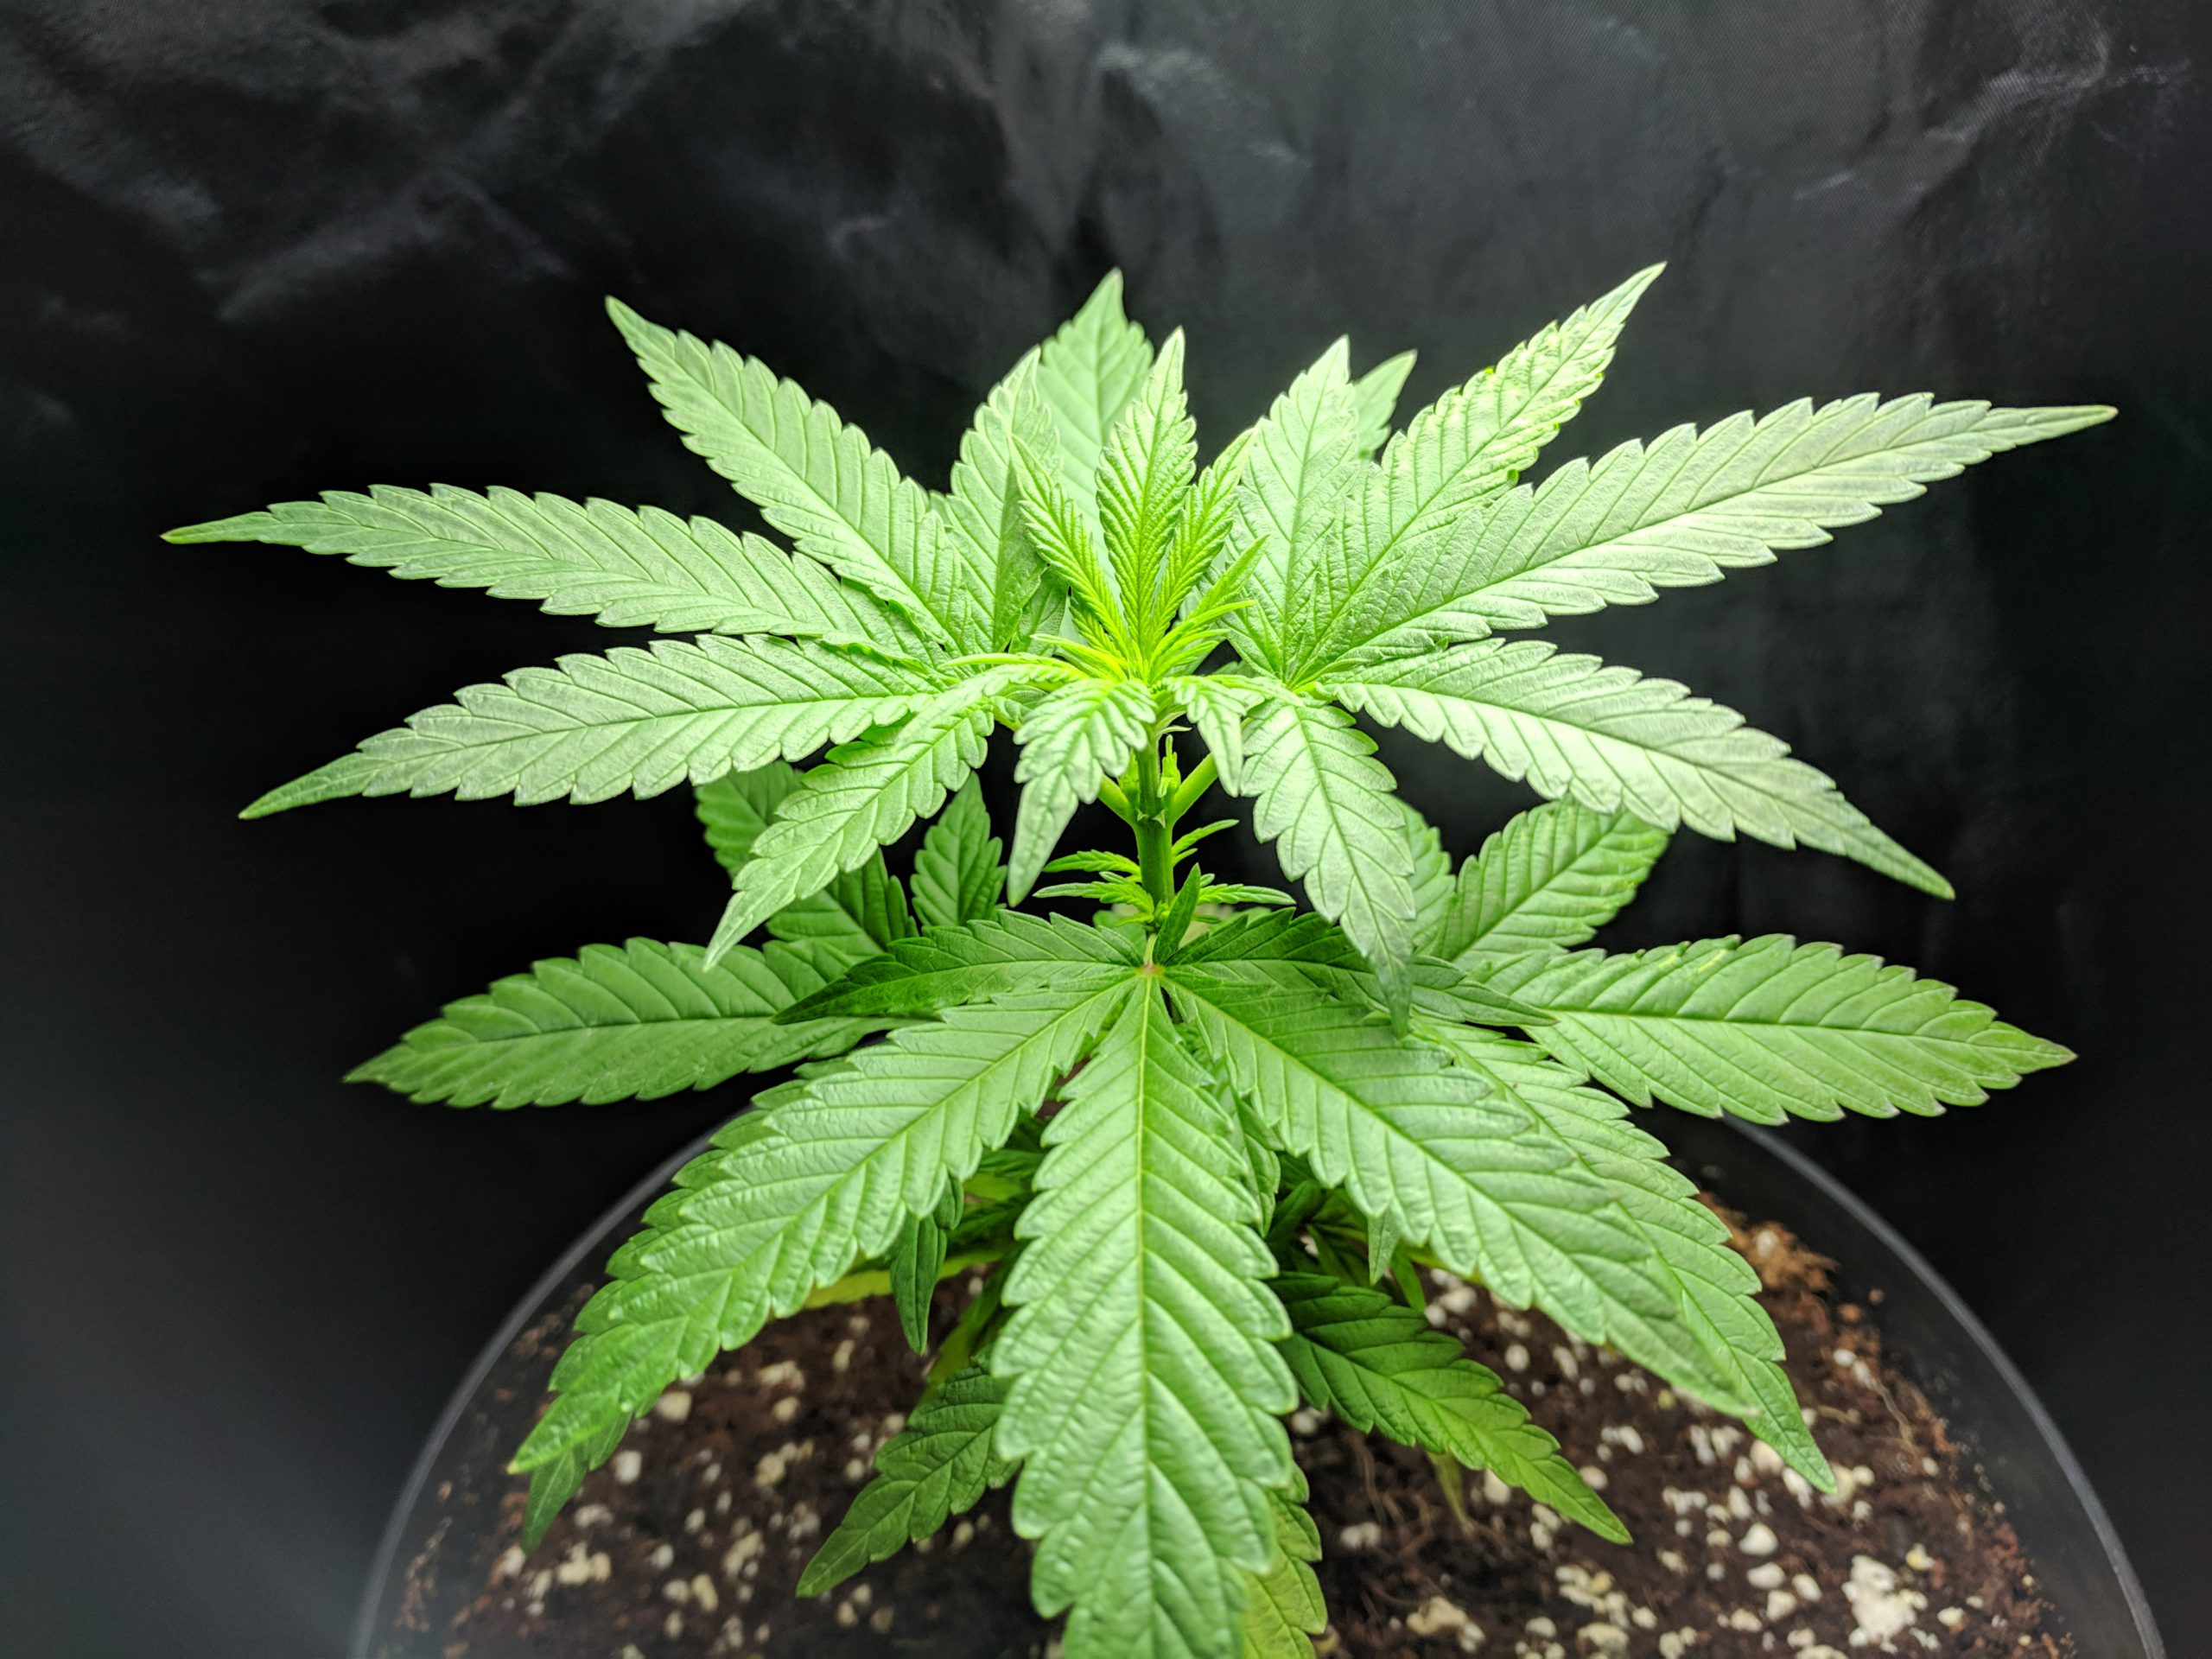
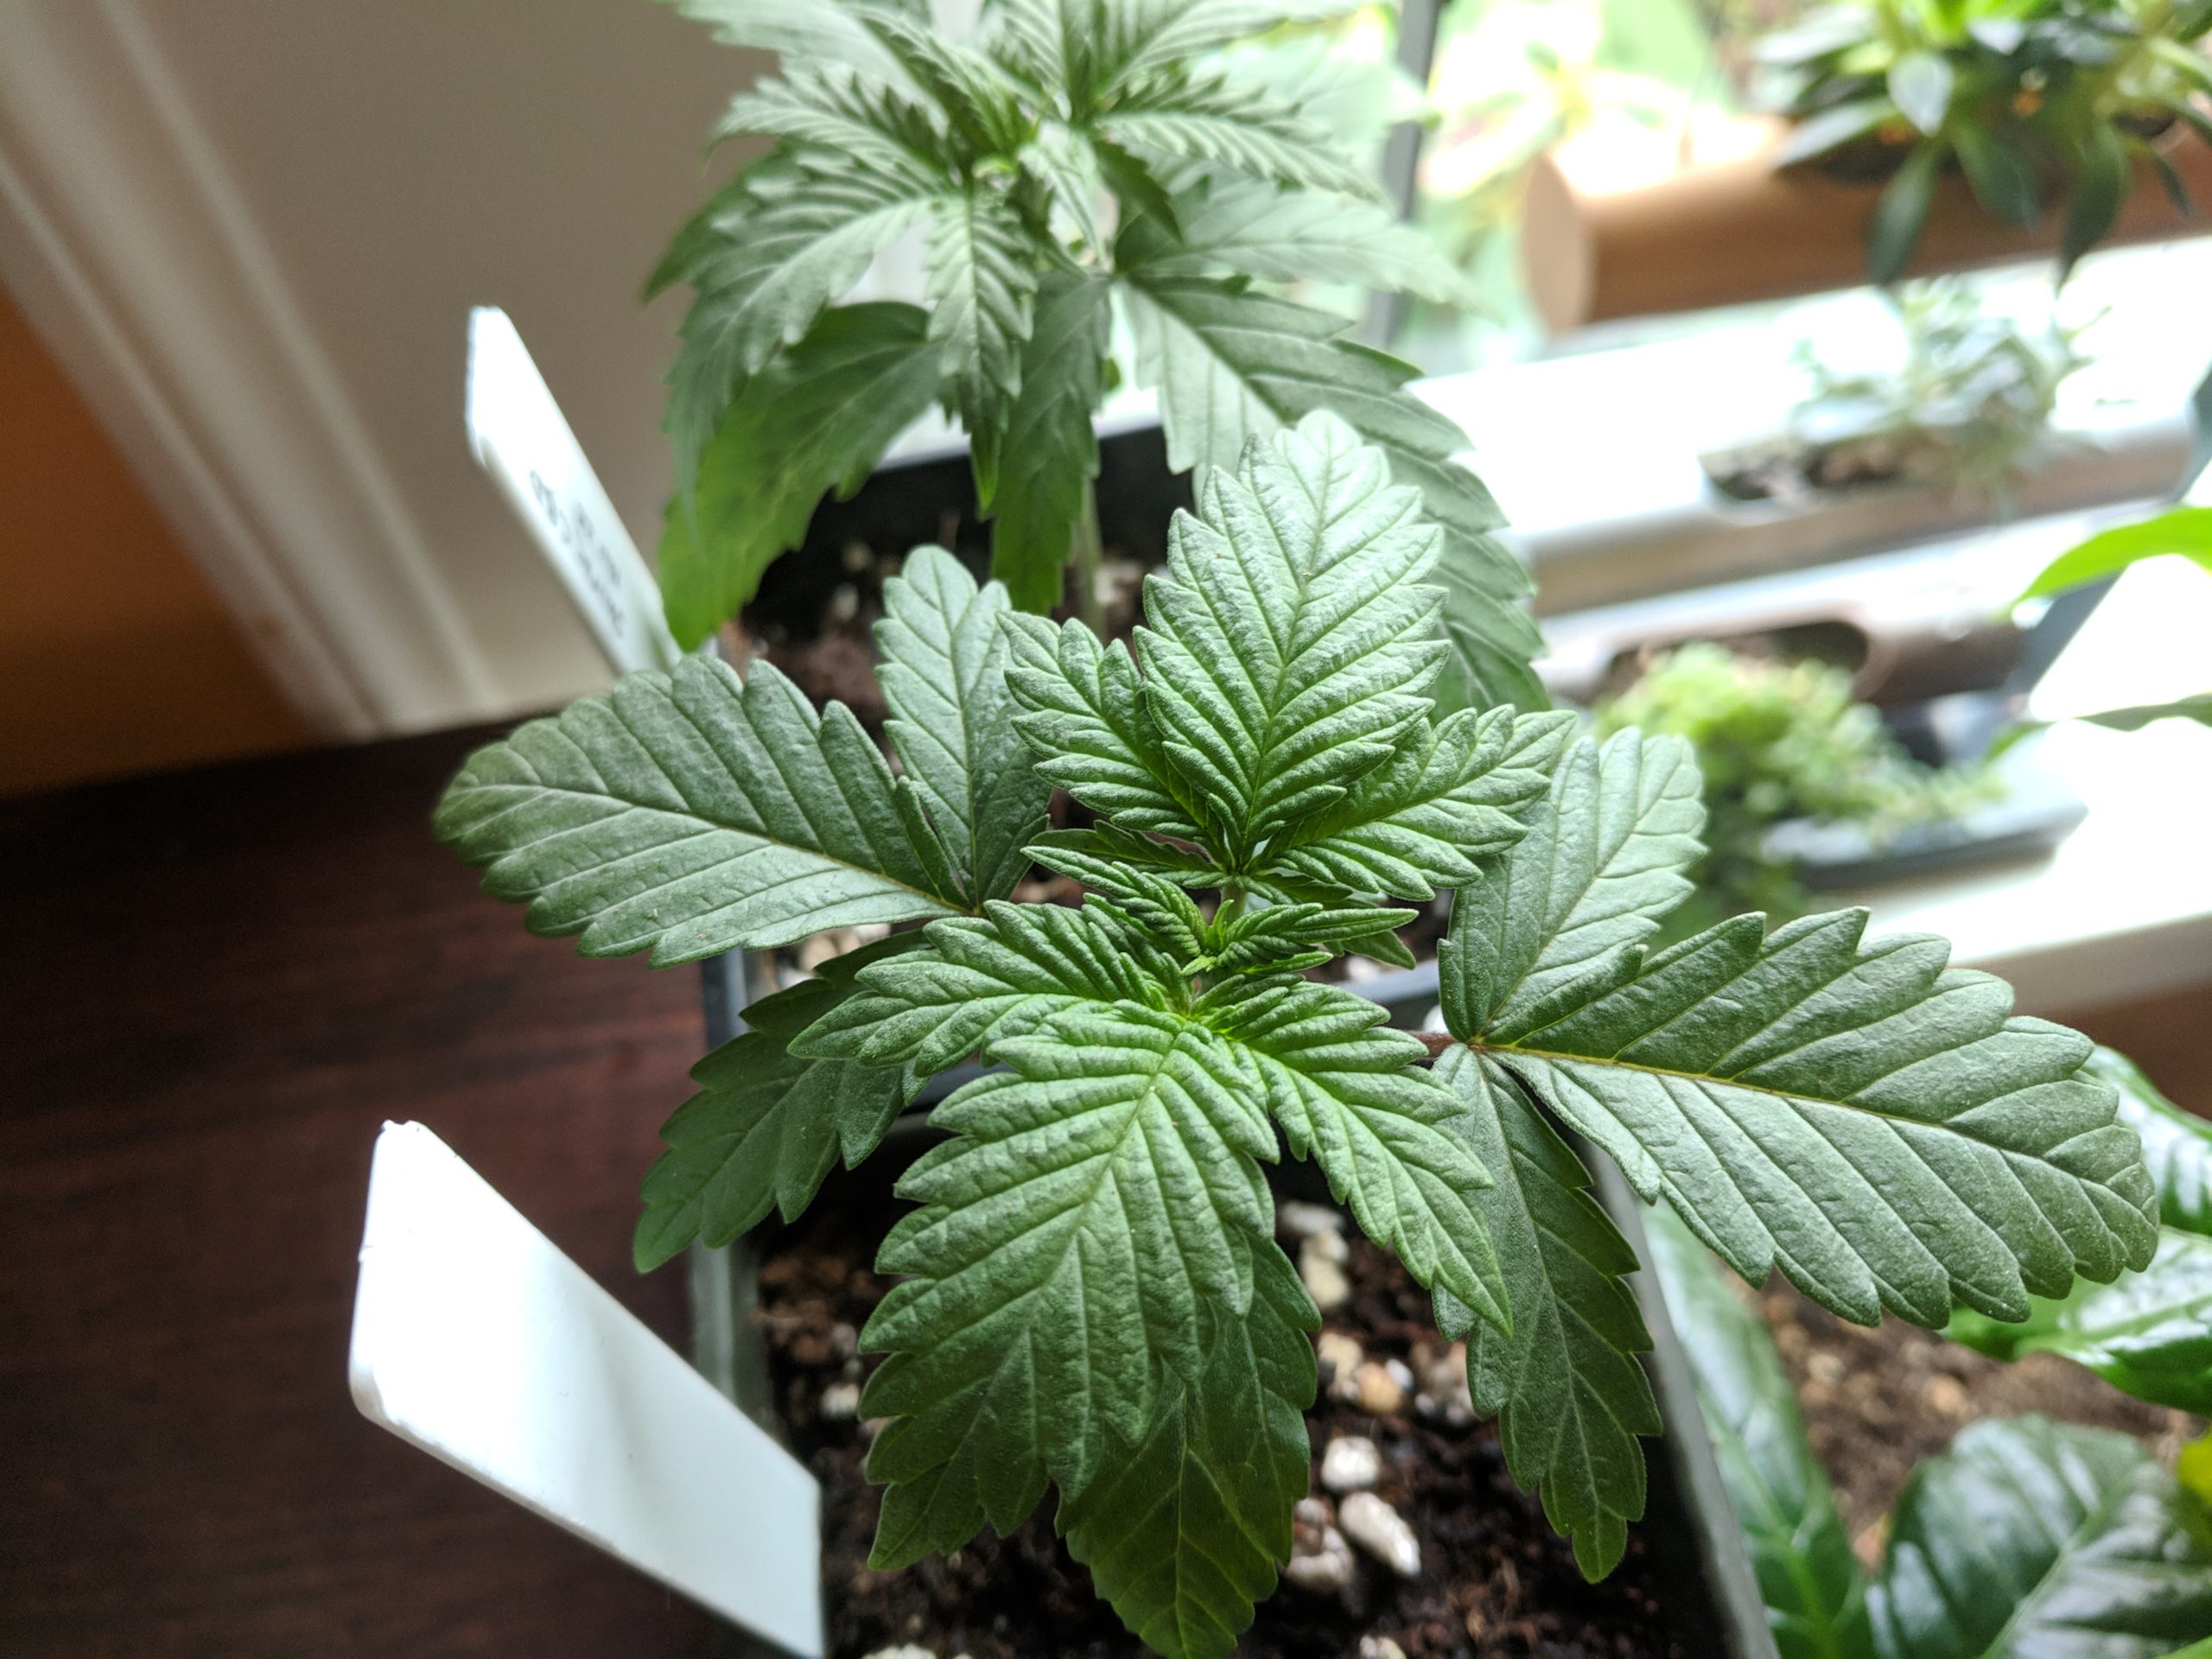
There isn’t a definitive moment: once plants start producing the seven-pointed leaves that we associate with adult cannabis, vegetation will begin.

These plants are producing 5 and 7 point leaves, their seedling days are over!

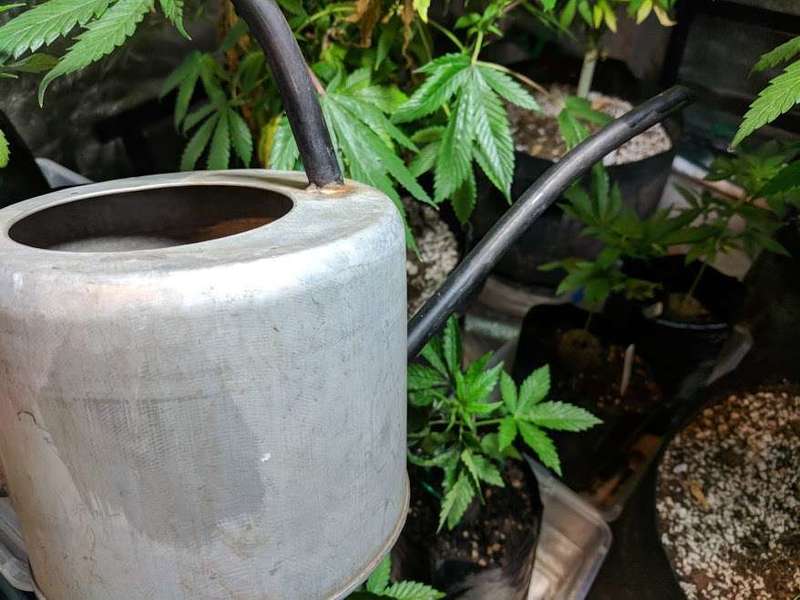
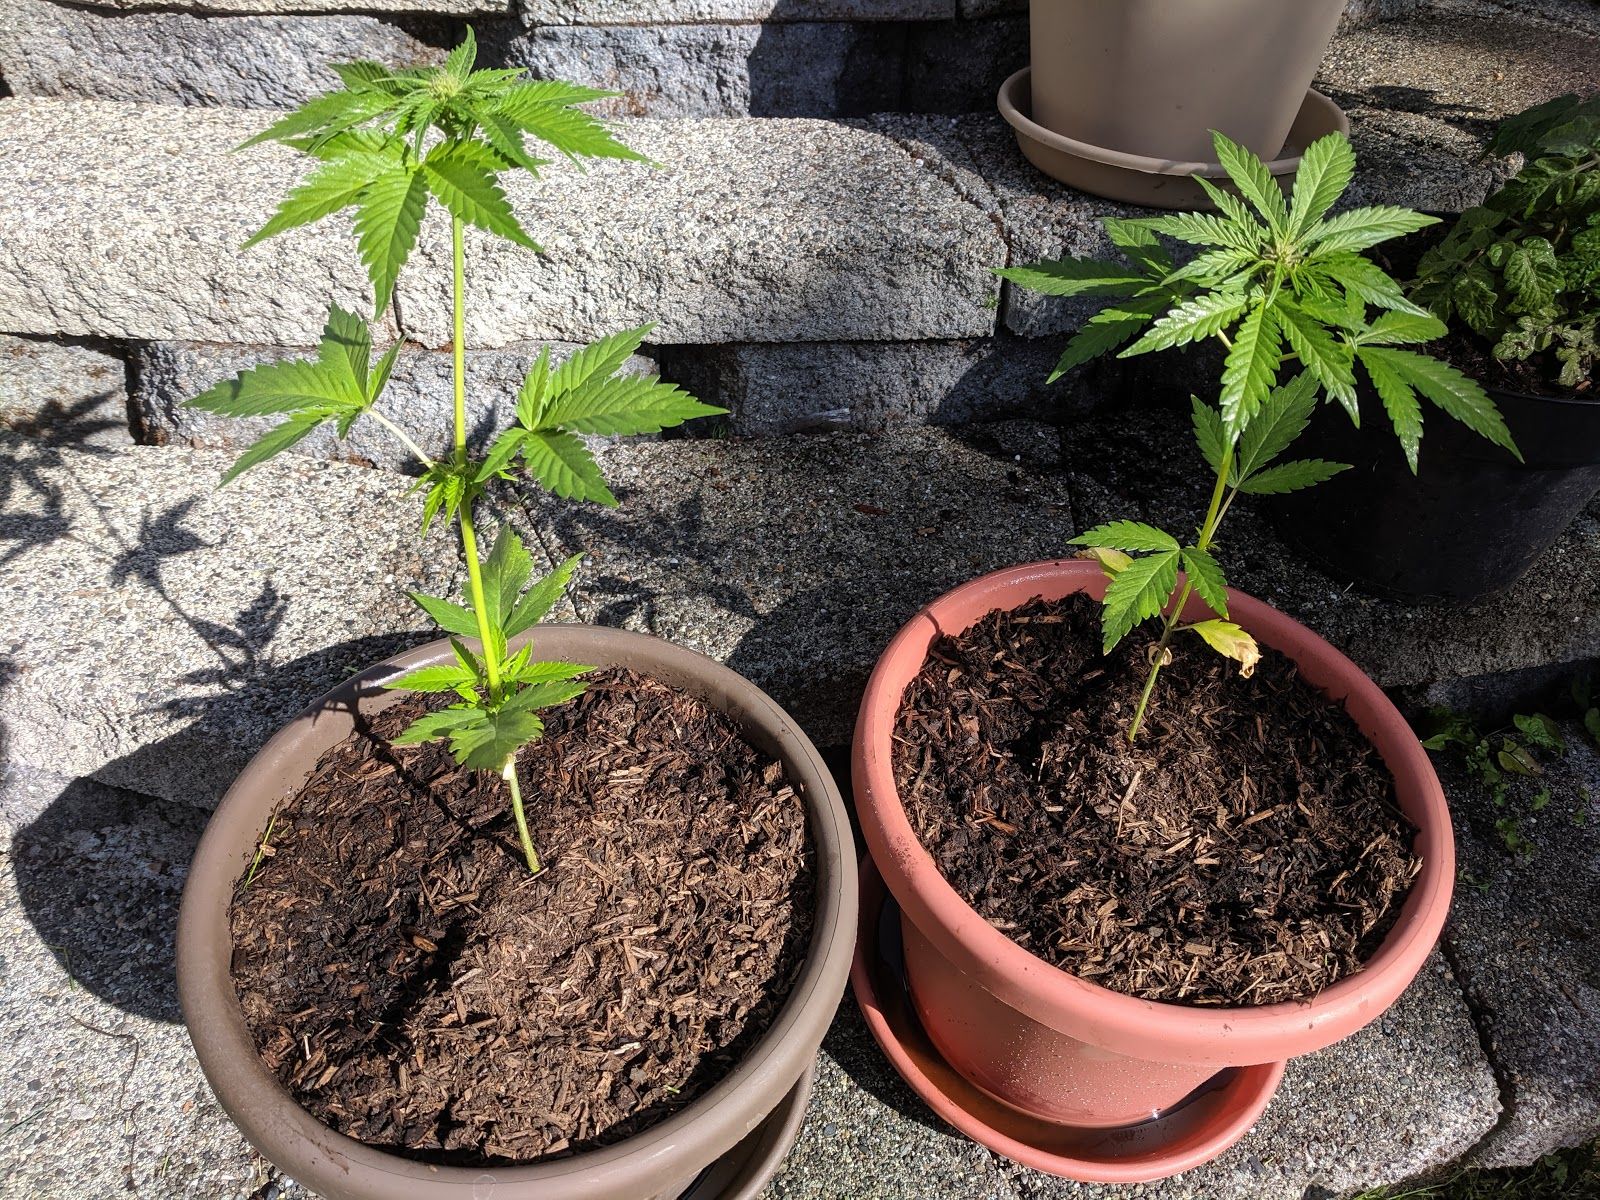
The plants in the picture above have matured and strengthened, and are beginning to produce five- and seven-point leaves. So far they’ve spent their lives under a soft fluorescent light, with only water and a light compost tea. Now they’re ready to be transplanted to larger containers and are showing early signs of nutrient deficiencies, seen in the yellowing leaves at the base of the plant. All of these signs taken together signal the end of the seedling phase, and the beginning of the adult vegetative stage.

Why is my young seedling drooping?

Most often, a drooping seedling is caused by overwatering, known as ‘damping out.’ Let the medium dry out before watering again, and the young seedling might recover.

How can I get the seedling to grow straight?

Even healthy seedlings often droop or grow crooked. You can quickly correct leaning or drooping plants without stressing the plant by staking it up. Take a small wooden or plastic stake and push it into the soil deep enough to stay upright. Attach gardening wire to the stake and tie the plant upright by enclosing it in a loose loop. This low-stress training method will encourage the young plant to grow upright without harming or damaging it.

Staking seedlings does not stress the plant but encourages straight growth.

Why are my seedlings turning yellow?

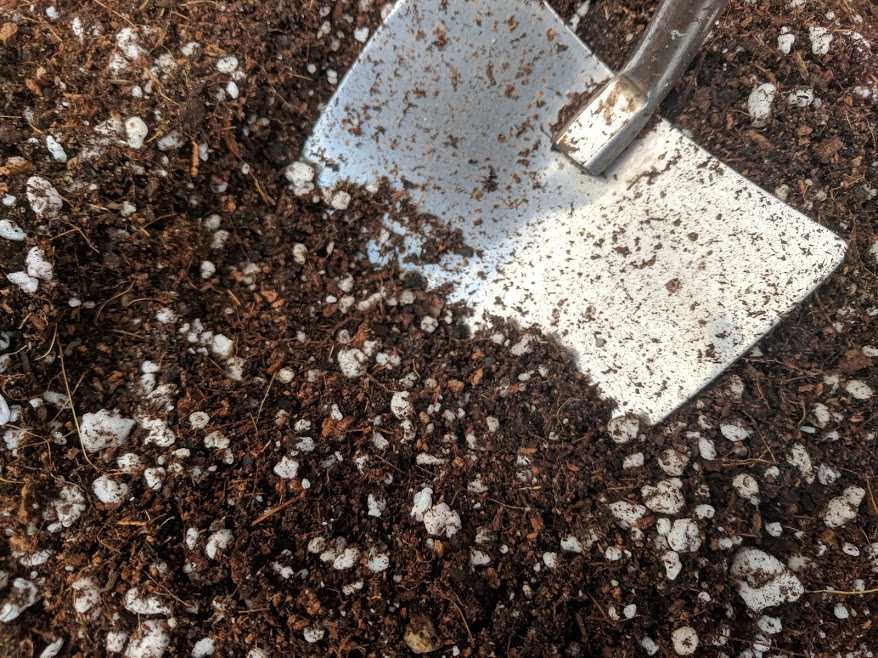
The plant isn’t getting enough nutrients. Deficiencies often due to a pH imbalance locking out available nutrients or it could be a lack of available nutrients. Check pH first, but if you plant in with entirely inert mediums, like coco and perlite, add gentle nutrients after the first week.

Learn More

Seedling Guide

In this chapter, we’ll cover caring for your cannabis seedlings. The seedling phase begins when…

Germination Guide

If you are starting with seeds, you’ll have to germinate them to get the grow started. In this chapter, you’ll learn all about the natural conditions that cannabis seeds germinate under and then we’ll show you a failsafe way to germinate your seeds.

This cannabis seedling emerges 3 days after planted directly in soil

What is germination?

A cannabis seed is just an embryonic plant enclosed in a protective shell and germination is the process of reactivation of metabolic machinery of the seed. The outer shell splits apart and the embryonic plant emerges as a seedling. For cannabis seeds, this process takes between 1 and 7 days.

What makes seeds germinate?

Cannabis seeds lie dormant until they meet the right conditions to begin germination. In tropical conditions, cannabis seeds germinate in the warm rains of early spring. The well-drained soil of the forest floor wouldn’t be waterlogged, but it wouldn’t dry out. The ideal temperatures would be between 70°F-80°F (21°C-26°C), with 60-80% relative humidity. These spring seasonal signals tell the embryonic plant contained in the seed that conditions are right to begin its life cycles. These are the same conditions you will emulate to germinate seeds.

What’s the easiest way germinate cannabis seeds?

Peat moss pellets are pucks of dried peat moss enclosed in a fine netting. As a mostly inert medium that retains water well, peat moss pellets do a great job of mimicking the natural conditions of spring jungle floor.

What you need

Peat moss pellets – Get them online or at local department/hardware stores – they are widely available.
Filtered water – You probably have this in your fridge. pH balance between 5.5 and 6.5.
Cannabis seedsLearn more about cannabis seeds in our guide

Peat Moss pellets swell to 5x their normal volume when flooded with water

Step 1 – Flood the Peat Moss

Peat plugs come dried and compressed, so you need to flood them with water. Use some warm filtered water from your fridge, rainwater, or distilled water that’s pH balanced between 5.5 and 6.5. Add water until the plugs are saturated, then drain the excess water. The plugs will swell 4-5x their original volume.

Step 2 – Insert Seed

Most plugs or pellets have a small hole in the top. Insert the seed between 1/4-1/2″ (6-12MM) deep and lightly cover with an excess medium.
All emerging seedlings look identical, and most mature plants look very similar. If you start multiple strains at once, make sure to label them. Plastic plant labels can be fixed to peat moss plugs to identify the plant through its life – adding dates makes it a self-contained record.

Step 3 – Wait for it!

The next few days is mostly a waiting game. Put the pellets in a partially covered container to prevent drying out and follow these two simple rules:

DO keep the pellets warm and moist throughout germination, cannabis seeds germinate best in these conditions.
DO NOT flood or over-saturate the pellets after the initial flooding, since this will prevent the roots from getting enough oxygen. Too much water and the seedling will ‘damp out’ and fail.

One easy method to ensure that you get the right amount of water is to use a spray bottle to wet the outside edges. Another is to quickly dip the bottom of the pellets into the water; moisture will wick upwards to the rest of the pellets. Either method will encourage roots to grow outward.

This seedling is emerging with the seed still attached – it will fall off in a a day or so.

Step 4 – Care for it!

As your young seedling emerges from the seed, you’ll notice that it has a set of ‘built-in’ leaves that don’t look a lot like pointy cannabis leaves. These are the cotyledons, and they are there to help the young seedling bootstrap the photosynthesis process. Young seedlings need light right away – but not too bright for the first few days

Keep the peat pellet moist until the seedling is ready to plant in a growing medium, but never saturate the pellet since that can drown the young plant. Add water from the bottom up by dipping the pellet quickly in water. This will promote rapid root growth as the roots will grow down after the water.

When is it time to plant the seedlings?
You’ll know when it’s time because roots will be bursting out of the bottom of the peat pellet. Plant the pellet in a solo cup sized container using a quality soil mix. Water without nutrients for the first few weeks.

Optimizations & Alternatives

Germination Heat Mats

Germination heat mats are just like heating pads, but they don’t get as hot and are water resistant. These are especially useful for germinating seeds in colder conditions.

Germination Enclosures

One of the best ways to simulate tropical climates is to use an enclosure to conserve moisture and heat. You can make your own from cheap plastic containers, or buy a special purpose kit made for peat pellets. Used along with a germination heat mat, you can easily set up a tropical jungle climate anywhere.

If you want professional results with no hassle and complete stealth, try a professional grow-box.

Can I germinate seeds in paper towels?

Yes, you can germinate marijuana seeds in moist paper towels. Just put a damp paper towel down on a plate or other container and spread the seeds around. Add another damp paper towel or fold over the existing towel to cover all the seeds. You will need to keep the paper towels damp at all times throughout the germination process – a spray bottle can really come in handy for that. Covering the seeds with another plate or plastic will prevent it from drying out too quickly, just make sure that there is still some airflow for when the seedling emerges.

After a few days, the seed will crack and the embryonic cannabis plant will start to emerge. Once you see a solid root begin to emerge, you will need to transplant it into your growing medium. While this approach might be slightly faster than the other methods we’ve shown here, we don’t use this method because of the risk to the plant and main root during transplanting.

Can I germinate seeds directly in the growing medium?

That’s how it works in nature and it’s easy to do. Use a solo cup sized container filled with soil or coco and place the seeds about 3/4 inch (~ 2cm) deep. Keep the medium moist but not wet until you see the seedlings emerge between 3 and seven days later. The reason we recommend peat moss over directly planting in soil is that it is easier to control moisture levels in peat plugs due to the texture and qualities of peat. Experienced growers often sew directly into the growing medium.

Many farmers use rock wool cubes for starting clones and germination, particularly hydroponic growers. While these work well and are economical, they come with drawbacks. We recommend that new growers begin with peat pellets.

How long does it take to germinate?

From the time that you place your seed into the germination medium, you should start to see the emerging seedling within 2-5 days. Cannabis seeds germinate faster when they are kept at the correct temperatures, between 70°F-80°F (21°C-26°C), with a 60-80% relative humidity. Cooler temperatures will slow the germination process or stop it altogether. Germination is usually complete, and the plant is a young seedling within seven days. If you warm the seedlings with a heat mat, they can emerge in as little as 24 hours.

Should I germinate with nutrients?

Germinating plants don’t need any nutrients; it can burn their new leaves and roots. That’s why it’s best to grow seeds in an inert medium, like peat moss pellets or a paper towel. Young seedlings don’t need nutrients until they are a few weeks old.

Do cannabis seeds need light to germinate?

Not really, but they need light within the first day or so of emerging from the seeds, so it’s a good idea to germinate with a light source. Light sources also help increase the temperature, helping the germination process. Sunlight, fluorescent or low powered LED grow lights are all great options.

What if the seed gets stuck on the seedling?

They usually loosen and come off after a day or two. If it doesn’t come off, you can try to separate them. The easiest method is to find the direction of the crack and use a pair of tweezers to ‘help’ the seed continue cracking. Be careful that you don’t clamp the seed down or you can clip the folded embryonic leaves.

Next up, read our seedling care guide to learn how to care for your new seedling.

Learn More

Seedling Guide

In this chapter, we’ll cover caring for your cannabis seedlings. The seedling phase begins when…

Soil Mix Guide

As most potting soils don’t provide adequate water drainage or retention for Cannabis off-the-shelf, it’s essential to prepare a mix that will promote growth and optimize yield.

In this guide, we will walk through the basics of creating a compelling, versatile growing mix of common ingredients.

Requirements for a good soil

  1. Drains excess water well, but doesn’t dry out too quickly.
  2. Light and airy enough – compacted soil will stunt root growth.
  3. Maintains pH balance, and efficiently delivers nutrients.

To meet all of these requirements, we’ll start with commercial potting soil, then add coco-coir and perlite to improve drainage, nutrient delivery, and water retention.

There are commercial options that come premixed and ready to go, – we’ll cover some of these at the end of the article – but making your own is more cost effective and gives more control over your mixture, to best suit your needs.

This Youtube short will give you everything you need to know to make a productive soil mix.

Quick Soil Mix Guide

1) Add 40% Potting Soil

A high-quality potting soil forms the foundation of the mix.

This is the ‘dirt’ part of the soil mix. Dirt is mostly organic matter, and good potting soil is made up of bark, composted forest humus, peat moss, perlite, and vermiculite to form a light, airy soil that will retain water and nutrients close to the roots. An excellent soil will contain earthworm castings, kelp meal, bone meal, guano, and other natural nutrients.

Top quality potting soils sometimes add mycorrhizal fungi, very beneficial organisms that colonize the roots and assist in the uptake of water and nutrients. This root colonization is especially essential if you are using organic nutrients. Mycorrhizal fungi are available at most gardening centers so that you can add it yourself.

If your potting soil comes with nutrients and fertilizers, keep this in mind when transplanting. If you are using Fox Farm’s Ocean Forest, for example, you won’t need to add any nutrients for the first few weeks.

Important: Don’t use Miracle Grow soil or any potting soil with time-release fertilizers. To optimize yield, you’ll need control of nutrient levels in your soil, (e.g., lowering nitrogen and raising phosphorus and potassium during flowering) but time-release fertilizers work on constant nutrient rates.

Use about 40% potting soil in your mix.

2) Add 40% Coco Coir

Coco Coir helps with water retention, and lightens the soil.

Coco coir is produced from the fibers of coconut husks, making it incredibly convenient and renewable. It functions as a fantastic retainer of water and lightens the consistency of the soil. Adding it to your mix will create an optimal environment for your Cannabis roots to grow. Coco coir is an inert ingredient; it does not contain any nutrients.

Coco coir is available in bricks or loose forms. Since it naturally contains a lot of sodium, look for products that have been washed to remove the sodium: also consider using a calcium supplement, (like Cal-Mag) as Cannabis grown with coco coir seem to need increased calcium levels.

Coco coir takes the place of peat in traditional mixes. Peat is sufficient but not easily renewable, so it comes with an environmental cost. Use about 40% coco coir in your mix.

3) Add 20% Perlite

Perlite improves drainage and lightens the soil further

Perlite is a volcanic glass that increases water drainage and lightens the soil to provide more air to the roots. Although commercial mixes often already contain perlite or pumice, Cannabis will benefit from additional drainage and aeration.

Use about 20% perlite in your mix.

4) Mix it!

That’s all. Three simple ingredients make up the perfect recipe for a healthy cannabis soil.

These three ingredients make soil with ideal weight and consistency for growing Cannabis.

What about premix?

If you’re looking for a premix that’s optimized specifically for cannabis, several options have been designed by experts specifically for marijuana. We have tested several and found them to be extremely useful mediums.

What about organic enrichments?

Enriching your soil with additional amendments is a great idea and will help your plant reach its full potential.

Worm Castings – A mixture of active bacteria, enzymes, and animal waste, worm castings are excellent organic fertilizers. They are high in nitrogen, phosphorous, potassium and calcium as well as iron, copper and other micro-nutrients. Worm castings are water soluble, so nutrients are immediately available to the plant but won’t burn plants. Mix worm castings directly into the soil. As a bonus, worm castings also improve the texture and drainage of the soil.

Mycorrhizal Fungi – ‘Mycorrhiza’ describes a symbiotic relationship between fungus and plant roots – where the fungi get access to water and carbs, and in return, they enable the plants to more efficiently uptake water and nutrients. Adding mycorrhizal fungi to your mix can significantly improve growth rate.

Bat Guano – This is bat fecal matter, and it has been used as an organic fertilizer for centuries. Guano is an excellent source of NPK. You can spread it on the top layer, work into the soil or make a compost tea with it. As a bonus, bat guano also improves the texture and drainage of the soil.

To learn more about organic cannabis farming, read our guide to organic cannabis gardens.

Alternatives to Coco Coir?

Coco takes the place of peat moss in traditional soils but can be more challenging to find.

Peat Moss – Peat moss is very commonly used to lighten soils and improve water retention. The problem with peat moss is that it takes many thousands of years to replace, so comes with an environmental cost.

Rice Husks – Rice husks lighten the soil and improve water retention. Since they are the by-product of processing rice, they are a renewable and economical medium.

Learn More

Soil Mix Guide

As most potting soils don’t provide adequate water drainage or retention for Cannabis off-the-shelf, it’s…

Water & Nutrient Guide

Every living thing needs water, and cannabis is no exception. You don’t want to let the soil dry entirely out, but you don’t want to keep the medium saturated since this will prevent the roots from getting enough oxygen. Too much water and the plant will suffer root and nutrient problems and eventually fail.

How often you water will depend on many variables. Higher temperatures increase evaporation, as will low humidity and increased airflow. Some mediums retain water better than others, like coco-coir. A good rule of thumb is to wait until the top two inches of the medium (knuckle deep) is dry before watering again. Another method is to gauge the weight of the container and water when it gets light.

Cannabis plants need macronutrients for basic building blocks in their rapid growth process. During the vegetation phase, nitrogen is, and potassium is less critical – though those roles reverse during flowering. Marijuana plants need micronutrients too, like iron, calcium, magnesium, zinc, etc.

Most nutrients are only available to the plant at specific pH ranges. For soil/coco mixes, water needs to be pH adjusted between 5.5 to 6.5. Use test strips or a pH meter to test pH and pH balancing kit to adjust the pH levels of the water before feeding.

There are a lot of complex interactions between pH levels and nutrient levels that need to be controlled. Too many micronutrients can block macro-nutrients, so it is essential to keep a proper balance. It’s important to keep water pH balanced to avoid nutrient lock-out. Using balanced multi-part nutrient systems is the best mechanism to assure your plants get what they need when they need it.

What are Organic Nutrients?

In nature, cannabis gets nutrients that seep down from decomposing plant and animal matter on the forest floor. Organic nutrients are derived from all-natural sources, stuff like bat guano, composted plant matter, kelp extract, and earthworm castings. It’s all pretty much the same stuff in nature, but more conveniently packaged.

To make the most of organic nutrients requires an active ecosystem in your soil to assist in the nutrient breakdown and uptake process. Add mycorrhizal fungi and microbes to your soil to help break down the nutrients and to deliver them to your plant. Read more about active soils in our soil mix guide.

To learn more about organic farming for cannabis, check out our guide to organic cannabis gardens.

What are Synthetic Nutrients?

Synthetic or ‘chemical’ nutrients contain the same type of nutrients as organic, but they are already broken down and immediately available for uptake. For micronutrients, this is often done through chelation or wrapping an inorganic metal (like copper, boron, and zinc) in an organic molecule that is ready for uptake by the plant.

Synthetic nutrients most often result in increased growth rate and yield compared to organic. Many farmers believe that salts and metals negatively impact taste and quality.

What NPK ratios are best for Cannabis?

NPK ratios describe the Nitrogen (N), Phosphorus (P) and Potassium (K) levels in the nutrient. Vegetative growth requires more Nitrogen, while flowering plants need more potassium.

The table shows the general guidelines for NPK ratios at each stage in the cannabis lifecycle.

Stage(N)(P)(K)
GerminateNoneNoneNone
SeedlingMedLowLow
VeggingHighLowMed
FlowerLowMedHigh

If you’re using a multi-part that is specially formulated for cannabis, you won’t need to worry about the ratios. If you’re using a variety of nutrients to tune your growth, we’ve found that the ratios in the following table work well for the strains we grow.

Stage(N)(P)(K)
Germinate000
Seedling211
Vegging936
Flower248+

If your plant is missing critical nutrients, it can impact its ability to grow and produce and can ultimately kill the plant. Learn how to identify nutrient deficiencies in our troubleshooting guide.

This cannabis plant is suffering from moderate nutrient deficiencies in the older leaves.

Why is pH important?

PH is short for ‘potential Hydrogen’ but is most often used to describe the acidity or alkalinity of a substance. Every substance in the universe falls somewhere on the pH chart.

On the pH scale, 0 is highly acidic, 7 is neutral (not acidic nor alkaline) and 14 in highly alkaline.

This is important when growing cannabis because nutrients are not available for uptake by the plant outside reasonably narrow pH ranges. Cannabis plants in soil do best between 6 and seven while cannabis plants in coco or other soilless mediums do best between 5.5 and 6.5. If you’re using a mix, like in our soil mix guide, stay between 6.0 and 6.5.

Cannabis pH for soil should be between 6.0 and 7.0 and between 5.5 and 6.5 for soiless.

If the pH is too high or too low, then the nutrients aren’t available for the plant to uptake. This is called nutrient lockout because no matter how many nutrients you provide, the plant still cant use them. This is a widespread problem for farmers and the best way to combat it is to test the pH at every watering.

Nutrients are available at different pH ranges.

You can see from the graph above that not only is there a narrow range that cannabis prefers, but also that the nutrients spread the entire range. To make sure you hit all the sweet spots, it’s a good idea to alternate between the high, low and medium within that range. If you’re growing in soil, you might want to water once at 6.0, the next time at 6.5 and the next time at 7.0.

How do I test pH?

When growing cannabis, we are concerned about the pH near the roots and our best way of controlling that is by controlling the pH of the water. To keep your plant growing at its full potential, you must monitor and control the pH every time you water. pH water meters are an inexpensive and reliable method for accurately testing water’s pH. Best of all, they are dead simple. Just turn it on and put the sensor head into the water and the pH will be displayed on the LCD screen. These are available online or in your local hardware store, starting at $15 all the way up to $150+.

How do I balance pH?

There are several pH Up and pH Down solutions on the market. After you have added nutrients to the water, test the pH. If you need to raise or lower it, add a few drops of pH up or down the solution and check again. It’s a good idea to test the runoff water too since that’s your best indication of the pH near the roots.

Make sure to wash your pH tester off with pure water after testing the nutrient water.

If your plant’s pH becomes unbalanced, flush the plant with pH-balanced water and then make sure to adjust the pH at every watering.

How do I know if my plants are getting enough nutrients?

If your leaves are green and the plant is growing, it’s probably getting plenty of nutrients. Use our detailed troubleshooting guide to spot problems early and learn how to take corrective action.

Nutrient problems are often caused by pH imbalance and can be difficult to diagnose.

Can I use tap water for my plants?

Many farmers, including us, use tap water for their plants. If your tap water contains chlorine and other additives, you might want to purify it before use. To do this, draw your water 12 to 24 hours before watering. Keep the water in a bucket and add a bubbler (the kind used in fish tanks) overnight. The bubbles and air contact will help dissipate chlorine.

Note that if you have a reverse osmosis system installed, you will need to supplement with Calcium and Magnesium supplements, since RO water is stripped of these vital nutrients.

Regardless of your water source, make sure to pH balance at every watering.

Where can I get nutrients?

Suitable nutrients are available at many local gardening centers. If you are looking to buy from a reliable source online, we recommend these guys.

Can I use rainwater?

Hopefully! It depends on the quality of rainwater in your area. To test this, you will need to measure the Total Dissolved Solvents (TDS) – which will tell you how much ‘non-water’ stuff is in your water as ‘parts-per-million.’ The most common dissolved solids in rainwater are calcium, magnesium, and sodium, but can also contain other suspended solids. While these are important in the correct quantities, too much will throw off your nutrient balance. If your rainwater has a PPM of over 200, you should filter water before adding nutrients.

Next up: Learn about germinating seeds

Learn More

Soil Mix Guide

As most potting soils don’t provide adequate water drainage or retention for Cannabis off-the-shelf, it’s…

Seeds Clones Strains

Now that you have everything you need to grow cannabis, you need to get something actually to grow. You can start with seeds and germinate them, or you can get a clone – which is just a cutting from a female plant that has sprouted roots.

Feminized or Regular?

Marijuana is a dioecious plant, meaning that each plant (almost) always has either male or female organs. Females produce buds and males produce pollen that will cause female buds to produce large volumes of seeds instead of smokable flower. Clones will be from females, but for seeds, you have the option of getting ‘regular’ or ‘feminized’ seeds.

Regular seeds are natural, so each one has roughly 50% chance of being female and 50% chance of being male. Since male plants don’t produce buds, most farmers remove males as soon as they are identified to avoid pollinating the females and effectively ruining a crop.

Many seeds are sold as feminized because they have a greater than 99% chance of producing female plants. Feminized seeds are commercially produced by applying colloidal silver to female plants, which makes them grow pollen sacs instead of buds. Growers collect pollen from the female pollen sacs and use the feminized pollen to fertilize other females. The resultant seeds will almost always produce female plants.

A more natural variant of this approach takes advantage of a survival tactic built into the cannabis plant. If left unfertilized late into the season, female cannabis plants will sometimes grow a pollen sac to attempt to self-pollinate. Known as hermies, this pollen works the same as when produced through colloidal silver.

Male cannabis plants produce pollen sacs instead of smokable flowers.

Photoperiod or Autoflowering?

Traditional cannabis plants are called ‘photoperiod’ because flowering is induced by altering periods of light. As long as nights are shorter than 12 hours, photoperiod cannabis will stay in vegetative growth. Once nights are longer than 12 hours, marijuana plants will begin to develop flowers. Outdoors, this happens in the lengthening nights of fall. Indoors, we choose when this happens by manipulating light and dark hours.

There is another kind of cannabis plant that starts flowering a preset amount of time after germination. The amount of time before flowering starts is dependent on the strain. These strains have been bred out of a small hemp plant called Cannabis Ruderalis that had the auto-flowering trait but didn’t produce much THC. Over the years, breeders have crossed it with THC producing Cannabis Indica and even Sativa to improve THC and production. While auto-flowering strains are generally less potent and productive compared to their photoperiod counterpart, the convenience of not worrying about light control makes them a great option in many situations.

The benefits of feminized seeds are apparent: every plant is a bud-producing female. Producing feminized seeds using colloidal silver isn’t a natural process though, and many growers choose to avoid this and buy regular seeds.

Autoflowering strains go into flower a preset number of days after germination, while photoperiod strains go into flower after night is longer than 12 hours.

Where do I get Cannabis Seeds & Clones?

In many areas (like the UK and Spain in Europe or Oregon and California in the US) seeds and clones can be purchased from shops, dispensaries or directly from the breeder. In other areas, you will need to order them from an online seedbank – check your local laws.

There are many fine seed banks online, but we can only recommend Seedsman since they have served our needs perfectly since day one. They offer a broad selection from the highest quality breeders, free seeds with every order, and very stealthy shipping to the US and Europe. When ordering seeds, obey your local laws.

What strain should I grow?

Just like every other decision a farmer makes, the answer depends on your goals and what’s important to you and what constraints you might have. For all of our strain reviews, we rate each strain based on the following sets of goals and constraints:

Farmer’s Skill Level – Some strains are fussier than others. If you are a new grower, you will want to choose an easy-to-grow strain that isn’t susceptible to pests or nutrient issues.

Time Constraints – Some strains are specially developed to grow fast while others take longer (with potentially higher yield or increased potency). Since time to harvest can vary by over a month between fast and slow strains, if time is an issue then you will want to pick a quick flowering variety.

Medical Use – Most commercial strains are tuned for potency and yield. Other strains are particularly optimized to address specific medical conditions, like chronic pain, anxiety, or PTSD.

Potency – If you want to get really high, then select a strain that was bred for potency.

Yield – If you want a lot of weed, you’ll want to select a strain known for high yields.

Growing top-shelf buds, no matter the strain, is not an easy or straightforward task and can throw some curveballs that strike out the most experienced farmers. Some strains are particularly difficult to grow but are still worth it due to potency, yield, medical use, or another factor. For new growers though, we recommend focussing on an easy-to-grow variant that still maintains high yield and potency.

New growers should select a strain that is robust, stays fairly small and flowers quickly.

Picking the right strain for your grow depends on your goals and in large part, what kind of weed you like. To help you out, we’ve compiled reviews on our favorite strains to help you decide which is best for you. Click here to find the best strain for you.

Learn More

Soil Mix Guide

As most potting soils don’t provide adequate water drainage or retention for Cannabis off-the-shelf, it’s…

Container Guide

Unless you are growing directly in the ground or are using a hydroponic setup, you will need to select suitable containers.

The best approach is to keep small plants in small containers since they are easier to manage that way. As the plant gets older and larger, you will want to transplant them into larger containers. See the chapter on transplanting for more information on how and when to transplant.

What makes a good container?

There are lots of options out there for growing plants in, so let’s look at the universal requirements for a suitable container:

  • Must drain excess water well, since cannabis plants don’t like to sit in water.
  • Transplanting should be easy.
  • Should be inexpensive or durable.
Trade pots are readily available and make great starter pots

What kinds of containers are there?

Trade Pots & Solo Cups

Trade pots are the kinds of containers that plants are in when purchased from commercial nurseries. Typically black or dark green hard plastic, these basic round or square pots come in a variety of sizes from 2.5 ounces (0.07 Liters) to 20 gallons (~76 Liters).

Solo cups are a brand of plastic cup that happens to work very well during the seedling phase. They are a hard plastic cup that comes in a variety of sizes from 3 ounces (0.08 liters) to 16 ounces (~ .5 liters). Drainage holes aren’t typical features on drinking cups, so you’ll need to add those yourself.

Pros – These pots drain water well, are readily available online or at local stores, relatively inexpensive and durable enough to be reused multiple times
Cons – These pots are not the easiest to transplant out of and do not prevent overgrown plants from becoming root-bound.

Plastic drinking cups make great for seedlings if you cut drainage holes in the bottom

Plastic Grow Bags

These are exactly what they sound like: plastic bags made for growing. They come in a variety of sizes, from 1 quart (~1 liter) up to 5 gallons. Made from soft plastic in black or white to help with reflection and have excellent drainage. But the best part is that you can quickly cut them off the plant to simplify transplanting.

Pros – These bags drain water well, are easy to transplant out of, are relatively inexpensive and durable enough to be reused multiple times
Cons – These bags are generally only available online and do not prevent overgrown plants from becoming root-bound. Just like anyone who takes the garbage out can tell you: as plants grow heavy, you will need to be careful about picking the bag up or it will rip.

We use these plastic grow bags from Vivosun because they are durable and do the trick when we want to grow kinder bud.

Plastic grow bags are a great option for plants of all sizes

Fabric Grow Pots

Cloth or fabric grow bags, also known as Smart Pots, are precisely what they sound like: cloth bags made for growing. They come in a variety of sizes, from 1 quart (~1 liter) up to 50+ gallons and are made from soft fabric that is easily air and water permeable. Fabric pots have excellent drainage, but the best part is that even overgrown plants won’t become rootbound due to ‘air-shearing’. Air shearing is the process where roots shear off when they reach the air spaces at the edges of the bag, preventing them from becoming bound as they search for new soil.

Pros – These bags drain water very well and are durable enough to be reused multiple times. These are becoming common enough that you can even find them in local hardware stores now.
Cons – These bags are not as easy to transplant out of as plastic bags.

We use these 5 gallon fabric pots from Vivosun because the fabric is durable and provides great drainage and aeration – resulting in amazing root growth.

Fabric Shopping Bags

Working on the same principles as cloth grow bags, many cloth shopping bags can be repurposed as grow bags! This is great opportunity to repurpose something you already have and lower the cost of your grow.

Pros – These bags drain water very well, are easy to transplant out of and are durable enough to be reused multiple times. These bags are very easy to find – the chances are that you already have some laying around.
Cons – These bags are not as easy to transplant out of as plastic bags.

These small autos will live their whole life as in common house plant containers.

Stuff You Already Have

Along with the idea that fabric shopping bags make a great option for growing cannabis, there are lots of other options for items you may already have and want to repurpose. A clean 5-gallon paint bucket with drainage holes cut in the bottom can make a perfect final container for a medium-sized plant. Have some old household plant containers you want to reuse? Perfect, as long as they drain the water away from the plant, you should be fine.

Learn More

Soil Mix Guide

As most potting soils don’t provide adequate water drainage or retention for Cannabis off-the-shelf, it’s…

Lighting Guide

In this guide, we will walk through lighting options, best practices, and schedules. There are several lighting options available to farmers these days and the right choice depends on your situation. At the end of the article, we break it down by type to help you find the perfect light.

What makes a good light?

Heat Generation – If you are growing in a tent, closet or other confined space, heat can be a major issue and the type of lighting you choose can have a major impact on keeping your space at a comfortable temperature.
Energy Consumption – Growing cannabis indoors comes at an ecological, environmental and financial cost and there are major differences in how much energy different lights use,
Energy Output – Cannabis needs energy from direct light to produce to their full potential, so you will want to provide enough energy to reach your growth goals.

Lighting Options

Sunlight

Natural sunlight is a great option if available – it’s free and renewable. Sunlight through a window results in low yields, so you will need to live in an area where it’s safe to have the plant outside during the day. You can augment sunlight with artificial light sources.

Pros: Free and your plants are naturally optimized to take advantage.
Cons: Not very stealthy and you can’t control the weather or the seasons.

Fluorescent

Compact Fluorescent Lights (CFL) and fluorescent tube lights can be great options for your plants. The upside is that they’re cheap, burn relatively cool and are easily available – you most likely have some in your home right now. The downside is that since they don’t transfer as much power to the plants as LEDs, they can burn hotter.

You will need around 50 watts per square foot (0.3 Meters) during the vegetative phase and 75 watts per square foot (0.3 meters) in the flowering phase.

Pros: Cheap and readily available to get started
Cons: Burn hot compared to LED and not as efficient as other methods

LEDs

Over the past years, LEDs have overtaken almost all other lighting types for home grows. They are relatively inexpensive to purchase and operate and burn very cool compared to traditional grow lights. In almost all cases, we recommend LED lighting to other sources.

LED lights are very efficient, run cool and are fairly inexpensive, making them a top choice for home grows.

LEDs wattage vs lighting capacity is a confusing topic. Manufacturers attach a wattage number, but that number refers to the full capacity if every LED chip burned at maximum capacity (e.g. A light with 100 chips and each is at 10 watts max rating has advertised wattage of 10×100=1000 watts). Since LED chips don’t burn at their max capacity, the actual wattage pull at the wall is generally about half the advertised wattage.

The most important number for LED grow lights is the photosynthetic active radiation rating, or PAR rating. PAR isn’t a measure of brightness (like lumens, which measures human visible light) but is a measure of the light ranges that are specifically beneficial to plants. Quality light manufacturers publish PAR ratings at set distances to establish coverage area per light.

Pros: Most efficient and still fairly inexpensive to get started
Cons: Less available than CFL

HPS

High-Pressure Sodium lights are extremely effective lights and have been successfully used to grow amazing buds for decades. They do burn hotter than LEDs, which can cause temperature problems in tents and other confined spaces. Commercial operations use HPS because they are more performant for large areas. This is not only true in the cannabis industry, but also for indoor tomato growers and many other commercial crops. HPS is effective at a wider angle than LED lights, so they can provide broader coverage for large areas.

Pros: Fairly efficient and productive
Cons: Expensive, burns hot and not readily available locally

HPS lights are very powerful and are fairly efficient. This setup includes a heat exhaust and carbon scrubber to reduce heat and smell.

When should I turn the lights on or off?

There are a couple of things to consider on lighting schedules. To keep photoperiod strains from entering flowering, vegging plants need more than 12 hours a day. Light cycles are generally denoted as light/dark hours. Standard options are 18/6 (18 hours of light followed by 6 hours of dark), 20/4 (20 hours of light followed by 4 hours of night) and even 24 hours of light without any darkness.

During flowering, photo-period strains require over 12 hours of uninterrupted darkness each day. Even a single flashlight sweeping over can be enough to stop some strains from flowering, so light control during flowering is essential. For auto-flowering strains, this isn’t an issue since their flowering is controlled by an internal timer that starts ticking at germination.

For outdoor growing, the seasons control the light schedule. For indoor growing, tents, closets and grow boxes have good light control and most farmers use inexpensive electronic timers to turn lights on and off on a schedule. Keeping a tight schedule with automatic timers are good for the plant and easy for the grower.

Lighting Controller

The best way to keep your plants on a good schedule is to pick up an automatic timer. These are inexpensive and readily available online or at local hardware or department stores. The important note is to make sure that you get a unit that can handle the wattage your light setup pulls. You also need to get a grounded unit (3 prongs in the US) – many of the cheaper analog units are made for household lamps and the like, so they only have two hole plugs. It’s worth spending a few extra bucks for safety.

How high should I hang the lights?

To get the most benefit and avoid injury to your plants, pay careful attention to your light placement. Always hang the light directly over the plant(s) you are looking to benefit from it. That part’s easy though, the hard part is how close to the plant to keep it. If you place it too far above the plant then it loses its benefit to the plant. If you place it too close to the plant, then the plant can be burned or bleached by the light. LED add another complexity because they require a minimum distance for the colors from the various diodes to ‘mix’ so they can be absorbed by the plants.

A good rule of thumb is to avoid getting closer than 10 inches (25cm) with any light. Put your hand at the edge of the growth and if it is too hot for you then it will be too hot for the plant. We’ll provide some guidance. Always follow the manufacturer’s guidance on the proper distance for your plants, but here is a quick rundown on light placement at each phase of a plant’s life cycle.

Seedling – Need lower level of light because excessive light will stimulate vegetative growth before the plant has developed adequate roots to feed the growth. Keep strong lights at a good distance but not so far that it causes the young seedlings to stretch to reach it. A good approach here is to stay at the high end of the manufacturer’s recommended distances, moving a little closer every couple of days as the roots become established.
Vegging – Vegging plants need more light than seedlings, but still less than flower plants. Keep your light in the middle of the manufacturer’s suggested range.
Flowering – Flowering plants need a lot of light energy to grow fat buds, so put the lights a the low end of the manufacturer’s suggested range.

This setup is using Fluorescent lights for young plants and LED lights for larger plants.

How many lights do I need?

This is another one that is totally dependent on your goals and setup. Here are some basic metrics to help you select the right lights for your setup and desired outcomes.

50 Watt LED Panel – 6 to 9 seedlings for the first weeks or one small vegging plant,
75 Watt CFL – 6 to 9 seedlings for the first weeks or one small vegging plant. 2 x 75 Watt CFL will grow a small autoflowering plant through flowering. More CFLs equals more plants.
100 Watt LED – 6 to 9 seedlings for the first weeks, 2 small vegging plants or a single small auto-flowering plant to flower, covering approximately .4 square meters of canopy in flower.
200 Watt LED – Small to medium sized plant through its lifecycle, covering, covering approximately .8 square meters of canopy in flower.
600 Watt LED – Large plant in flower or two plants in vegetative growth, covering approximately 1.5 square meters of canopy in flower (approximate size of a 4’x4’ tent).

Optimal Setup

The basic metrics above represent a minimum setup. If you want to grow larger buds, we recomend the following setup for flowering:

4×4 Tent: 4x600W or 1x2000W LED
2×2 Tent: 1x600W

If you want to keep it dead simple though, a professional grow box comes with the optimal lights and controllers built right in.

Grow Boxes Keep It Simple.

Next Up: Learn about containers and soil.

Learn about the different container and soil options available, and all about transplanting marijuana plants as well.

Learn about containers and transplanting
Learn about soil and growing mediums

Learn More

Soil Mix Guide

As most potting soils don’t provide adequate water drainage or retention for Cannabis off-the-shelf, it’s…

Grow Space Guide

Often people think of cannabis gardens as a prohibition-era back room or basement utilitarian affair. It doesn’t have to be that way though, if you happen to live in one of the areas that have legalized cannabis cultivation, you can incorporate the plants into your life and into your existing gardens – it is a beautiful and robust plant.

There are many options for where to grow, and your choice will mostly depend on your needs and what’s practical. You’ll want to consider stealth, available space, how much you want to grow. Be creative and use or modify spaces you already have – as long as they meet the basic rules of a good growing space.

What makes a good grow space?

In the sections that follow we’ll cover the pros and cons of the different grow space options, but there are a few rules that are common over all the possibilities:

Good ventilation – Without proper ventilation, the air in your grow space will become very humid and hot and lead to mold, disease, and stress. A good grow space is well ventilated to make it easy to exchange fresh air.


Heat control – Cannabis likes the same temperature ranges as you do; too hot or too cold and the plant shuts down. Therefore, a good grow space keeps temperatures between 65F (18C) and 80F (27C) and never less than 60F(15C) and never more than 90F (32C). Cannabis can take more extreme temperatures, but these ranges are good targets for indoor production.


Light Control – Traditional photoperiod cannabis strains need over 12 hours of uninterrupted darkness in a 24-hour cycle to flower. Even a quick sweep of light can cause the plant to stop flowering. A good grow space for photoperiod strains can be completely blacked out.


Vertical Space – Cannabis can get tall, from 1′ all the way to 20′ (6.6m) tall, depending on the strain. You will need to select a strain that will fit into your space and use topping and training to make the most efficient use of your space and lights. Remember that lights hang down at least 1 foot (0.3M), and you will need to keep at least the same amount between the lights and canopy. A good grow space is at least 2′ (.6M) taller than the top of your plant after it’s done growing.

What options are there?

Outside – Cannabis is often grown outside and is an excellent option if available to you. The sunshine is free and the open air is great for growing cannabis. Make sure you are aware of local regulations.


Space Bucket These are self-contained environment-in-a-bucket are perfect for single plant stealth gardens.


Grow Box – They are a great option for small and stealthy grows for single plant production. You can pick these up premade or make your own or repurpose an old piece of furniture.


Closet – A spare closet can make an ideal grow space because they offer good height and are good at keeping light contained. You will need a fan for ventilation in most closets.


Grow Tent – Grow tents range in size, from 2′ x 2′ (.6m x .6m) on up and are great options for all phases of cannabis life. Tents have great ventilation, reflective walls to make efficient use of lighting and they keep light contained to keep your grow stealthy.

Farmers often use multiple methods throughout the plant’s lifecycle. For instance, you might veg in a space bucket, but move to a grow tent for flower, or veg in the sunlight and finish under lights.

This cannabis plant is being grown outside.

Growing Marijuana Outside

Cannabis grows great outside in most places that people live, so it will probably work where you live too. You will need to select a strain that grows well in your region and environment. Cannabis loves sunshine, so make sure to place it in an area that gets plenty of sun. If you keep it in a container, you will be able to move it around as the sun angle changes to optimize its light intake. If you plant it directly into the ground, cannabis plants can grow very large.

The major issue with growing outside is that growing cannabis is illegal in many localities. Check your local laws and be sure to stay in compliance.

Pros: The light is free and on its own timer.
Cons: Growing outside isn’t very stealthy, and you won’t have any light control.

Growing Marijuana in a Space Bucket

Space buckets are made by connecting a couple of five-gallon buckets to form a tube. Install 3 or 4 lights in the lid and cut holes in the side of the bucket for additional lights and fans. Add as many buckets as you want for extra height. In the end, you’ll have a self-contained grow tube.

You probably have a lot of the stuff you need to build a space bucket already: The major drawback here is that you will be extremely space constrained and will likely need to train all but the smallest strains.

Pros: Growing in a bucket is very stealthy and a reasonably efficient way to grow. Buckets also have excellent light control.
Cons: Buckets are space constrained, and 3 or more 23 watt CFLs in a small area heats up very quickly. You will need to have plenty of ventilation and select a strain that does well in small spaces.

Growing Marijuana in a Grow Box

Grow boxes are self-contained cabinets meant to grow plants from start to finish. You can make your own from an old cabinet, lights, and fans.

You can also buy turnkey solutions complete with lights and hydroponics kits. These make for perfect small stealth grows, but are expensive.

Pros: Grow boxes are stealthy, self-contained and have excellent light control and a great for space-constrained gardens.
Cons: You’ll need to proactively keep your plant the right size through topping and pruning.

Growing Marijuana in a Closet

Closets can make great grow spaces if you have a spare one available, just add lights and a small fan, and you’re ready to go.

Pros: You probably already have one, so there isn’t an up-front cost. If your closet has a door, they are stealthy and have good light control.
Cons: Closets don’t always have proper ventilation and can be space constricting.

Grow tents provide optimal conditions for cannabis inside.

Growing Marijuana in a Grow Tent

Grow tents are specially made ‘tents’ with canvas on the outside and a mylar coating on the inside to reflect light on the plants. Lights are hung from bars on the ceiling, and fans can be placed at ventilation openings.

Tents use blackout zippers to fasten the doors, and most vents can be velcroed, zipped, or cinched shut for complete ‘blackout’ light control. Tents come in a variety of sizes to suit your space. Make sure the tent has a metal frame and quality metal connectors.

Pros: Grow tents are efficient and have the best ventilation and light control of any option.
Cons: Grow tents can take up a lot of space.

We recommend these 4×4 grow tents from Mars Hydro because they are durable and have great light control and ventilation. For a smaller footprint, try out these 3×3 tents from Viparspectra.

How do I manage heat & humidity?

No matter where you grow, ventilation and temperature control are key to a successful grow. Remember that cannabis plants like the same conditions as you. If it’s too hot or cold for you, it will be too hot or cold for your plant. Similarly, if it’s too humid or dry for you then it will be the same for your plant.

In general, you will want to keep your grow space between 70°F-80°F (21°C-26°C) throughout the plant’s lifetime. Relative humidity ranges decrease throughout the plant’s life cycle, with seedlings being between 60-80% and full flowering plants being between 40-45% relative humidity.

Too Hot: The easiest way to decrease heat is to increase the ventilation in your grow space, and the easiest way to increase ventilation is to add fans and vents. Box fans are a good option, but compact duct fans work the best in tents. In cases where lighting is causing heating issues, try replacing it with modern LED options that will burn cooler.

Too Cold: If it’s too cold, turn on a heater. Heating pads specially produced for gardening will keep the roots warm. Incandescent bulbs don’t really help your plants grow, but they burn fairly hot and can be used to supplement heat.

Too Dry: Add a humidifier; you can pick up very cheap units at your local drug store. Decreasing ventilation and airflow can also help, but that will also cause increased heat.

Too Humid: The easiest way to decrease humidity is to increase ventilation. Decreasing temperature can lower relative humidity.

We use these duct fans for our tents – a 6 inch fan work well for 4×4 tents and 4 inch fans for smaller tents.

Fans are the best way to control heat and humidity for indoor grows.

How do I keep pests out?

No matter where you grow, keeping a clean grow space is a great preventative measure against pests. Keep old vegetative matter off the ground, and don’t leave standing water. Make sure to completely clean and disinfect between grows to prevent disease or pest holdover. In the end, pests will probably find your crop, and you will need to be proactive to make sure that they have as little impact as possible. See the section on pest control for more information.

Keep it clean

No matter where you grow, keeping a clean grow space is a great preventative measure against pests. Keep old vegetative matter off the ground, and don’t leave standing water. Make sure to completely clean and disinfect between grows to prevent disease or pest holdover.

What do we recommend?

We recommend what works best for your setup and needs. Be creative; it’s common to start seedlings and veg outside or in a small cabinet and then move to the tent for the flowering stage. The most important things are that your space has good airflow and temperature and humidity control.

If you are looking for tents, we recommend this line from Mars Hydro. They are durable, have great ventilation, and all the bells and whistles you could want in a grow tent. If you’re looking for an all-in-one kit, check out this line of complete kits.

If stealth and space are your biggest concerns, we recommend a grow box.

Next up: Learn about lights

There’s no shortage of options, and the best decision for you depends on many factors. You’ll want to consider heat control and balance cost to purchase and cost to operate when you make y our selection. Our guide will walk you through the options and help you make a clear selection.

Read our Lighting Guide

Learn More

Soil Mix Guide

As most potting soils don’t provide adequate water drainage or retention for Cannabis off-the-shelf, it’s…