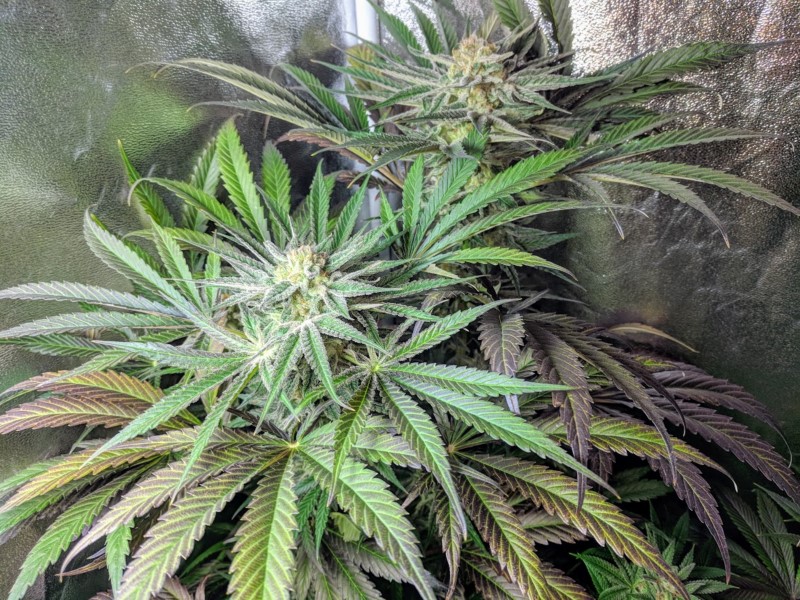
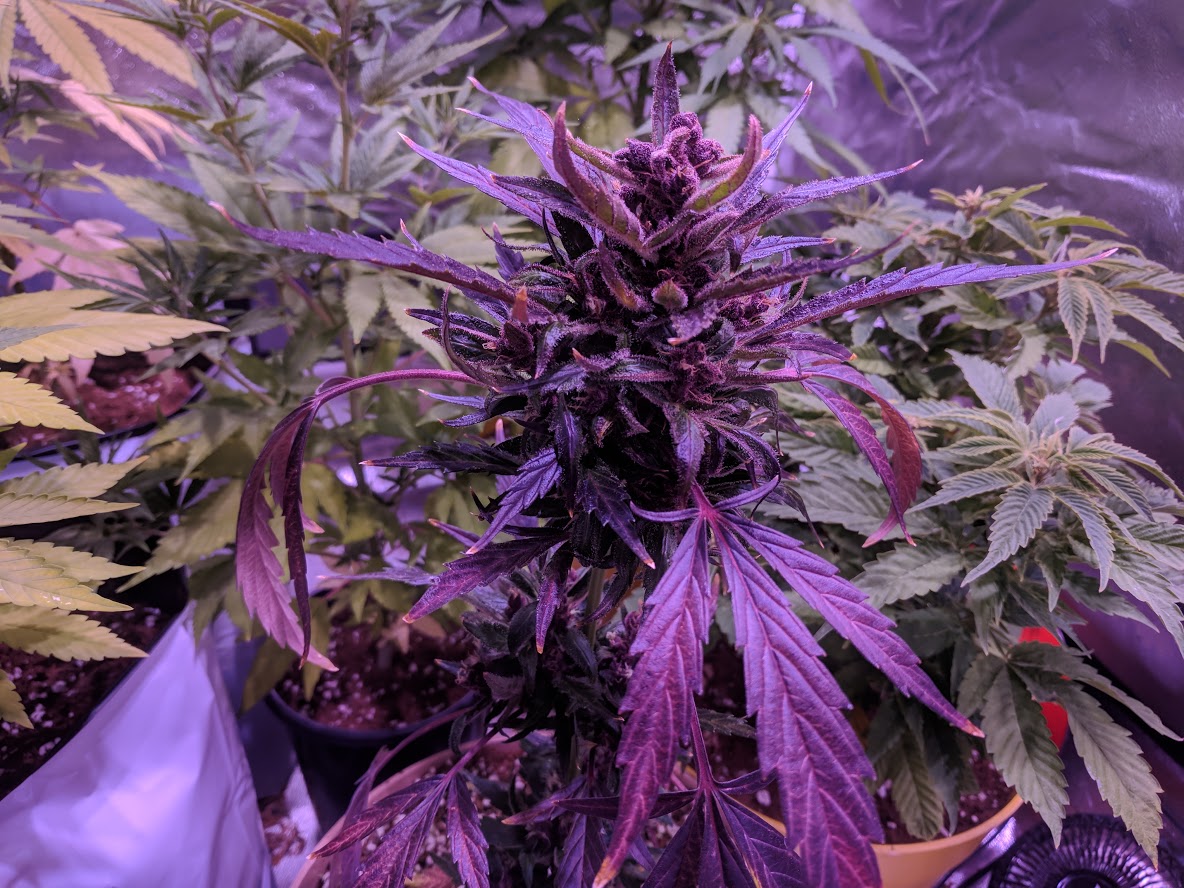
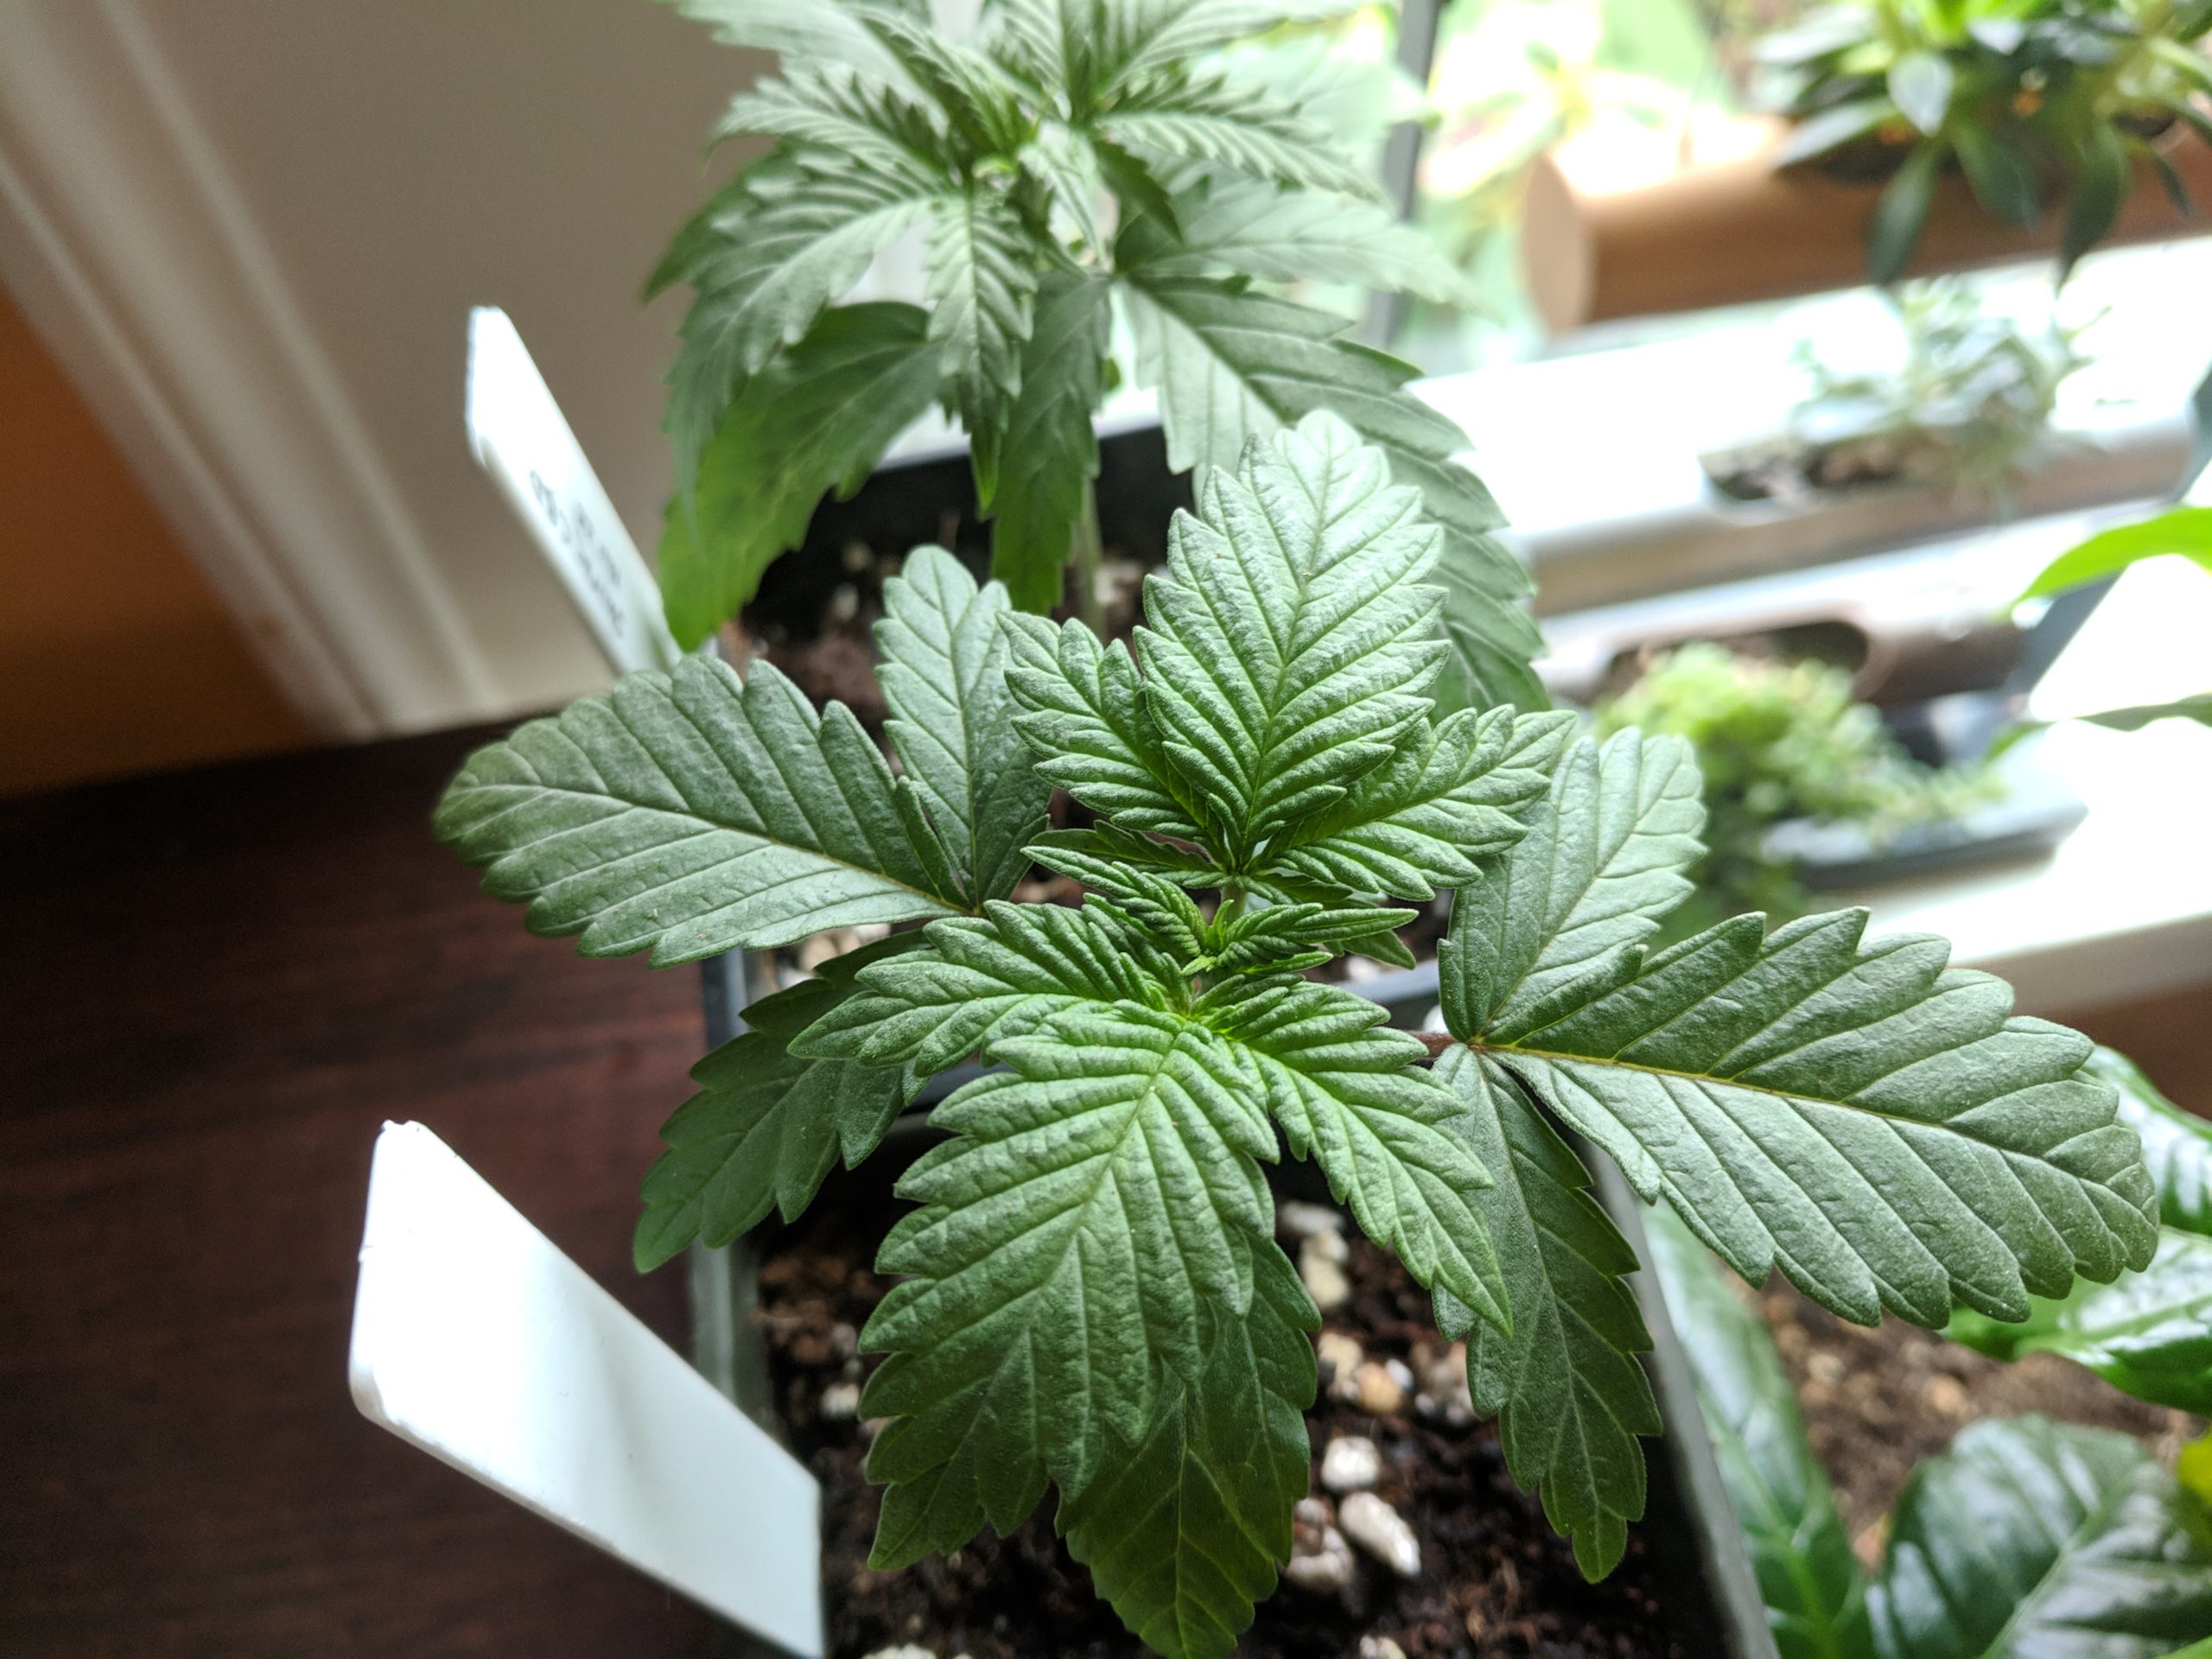
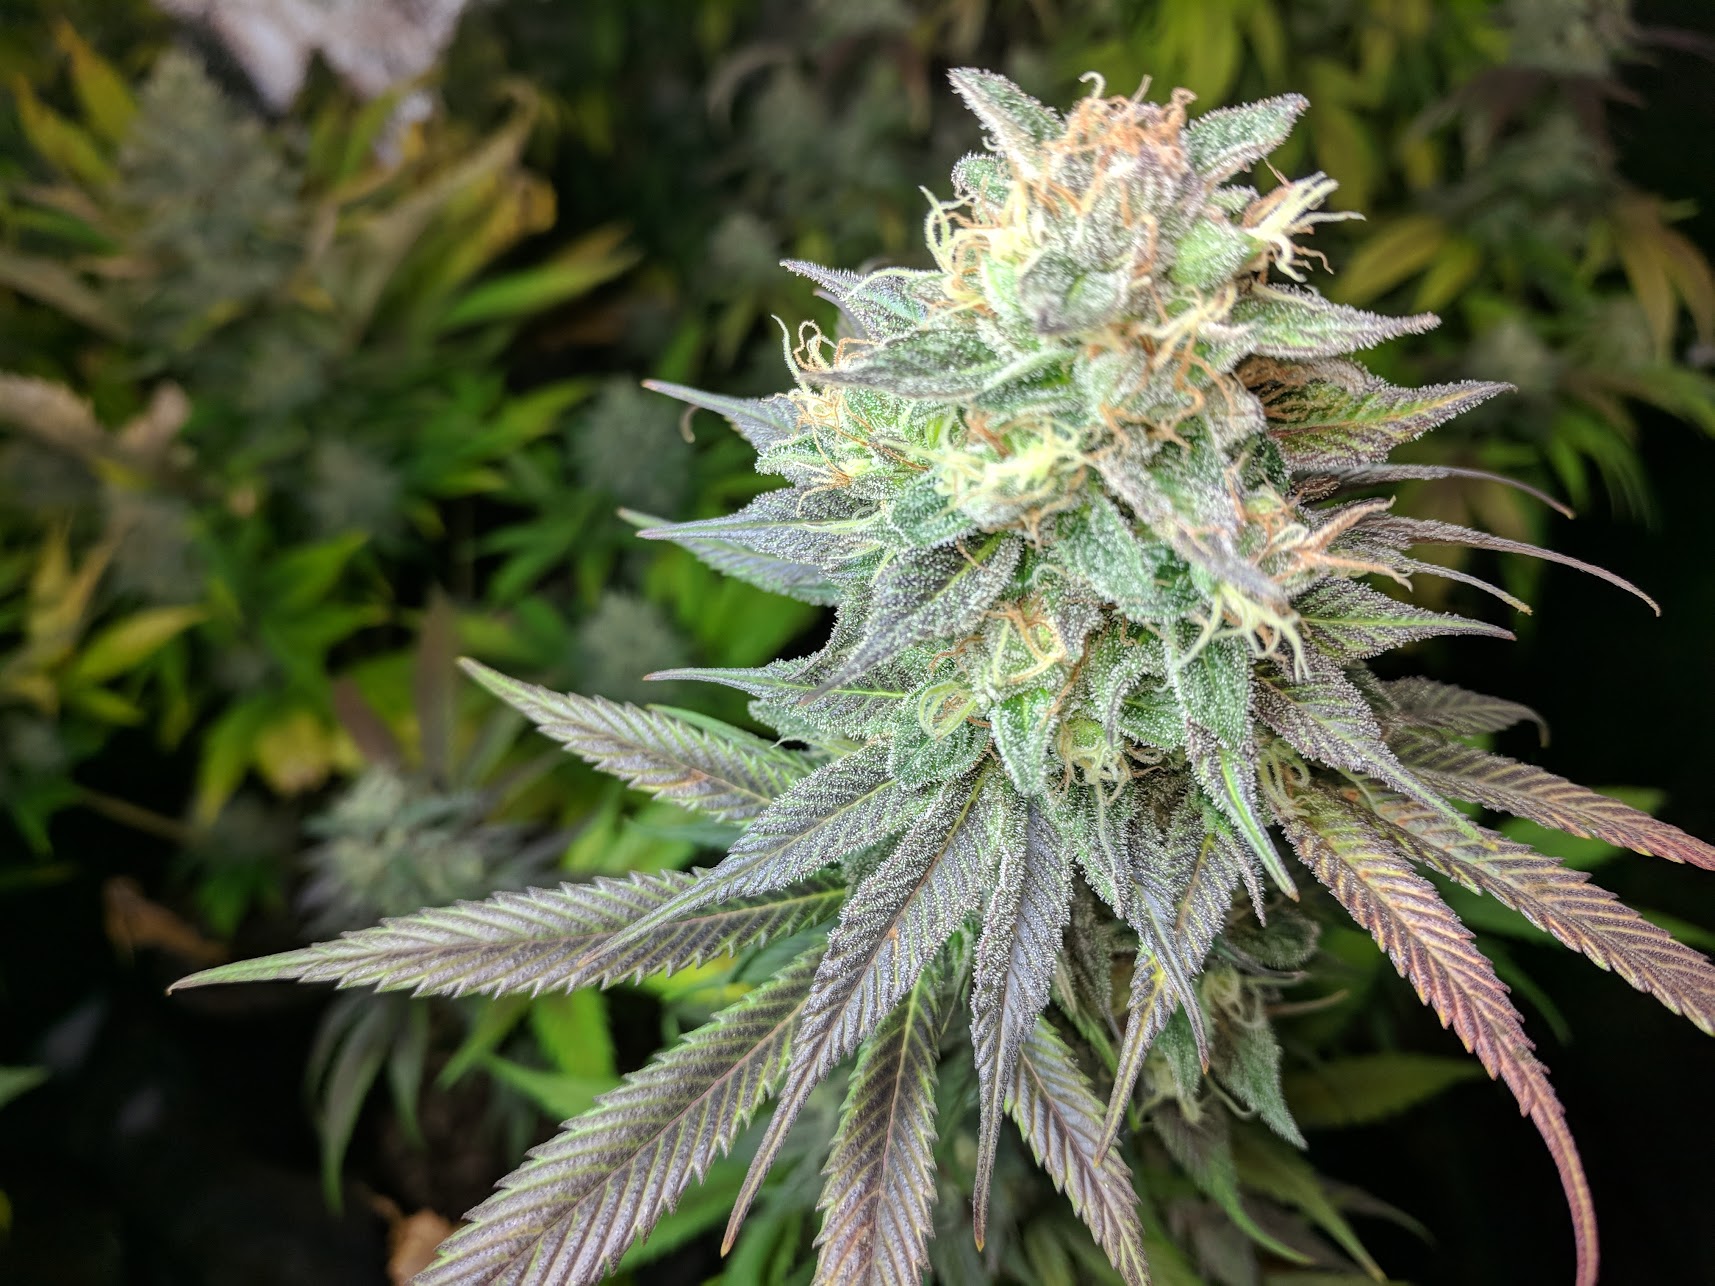
Overall, this plant is an aggressive grower and strikingly beautiful. It took on dark purple tones in the cooler growing temperatures. It needs training, or it gets very tall, but it’s also very productive and has great medicinal value; making this strain an excellent choice for intermediate and advanced growers.
Easy to Grow
8 out of 10
Flowering Speed
8 out of 10
Yield
9 out of 10
Potency
9 out of 10
Pros
Beautiful plant
Holds up to pests
Medicinal applications
Cons
Very leggy
Low flavor profile
The Details
We don’t know much about the exact genetics that led to this particular strain because the breeders at 00 Seed are a bit light on the details in that area. My observation of this strain grows like a true hybrid. It is very leggy and tall like it’s skunk Sativa lineage, but it has the fat leaves, and massive bud structures like you would find in an Indica.
We’ve grown several of these and each seed germinated successfully. We kept the plants in vegetative growth for about a month. We topped each one a week before putting them into flower but did not perform any training.
The leaves were very fat, and the lower fan leaves grew very large, reminding me of a kush strain. As soon as we put them into flower, they get extraordinarily leggy and almost tripled in height in the first few weeks!
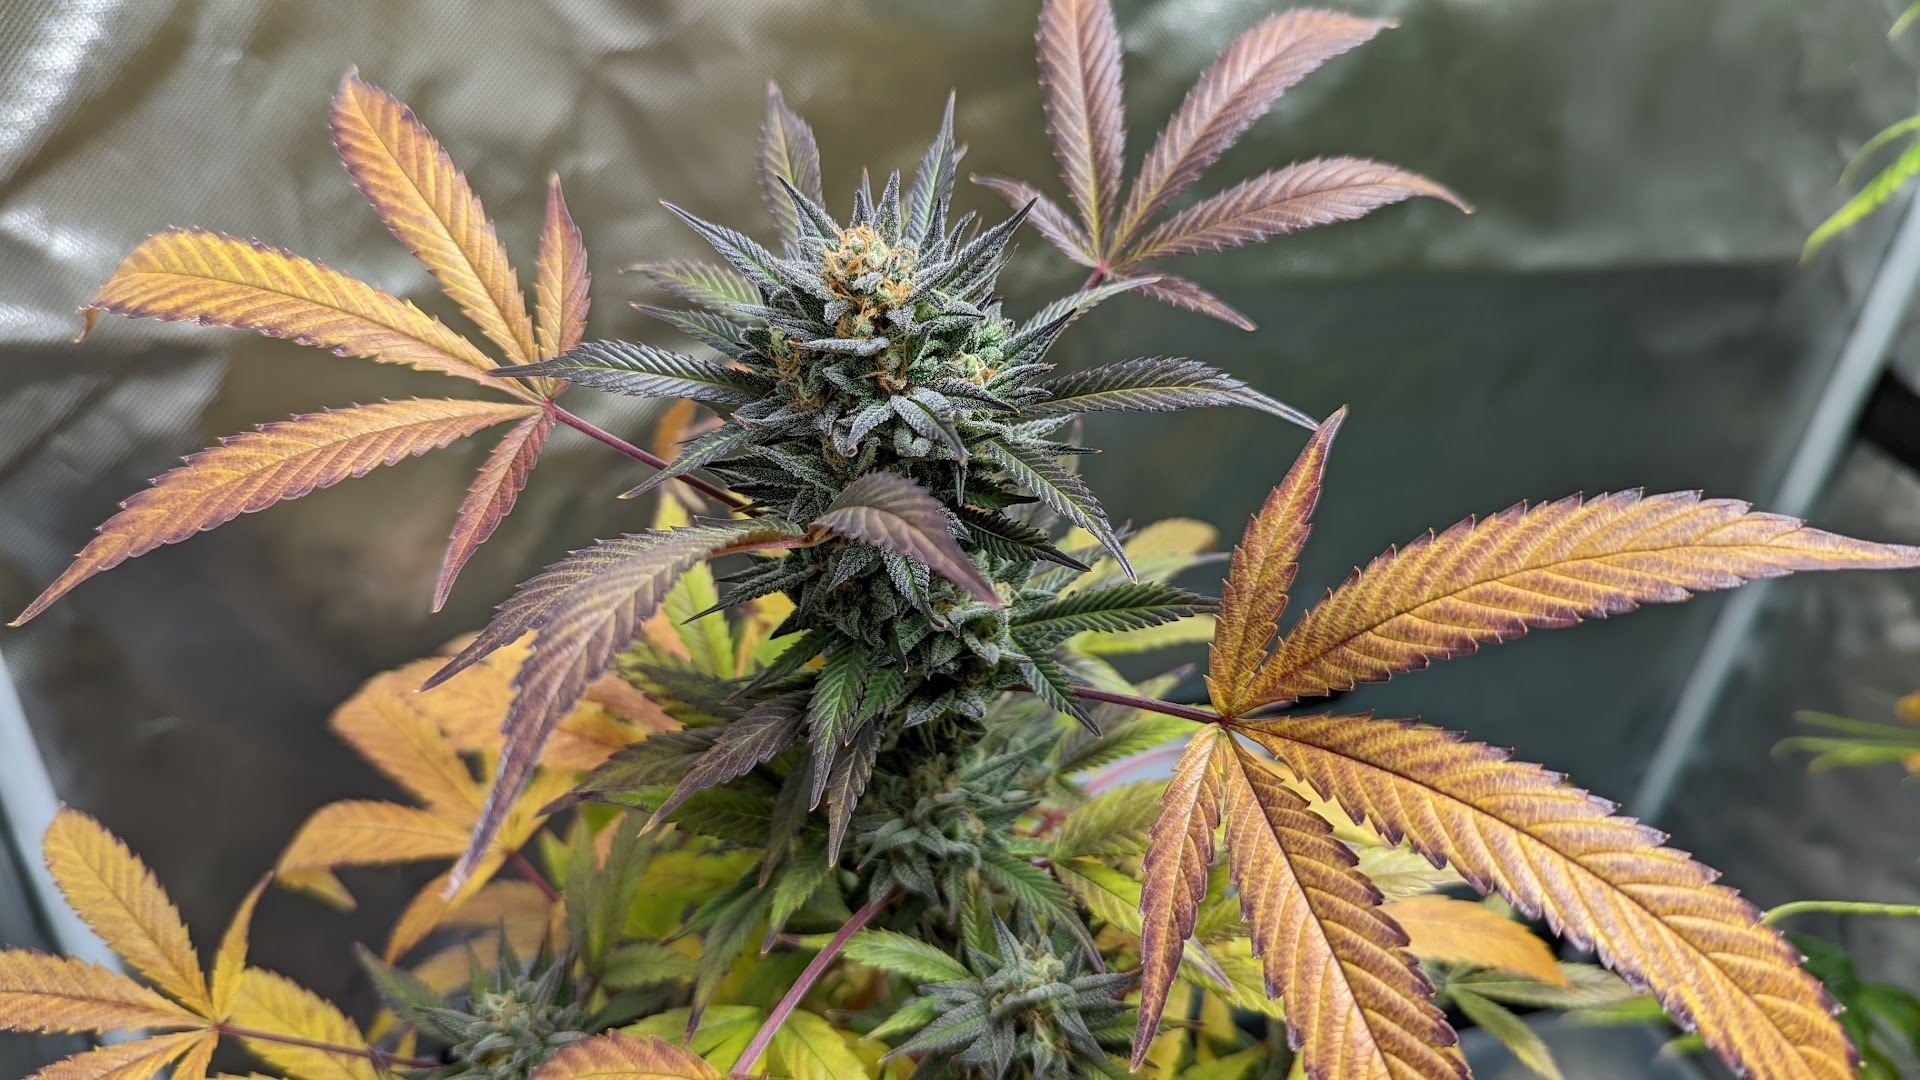
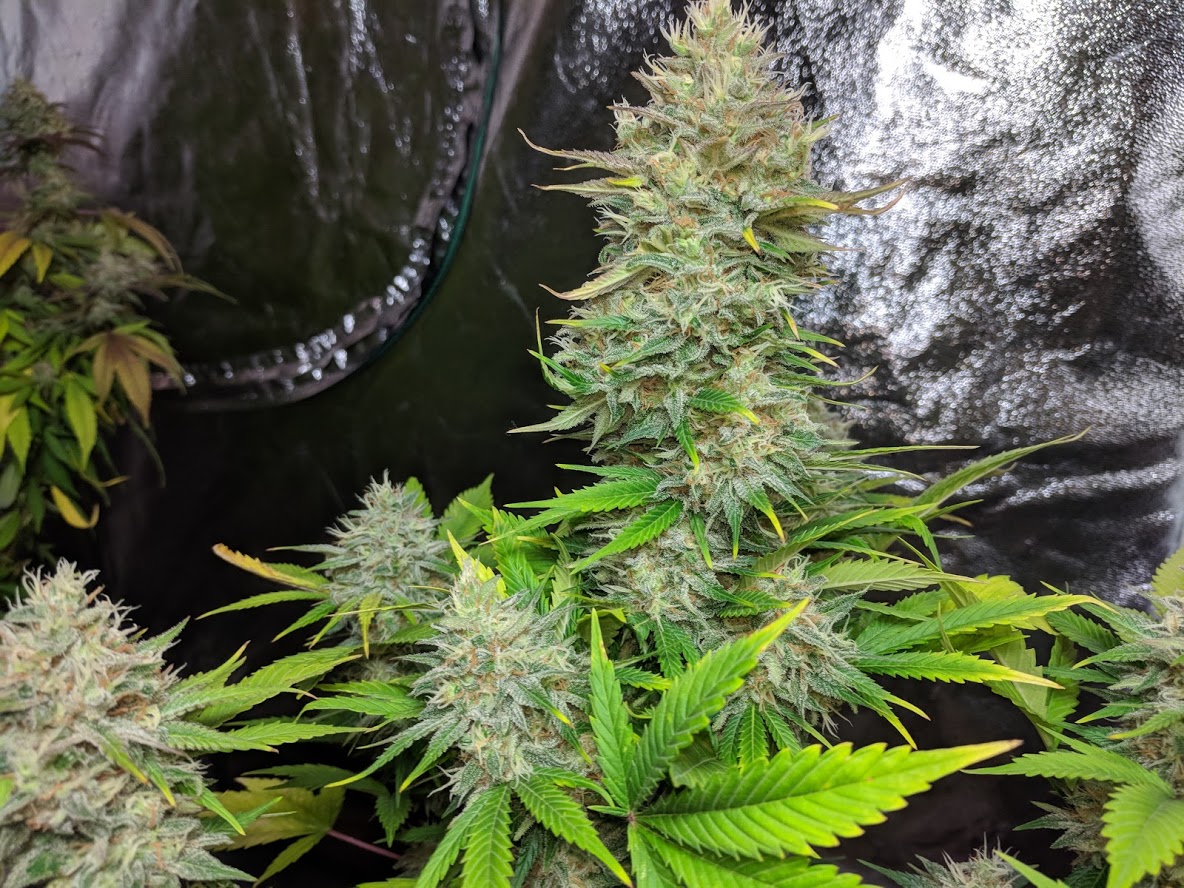
The flowers are enormous and also remind me of the flowers from a kush strain because of their size. The resin production is incredible, so it’s a good thing that the plant’s structure is stable and was able to maintain the height without drooping under the weight of the large buds.
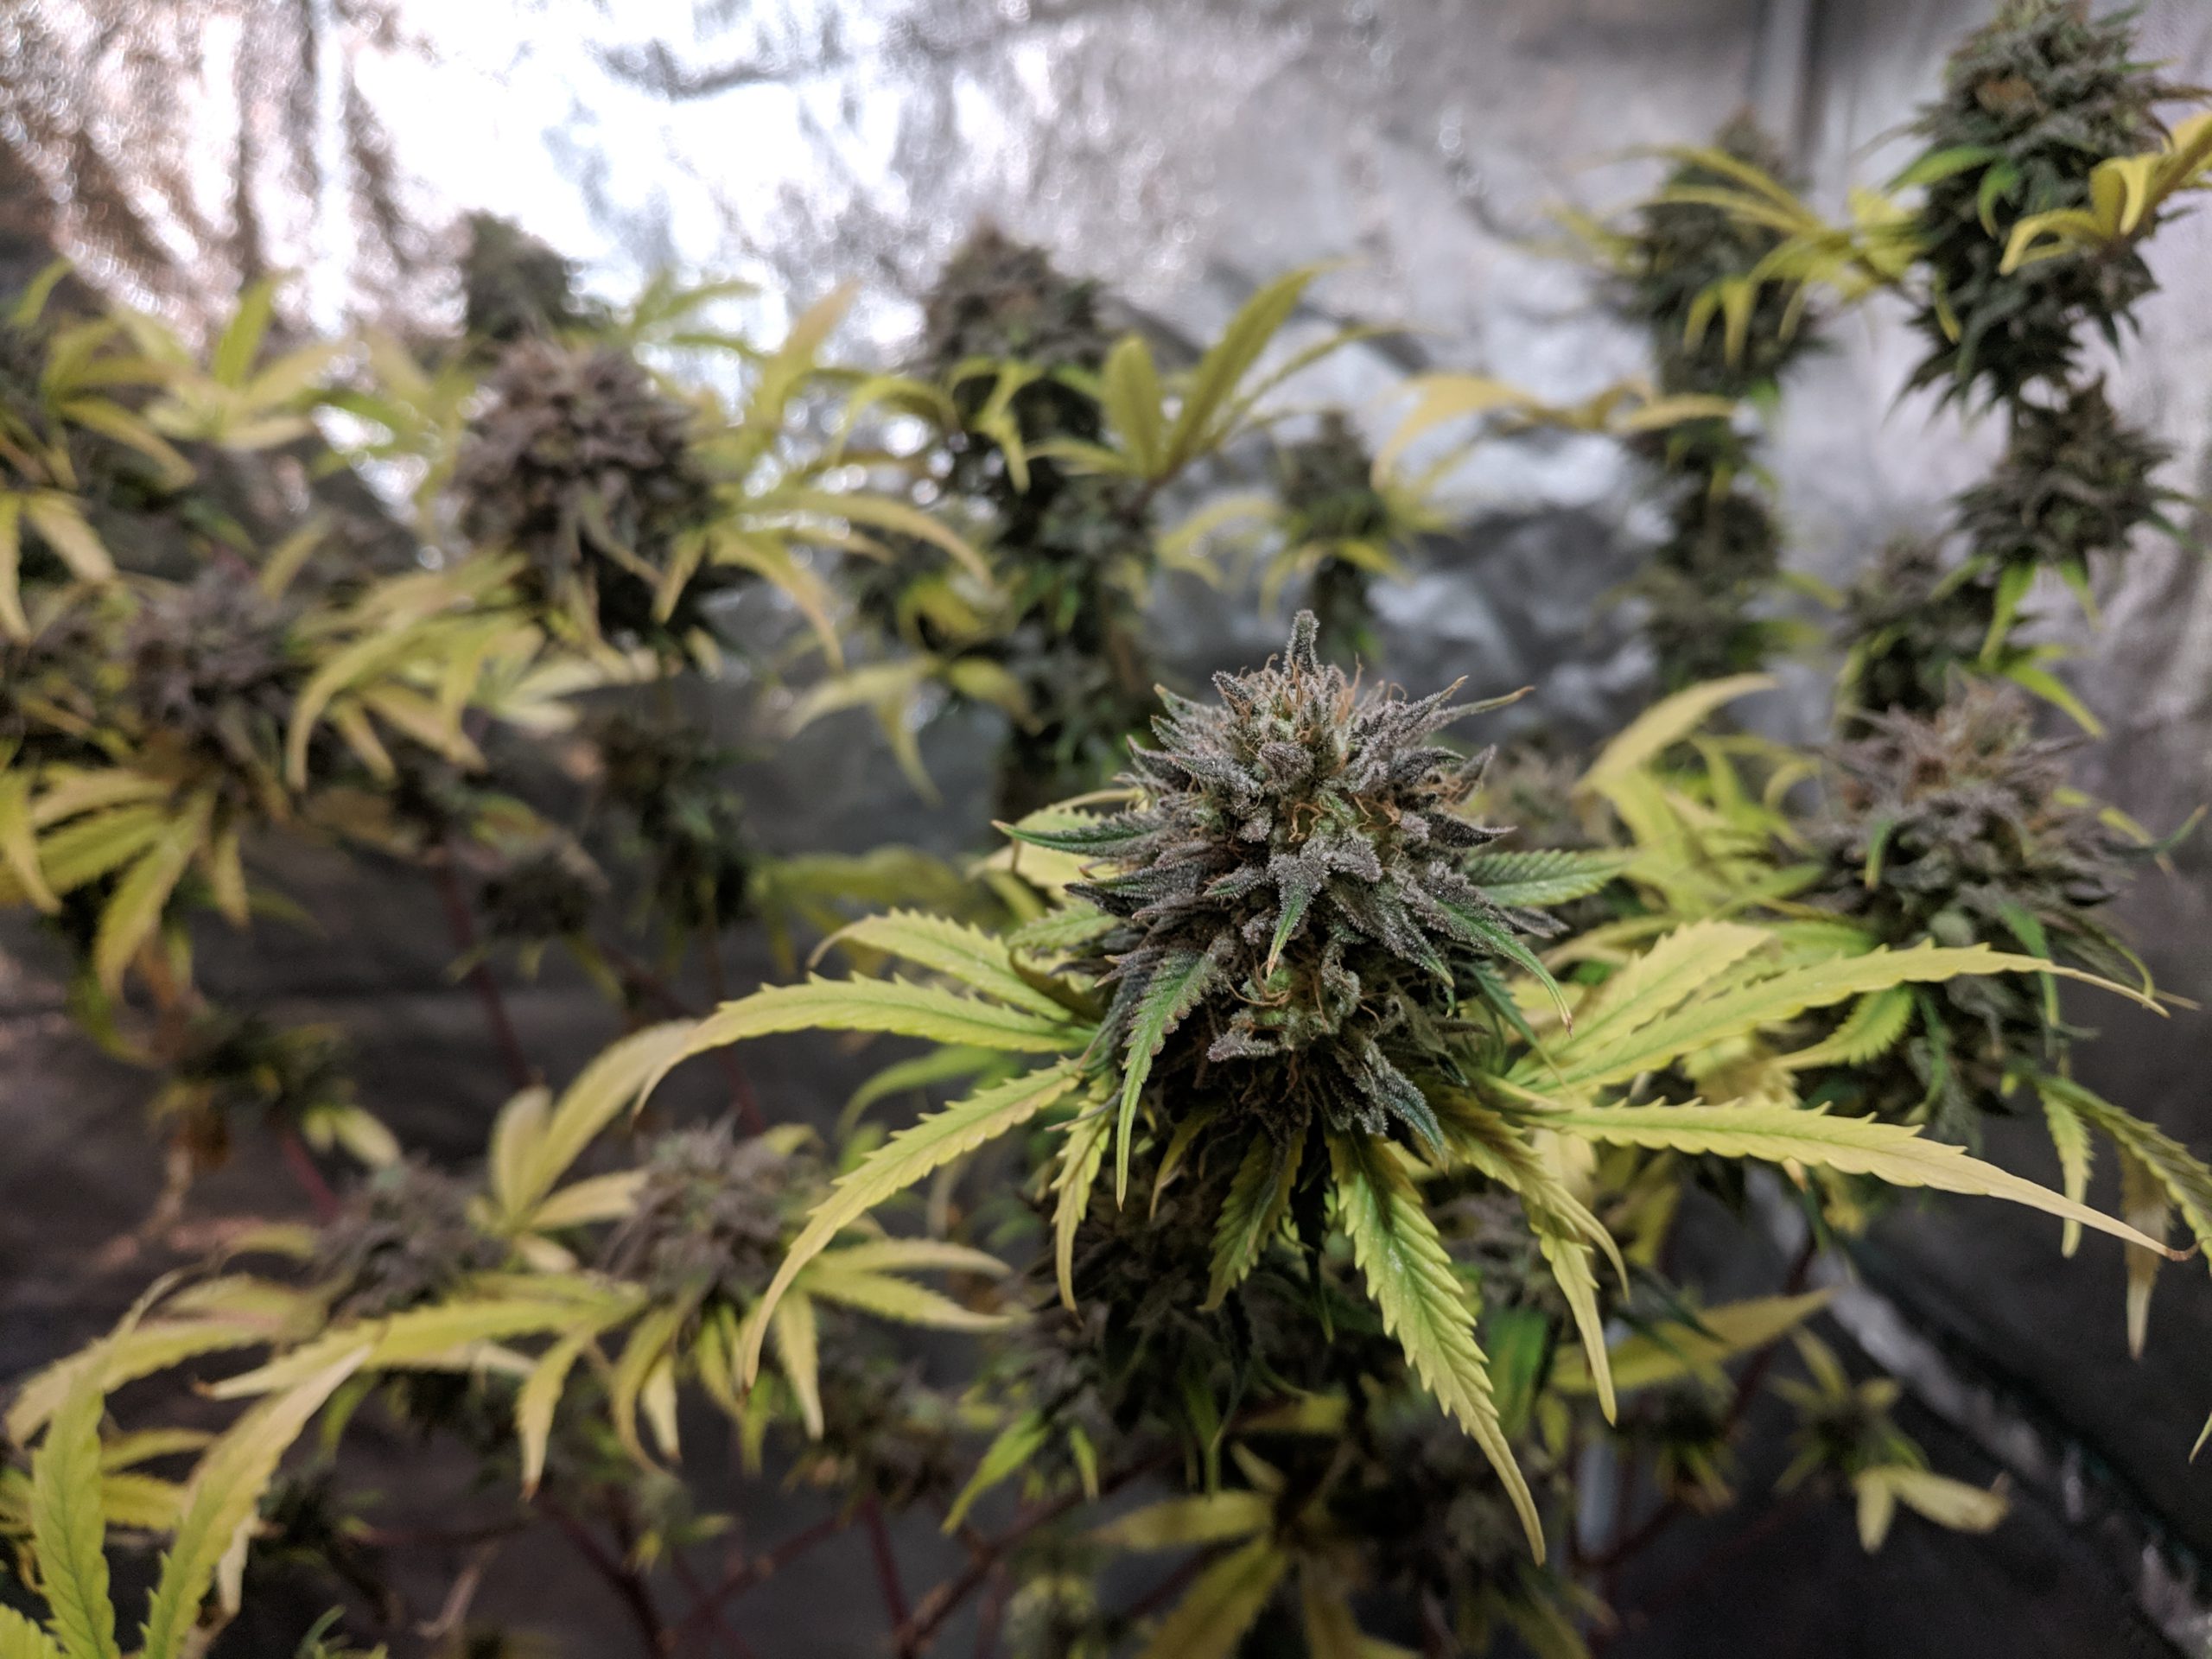
Chocolate Skunk CBD produces tons of resin and is a striking plant.
The next place this plant shines is in a super-quick flower time, and the breeder says the flowers are ready in 50-55 days after the start of flowering. The timings were accurate to get the highest THC content, and we saw consistent flowering times of 60 days from germination to get a the best medicinal benefits by harvesting at max CBD levels..
With high levels of both THC and CBD, the bud produces a nice sedative effect. It started slow and finished strong.
Easy to Grow?
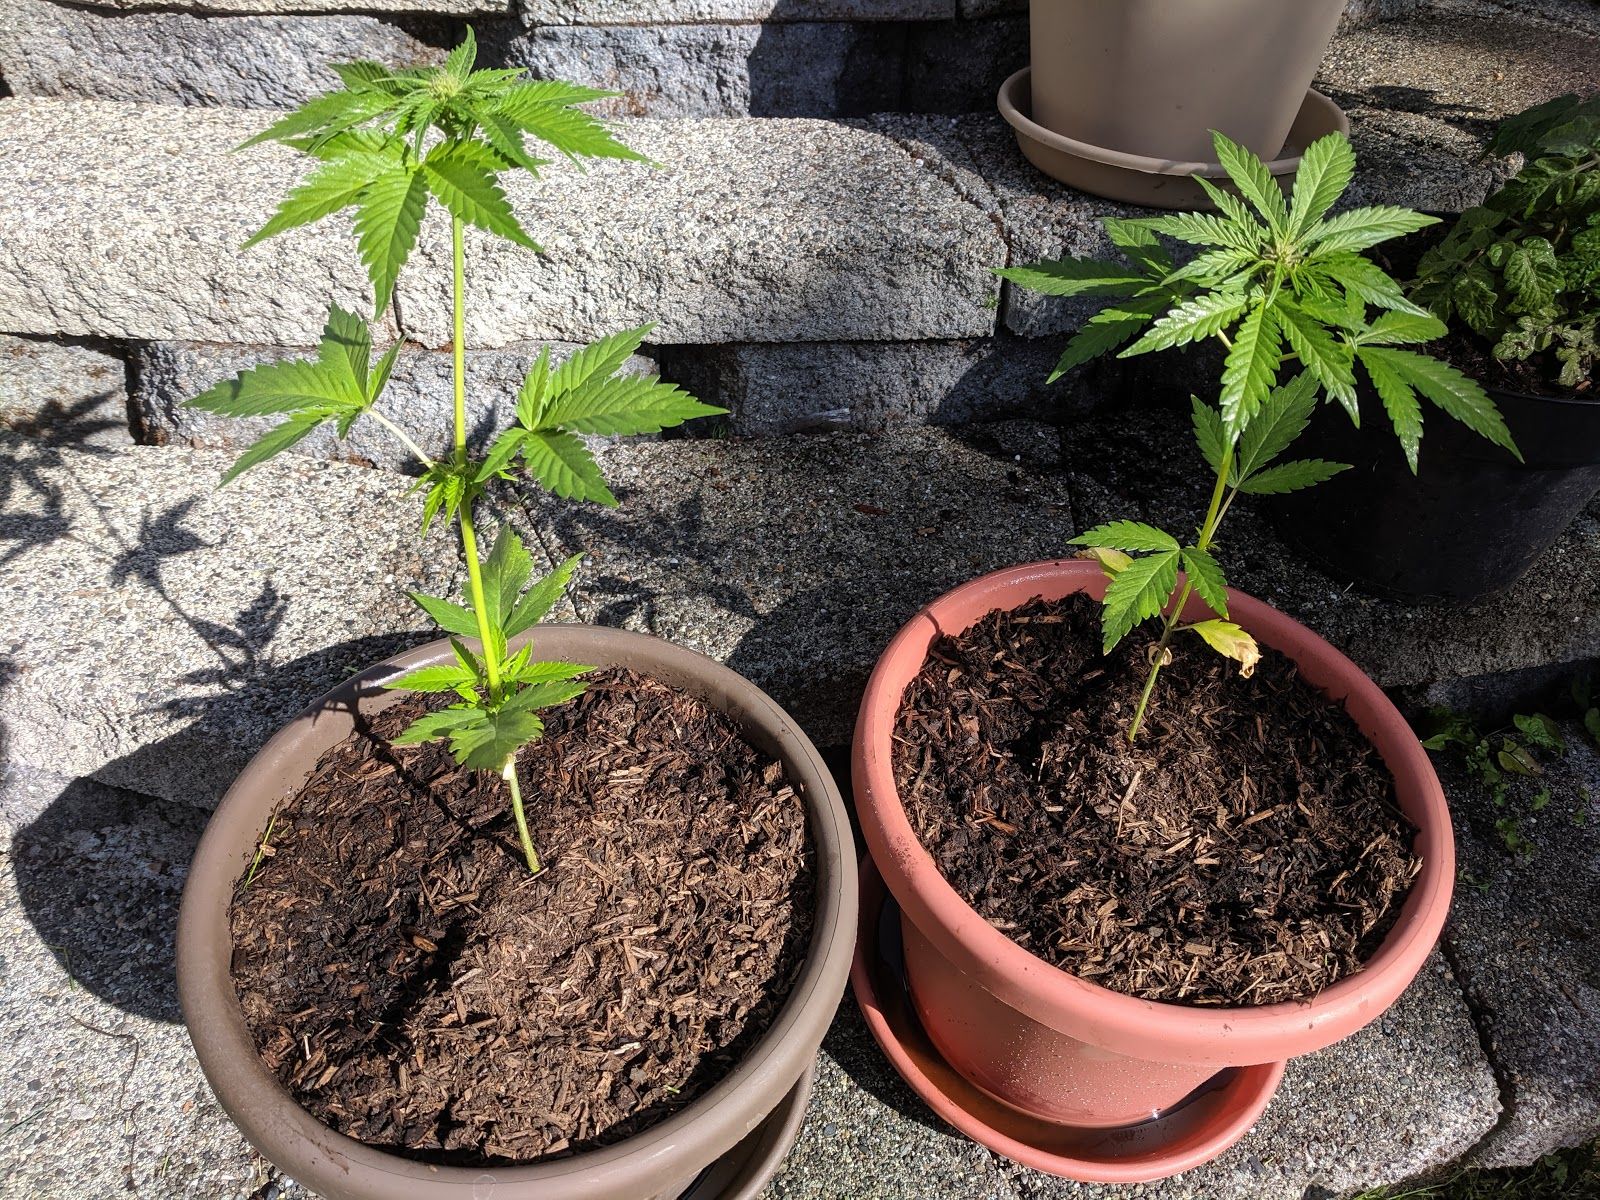
These plants are very robust and easy to grow through the vegetative stage since they weren’t particularly prone to pest or nutrient issues. As soon as we transitioned over to flowering, it became a slightly different story. The plants proved to be extremely leggy by quadrupling in size. They were about 18″ (47cm) tall when we put them into flower, and I expected them to double that during flowering roughly. They ended up over 6ft (~2m) tall!
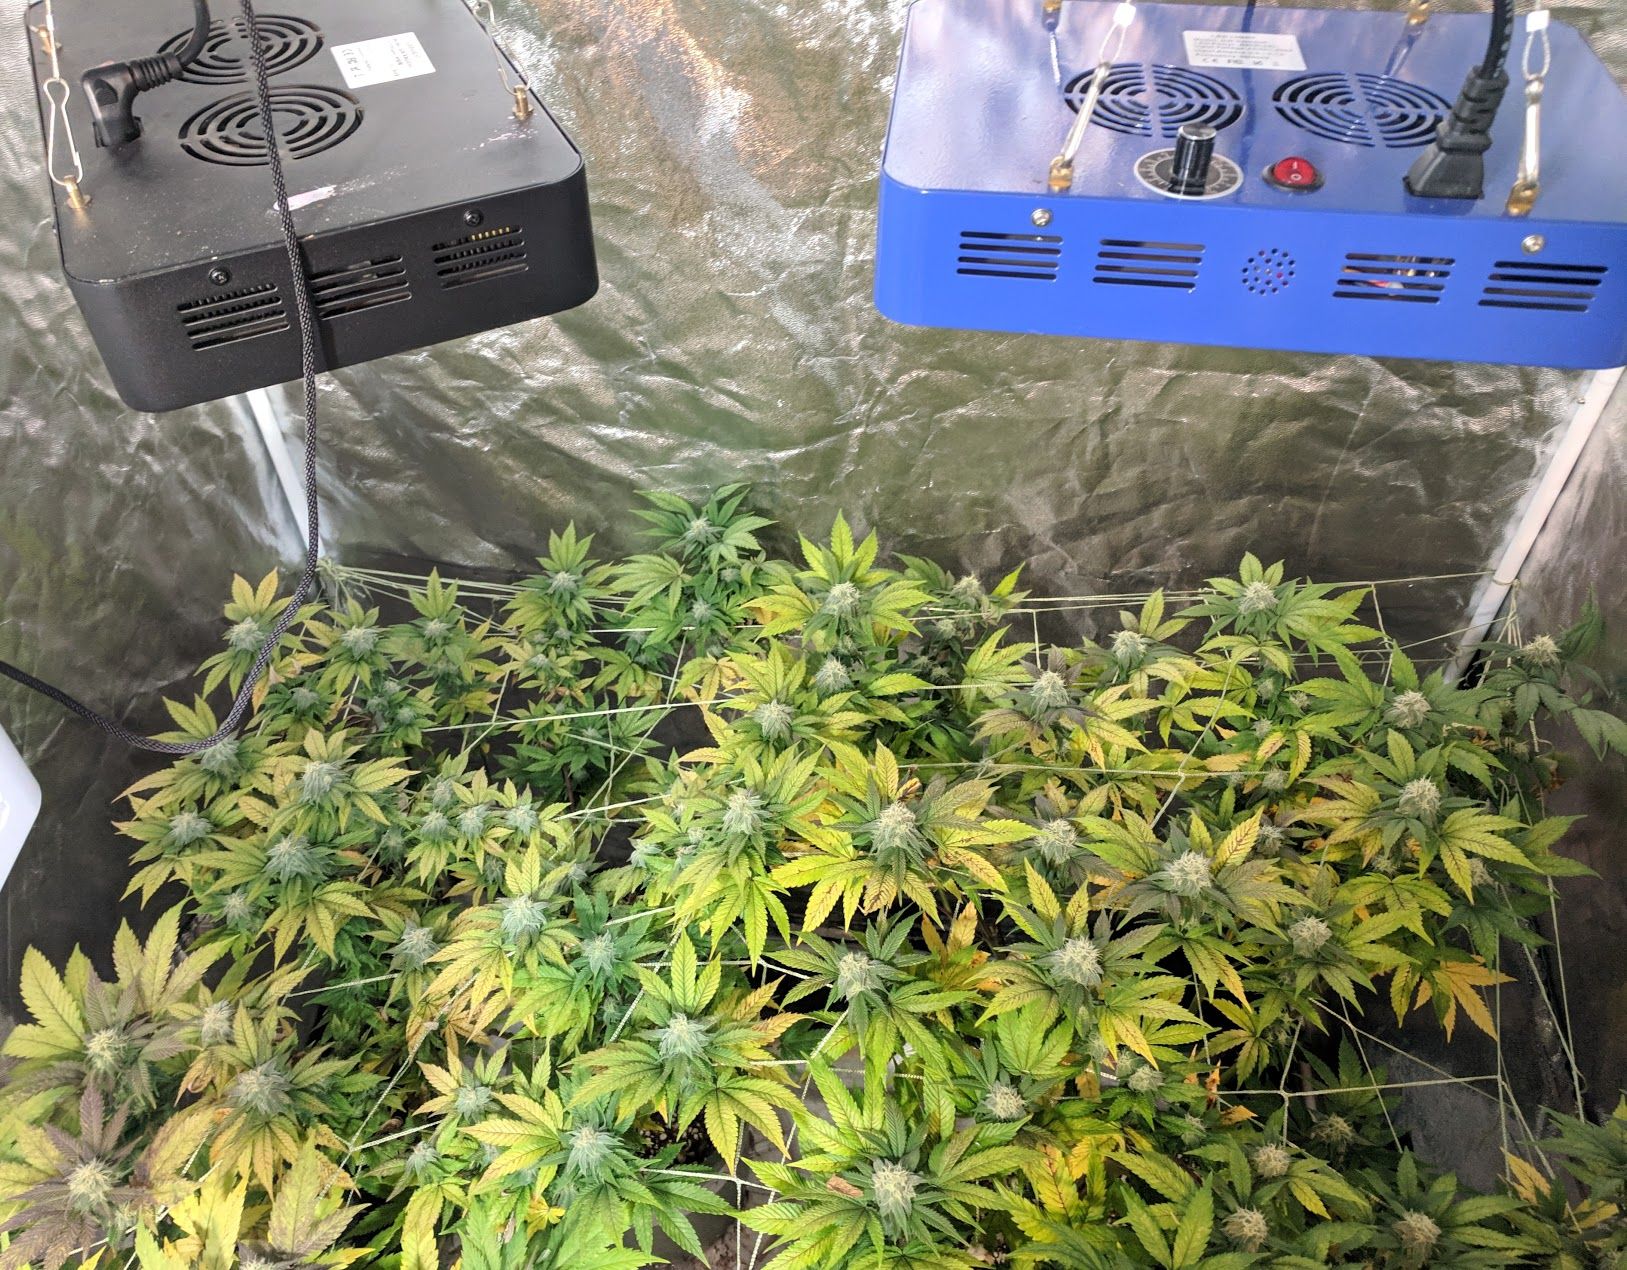
In this photo, you can see how much the plant grew after we topped it. It stretched aggressively after switching to 12/12 ligting.
Strong growth is generally a positive thing, but this became something of a problem in my 8′ foot tent. Next time I grow these, I will top multiple times and train more to channel all of that vertical growth into horizontal growth. This is an excellent strain for intermediate and advanced growers but could become a problem for beginners or those growing in confined spaces.
Even though it grew tall and had large buds, the structure was stable enough to hold the flowers upright. This is a view from the top down.
Speed to Flower?
The breeder advises 50-55 days from germination to harvest. We found that to be accurate and uniform across the plants we grew, though we waited 60 days to maximize the CBN development.
Medical Use?
CBD Chocolate Skunk has high levels of CBD and produces relaxing effects, making it an excellent choice for treating pain, anxiety, stress, and depression. We waited to harvest until CBD production was maximized, resulting in the medicinal bud of the highest quality. Learn more on how to find the perfect time to harvest in our harvesting guide.
Potency?
This strain has medium-high levels of THC that are balanced by high levels of CBD, resulting in relaxing high. The effects are balanced, without racing thoughts or anxiety.
Indoor plants will reach about 70 – 90 cm. tall and will yield in the region of 400 gr/m2 in a flowering period of between 50 – 55 days.
Remember, our plants ended up over 180cm tall, but we didn’t account for the rapid growth, and the plant wasn’t shaped to take the best advantage of our lights. Still, we saw very respectable yields that were approaching the breeder’s range.
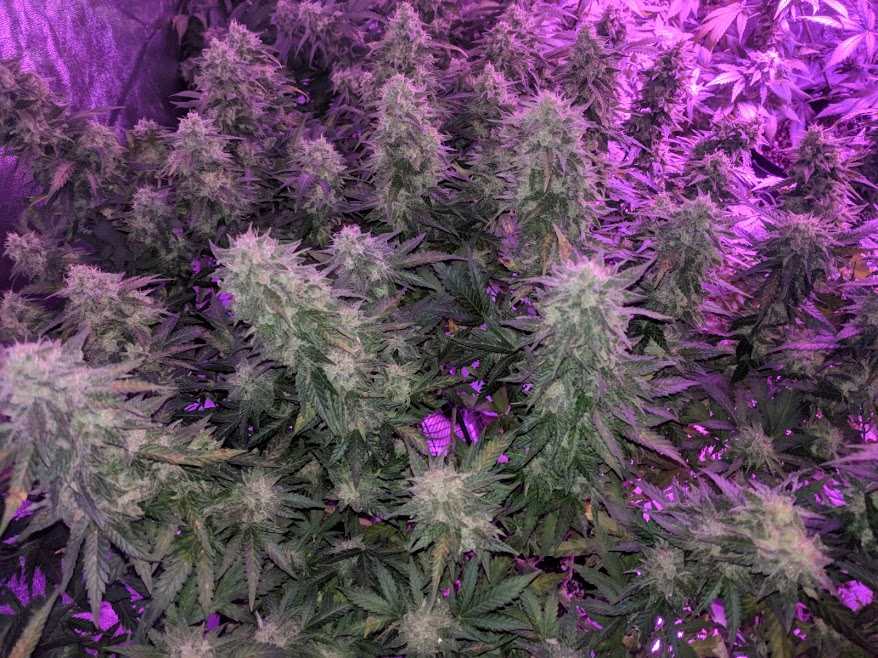
The colas were very dense, with resin coating every surface and spilling off onto the leaves.
The buds were large and dense with high levels of resin development. The plant’s structure is excellent, and we didn’t see much drooping, even though the plant was very tall and the buds were dense and heavy.
Even the lower branches produced large, resin coated buds.
Flavor?
The flowers cure well and results in a beautiful chocolate color with a relatively smooth smoke. The overall flavor profile is mellow and pleasant if not very distinctive.
The cured buds had a chocolate coloration and smoked smoothly.
Since these plants got so much taller than their tent mates, and so close to the top of the tent, each ended up needing its own light. We rotated lights around the tent every couple of days.
About 00 Seeds
This Spanish breeder specializes in Auto and feminized seeds, focusing on strong, unique flavors and aromas while maintaining a classic line of strains. Click here to see more strains from 00 seeds.
Learn more about selecting the right strain for your setup and about buying seeds online in our seed and strain guide.
This auto-flowering strain was bred from a Big Devil XL and a purple auto-flowering plant. This compact strain displays beautiful coloration but has relatively low yields.
Easy to Grow
7 out of 10
Flowering Speed
10 out of 10
Yield
5 out of 10
Potency
7 out of 10
Pros
Beautiful plant
Holds up to pests
60 days from seed to harvest
Cons
Low production
Prone to weather damage
The Details
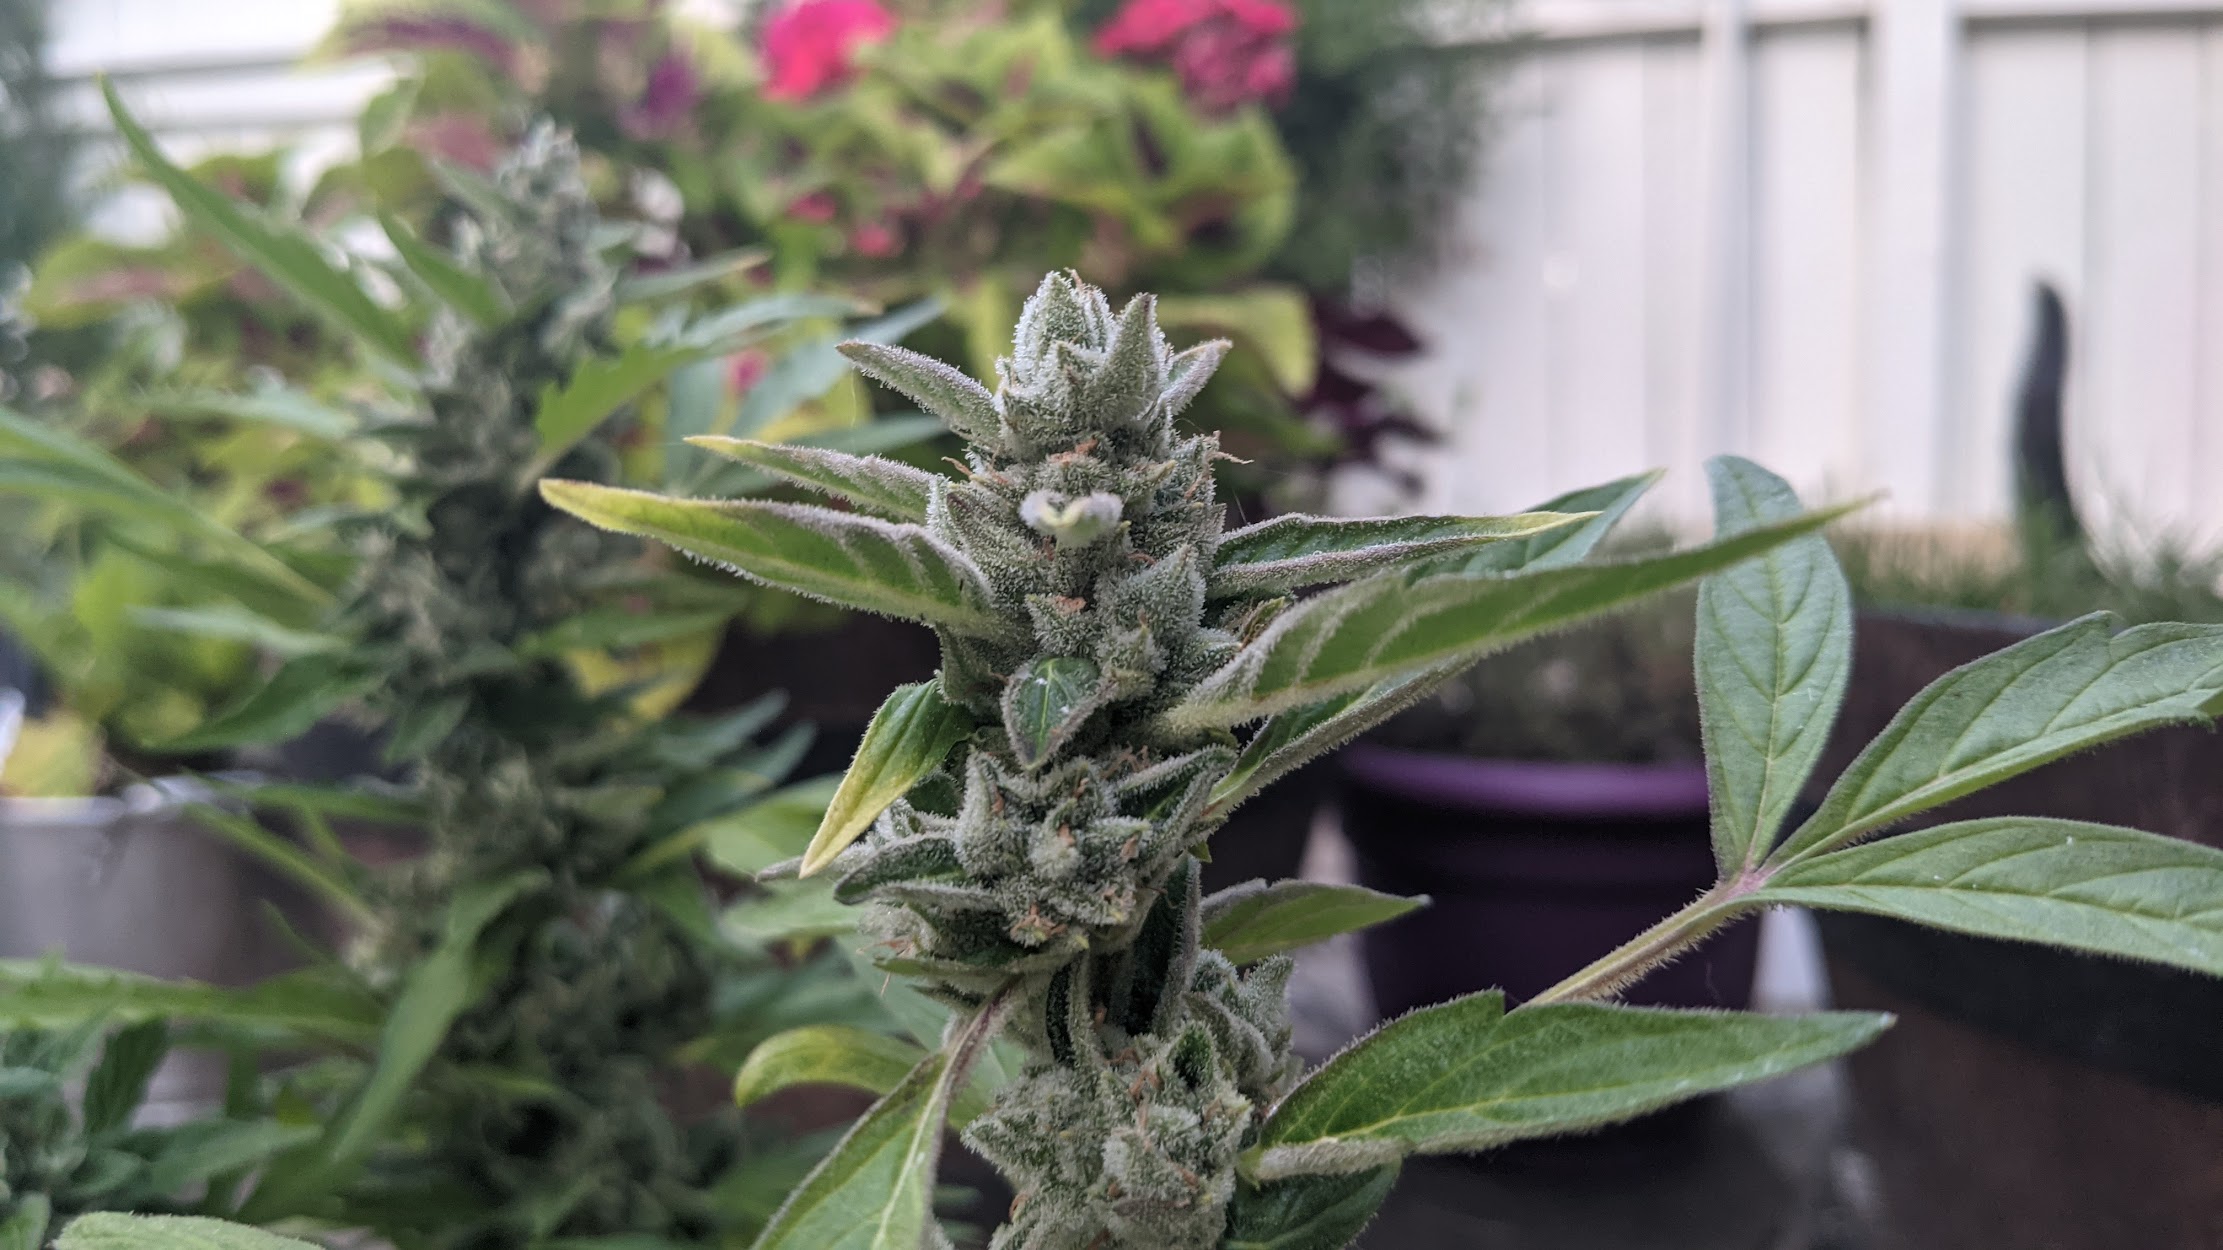
This plant is fun to grow because of its unique coloration, but it wont be the top performer in your garden. We grew several of these and have found that they are prone to weather damage (sun, heat and wind) when grown outside but do moderately better indoors. While the breeder claims 50 to 200 grams per plant outdoors, we never harvested more than 20 grams per plant. The best part of this plant is that it only takes 60 days from germination to harvest. However, we only recommend this plant for its aesthetic beauty as there are far more productive fast-autos on the market.
Phosphorus is a basic element, and just like nitrogen and potassium, it is a critical component in almost every growth function in your plant. Phosphorous is the P in NPK and like most nutrients, the plant absorbs it from the growing medium through the roots. There are a few simple rules to make sure your plant gets the right amount of phosphorous:
Phosphorous needs to be available in the growing medium in a form that cannabis can consume
The plant’s roots need to be healthy enough to uptake available Phosphorous
The pH near the roots needs to be in the right range for cannabis to uptake the phosphorous.
Why do cannabis plants need phosphorous?
Cannabis is like all living things and requires phosphorus for normal growth and maturity. Phosphorus is a key ingredient in photosynthesis, respiration, energy storage and movement, cell division and growth and almost everything else the plant does.
How do I diagnose phosphorous deficiency in cannabis?
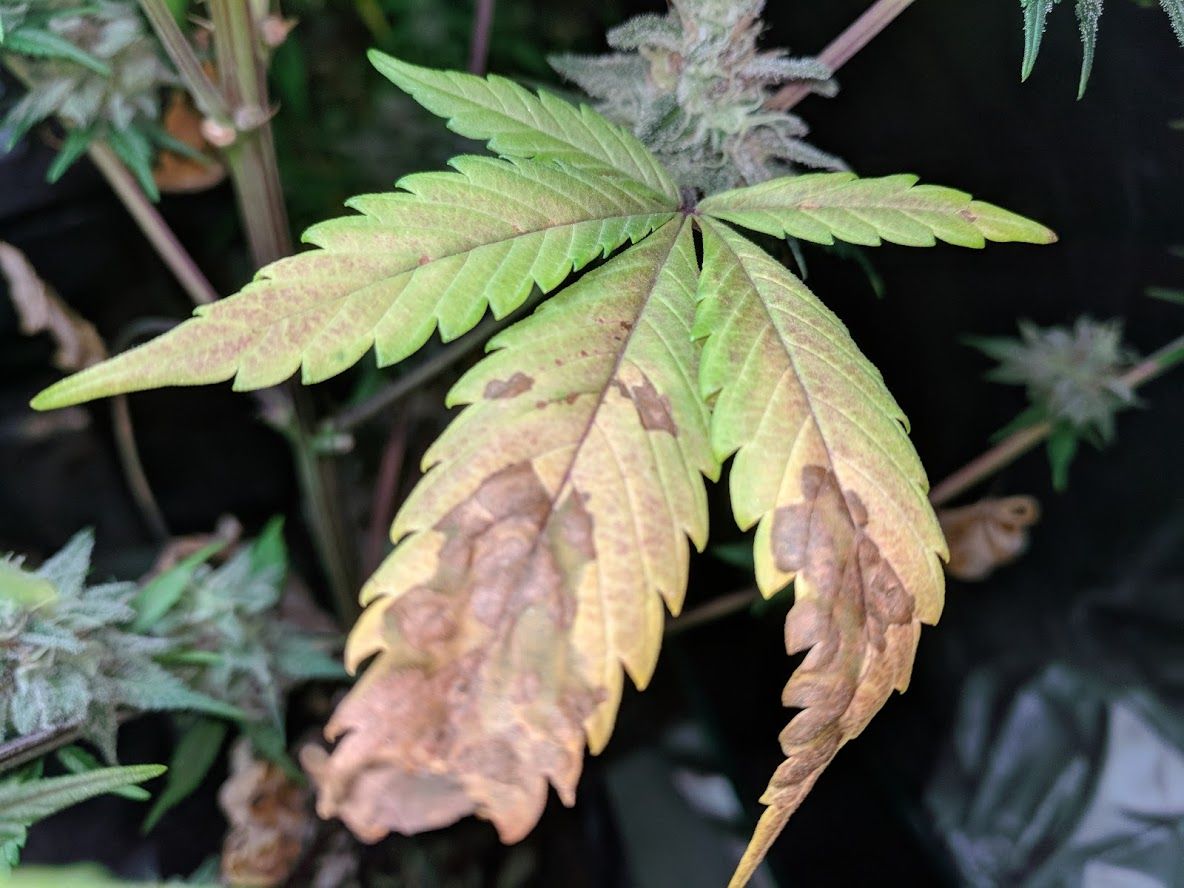
The easiest way to tell if your plant has healthy levels of phosphorous is to look at the older fan leaves at the bottom of the plant. Look for discoloration, spots and dark blotches that form between the veins. Often the leaves will feel stiff and dry to the touch.
Normal Phosphorous Levels
Lower fan leaves on plants with healthy levels of phosphorous are dark green in color.
Low Phosphorous Levels
Leaves on plants with lower levels of phosphorous start darken with darker blotches and may feel stiff.
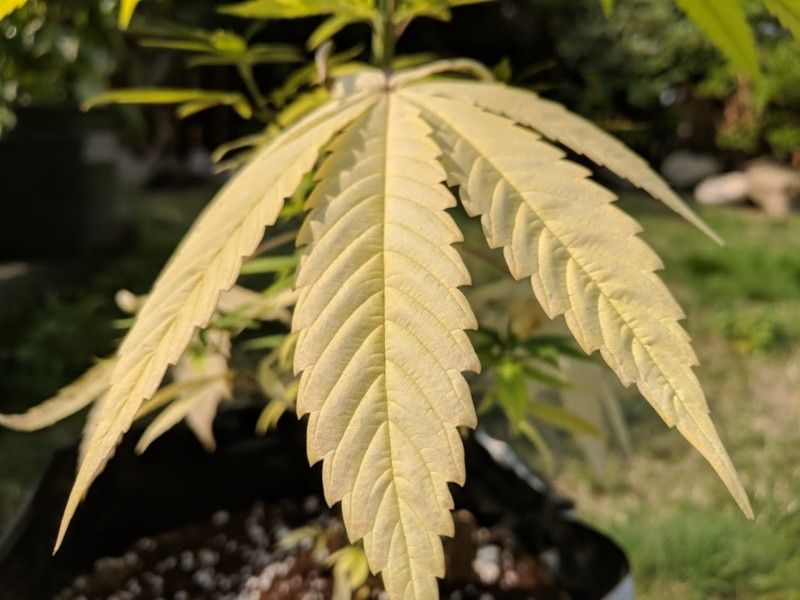
Depleted Phosphorous Levels
Leaves on plants with depleted phosphorous develop large blotches and rust spots and may turn yellow or develop a bronze sheen.
What causes blotches on cannabis leaves?
Cannabis leaves in healthy vegetative growth have green leaves due to high levels of green chlorophyll, which is used in photosynthesis to generate energy for the plant’s growth. If there isn’t enough phosphorous, the plant struggles to create enough chlorophyll. To optimize resources, pot plants will reroute phosphorous from older leaves at the bottom in favor of supplying the growth tips.
When vegetating cannabis leaves at the bottom of the plant develop dark blotches, it often indicates a minor phosphorous deficiency
Flowering plants need increased levels of phosphorous in flower production. If it doesn’t have enough, it will begin diverting phosphorous from even the new growth leaves near the buds.
Flowering requires a lot of phosphorous and the plant will divert supplies from nearby leaves to bolster flower production.
Is there phosphorous in the medium?
The easiest way to get phosphorous into the growing medium at the correct level is to use a balanced nutrients set. Using fertilizers and nutrients put all the required elements into the growing medium, so if you are using a nutrient system designed for cannabis, there is probably plenty of phosphorous available.
Are the plant’s roots healthy?
Root health is critical for the uptake of water and nutrients. If a plant is too big for its container, the plant can become root-bound. When this happens, the roots grow inward and can strangle themselves, slowing the plants nutrient uptake. Other root issues, like root-rot, will also impact the plants nutrient uptake.
Is the pH Balanced?
PH is short for ‘potential Hydrogen’ but is most often used to describe the acidity or alkalinity of a substance. This is important when growing cannabis because nutrients are not available for uptake by the plant outside fairly narrow pH ranges. Cannabis plants in soil do best between 6 and 7 while cannabis plants in coco or other soilless mediums do best between 5.5 and 6.5.
If the pH is too high or too low, then the nutrients aren’t available for the plant to uptake. This is called nutrient lockout because no matter how many nutrients you provide, the plant still can’t use them. This is a very common problem for farmers and the best way to combat it is to test the pH at every watering.
Nutrients are available at different pH ranges.
From the chart above, you can see why phosphorous deficiency is one of the first signs that your pH might be low.
How do I correct phosphorous deficiency?
In most cases, you don’t need to worry about a few leaves on the bottom going yellow or getting splotches during vegetative growth. If you are seeing it in new growth during flowering, you should address the problem quickly, since cannabis needs increased amounts of phosphorous during flowering.
If your plant’s roots are healthy and you’re using a balanced nutrient solution, you should check the pH of the soil. In most cases, balancing the pH and performing a feeding should prevent further problems.
How do I check the pH?
There are two methods for checking the pH at the plant’s roots. The most common method is to water the plant until there is a runoff and then check the pH of the runoff water using a hand-held pH meter. If the pH that comes out is higher or lower than what you put in, then you know that it is unbalanced.
The second method uses a soil pH meter. These unit have probes that allow them to test the soil near the roots after a watering.
How do I balance the pH?
To balance the pH, flush with water until the runoff is in an acceptable range. After the pH near the roots is at the right level, follow up with a hearty dose of nutrients and the problem should be solved.
To correct a deficiency, aim for a pH of around 7 in soil, or 6.5 in coco, to get the most phosphorous uptake. If you notice the yellowing continuing, you likely have a root condition. If the pot is too small, transplant into a larger container.
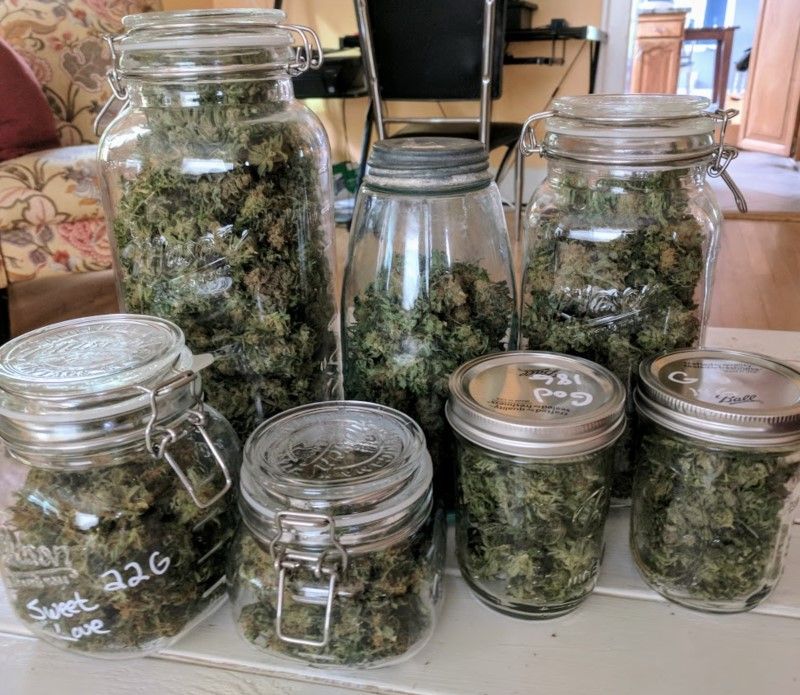
Its an exciting time! You’ve spent tons of time and energy into growing your crop and its finally getting close to harvest time and its tempting to claim victory and get busy reaping the rewards. There are 3 steps left though:
Harvest the plant
Dry the flowers
Cure the bud
You’ve invested too much time and energy to rush past the last steps. Harvesting too early can drastically decrease potency, since the THC has not finished maturing. If the buds aren’t dried enough, they can grow mold. Don’t cure for long enough and your bud will taste like hay and may make you anxious or paranoid. In this guide, we will cover when to harvest, how to dry and cure your bud for the best results.
When is the best time to harvest?
The amount of time spent in flowering varies by strain, but generally, your buds will be ready to harvest 8-12 weeks after flowering starts. There are two simple methods for determining when your cannabis plants are ready for harvest that will optimize potency, and give the best-finished product overall.
Most Precise: After a percentage of trichomes have turned milky or cloudy Simplest: After a portion of pistils have darkened in color.
This buds look close to harvest, but you’ll need to look closer to harvest at the perfect time.
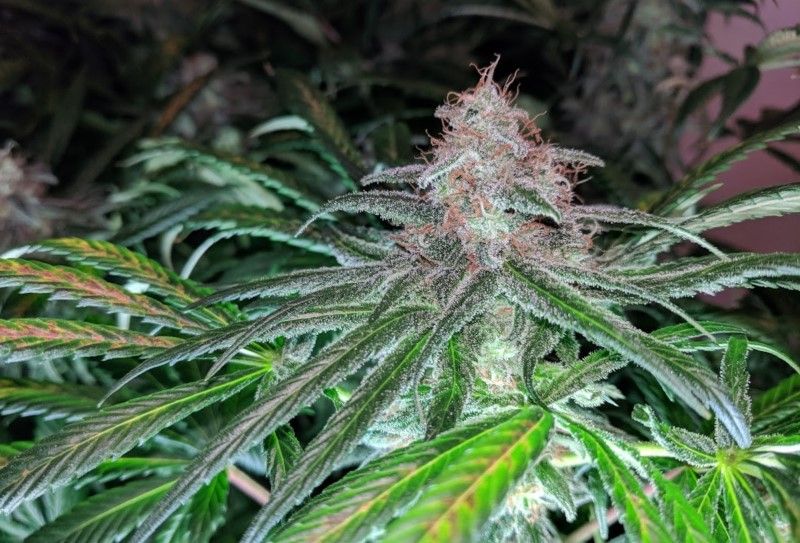
Using Trichome Color
Trichomes are mushroom looking structures that form the crystal structures on flowers – often referred to as resin – that contain the cannabinoid compounds we all love. To the naked eye, trichomes appear as the white dust that forms on the flowers and sugar leaves growing out of the bud structure. The ‘Fruity Jack’ from Philosopher Seeds above shows extreme trichome growth.
Young trichomes are clear when they first form and turn milky white as they mature. Trichomes that have just turned white are higher in the psychoactive compounds (like THC) that create cerebral effects. Fully mature trichomes turn amber and are higher in compounds like CBD and lower in THC, thus causing sedating or ‘couch-lock’ type effects. Counting the percentage of trichomes that have turned amber will let you know exactly when to harvest.
White
Amber
Effect
100%
0%
Highest psychoactive
80%
20%
High psychoactive effect
50%
50%
Balanced effect
20%
80%
Raised sedative and lowered psychoactive
0%
100%
Most sedative
The images below show trichome development as the plant matures.
While not as precise as looking at the trichomes, this is the simplest method since it requires no additional equipment. The white hairs growing out of young marijuana buds are called pistils. As the flowers mature, the pistils darken into brown or red colors.
Light Pistils
Dark Pistols
Effect
50%
50%
High psychoactive & milder sedative
25%
75%
Balanced
10%
90%
Raised sedative & lowered psychoactive
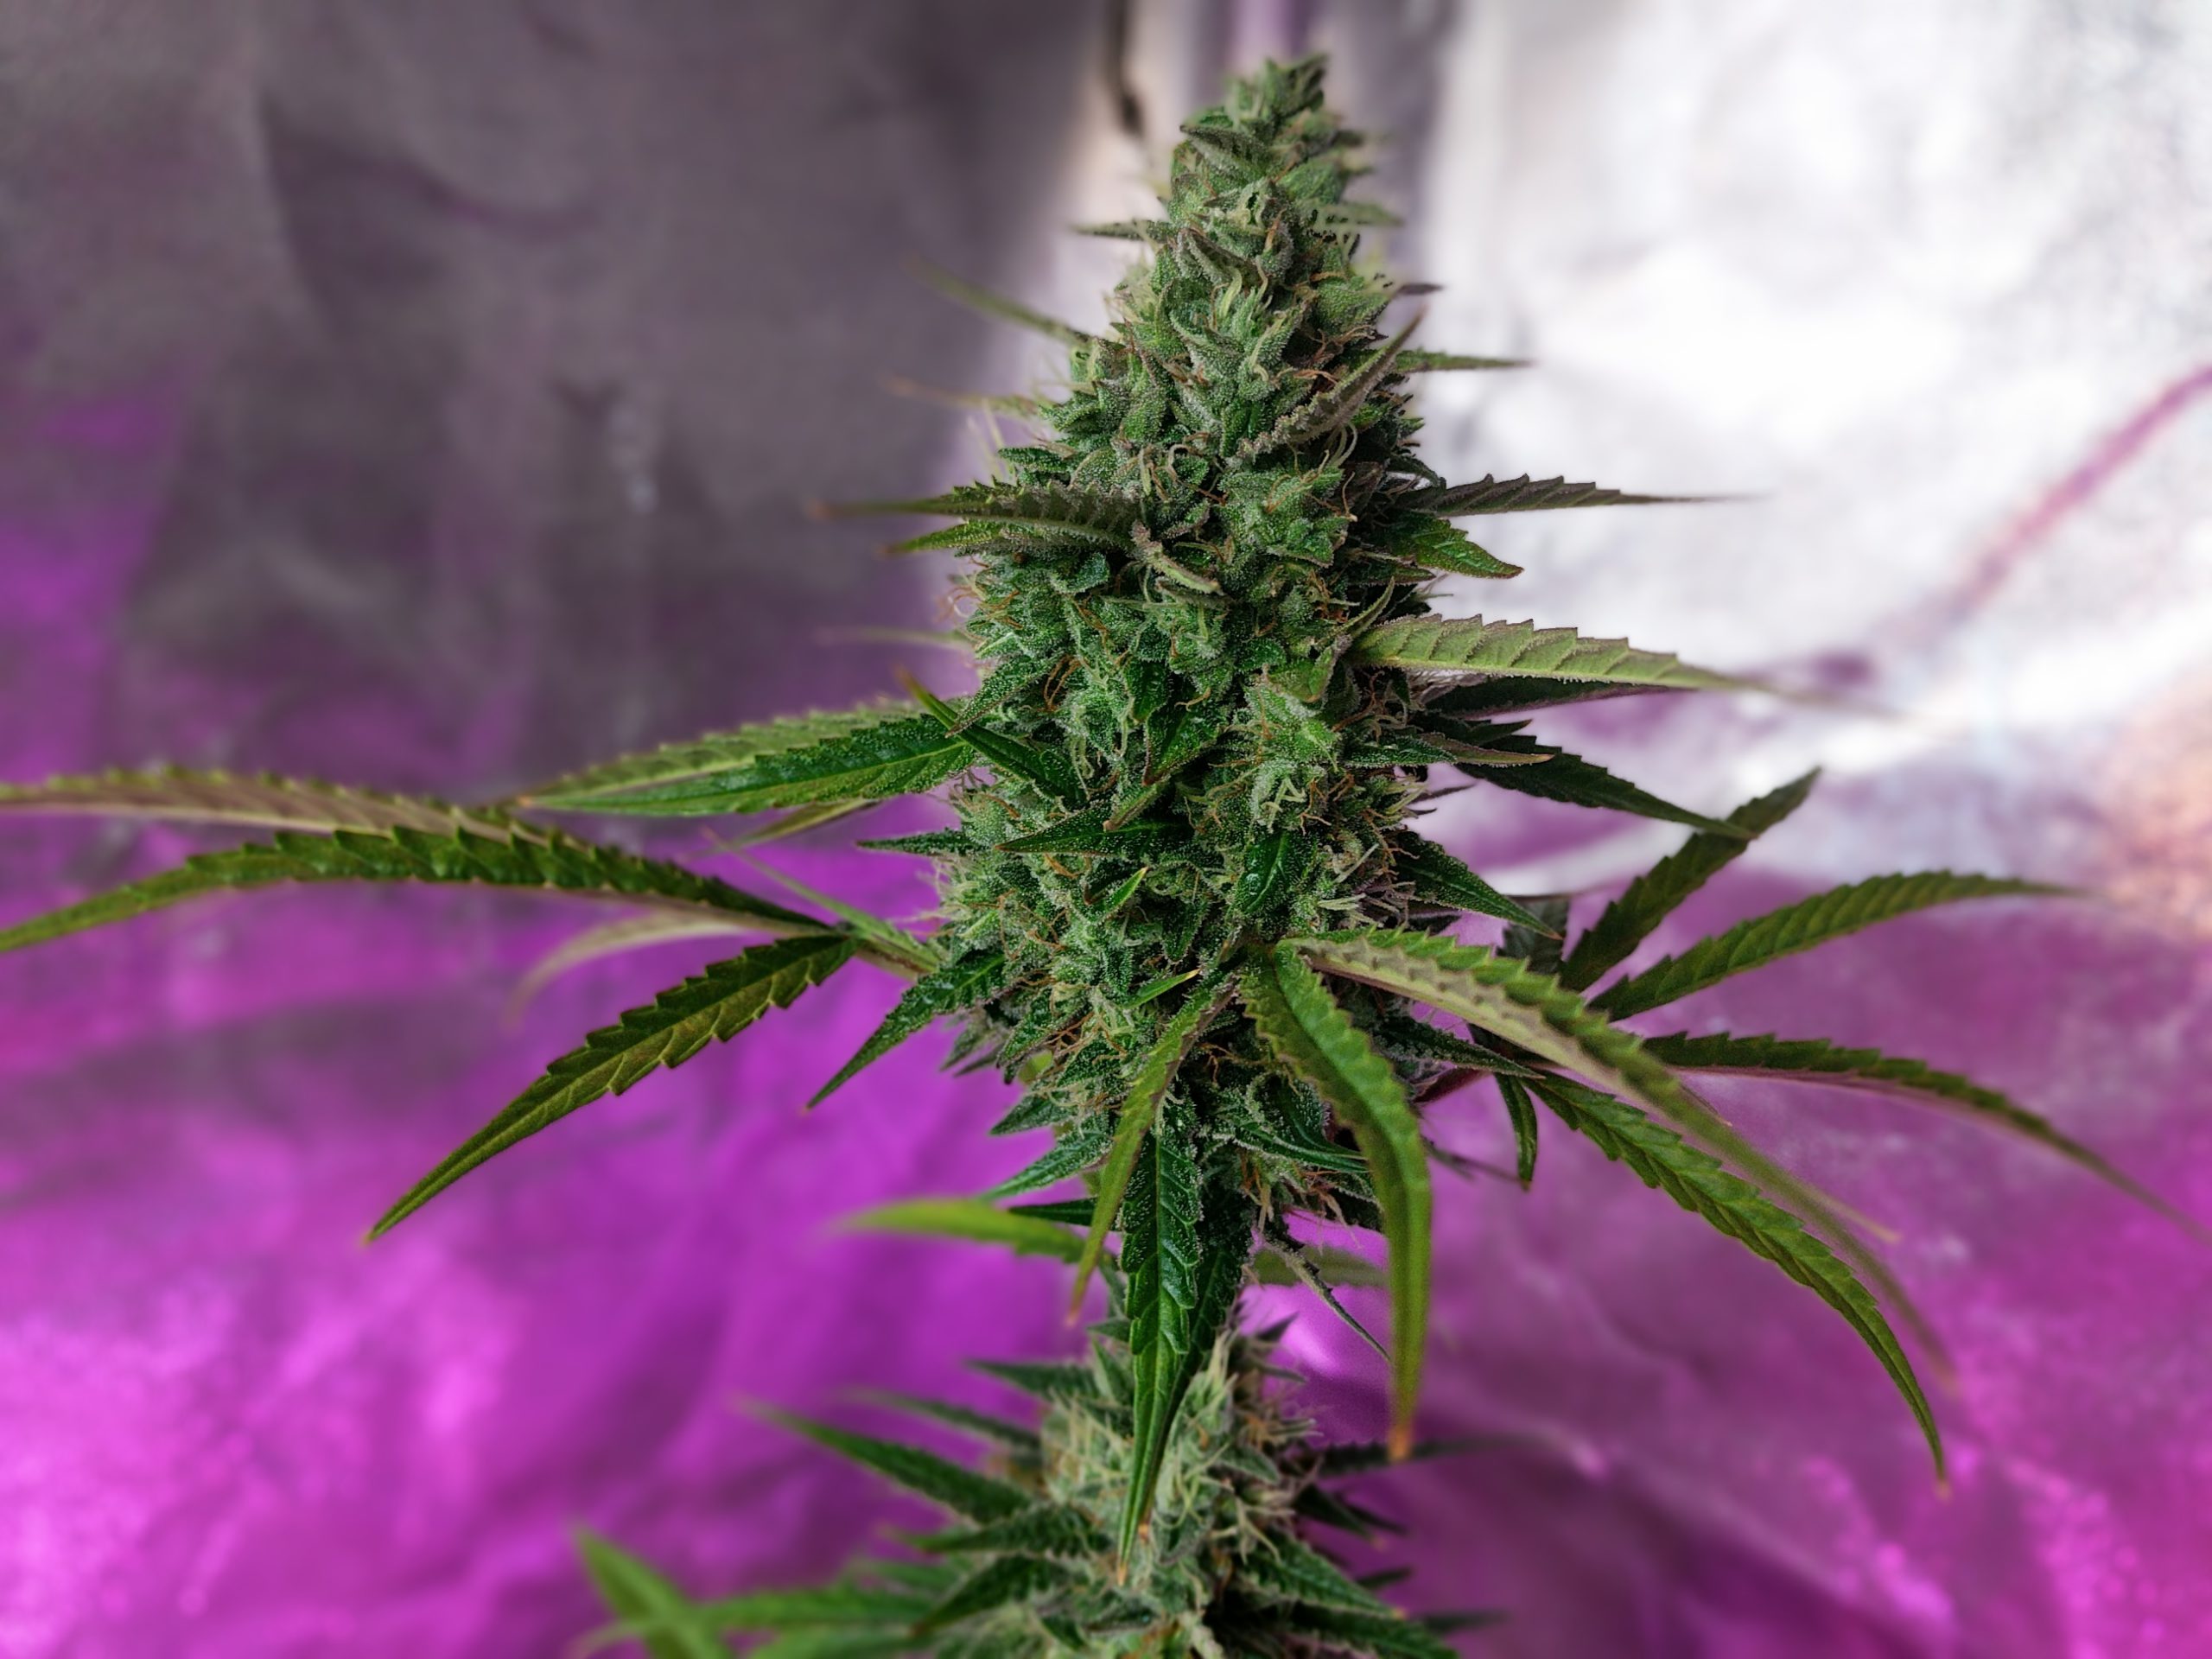
You can observe pistil color with your eye alone. Measure the percent light versus percent dark on several buds, and take the average. The pistils in the ‘Purp Pac’ below show that it is almost ready to provide a balanced effect.
This plant is ready, with almost all dark pistils, resulting in an increased sedation effect.
Getting Ready
As your plants are getting closer to harvest, there are a few things you’ll want to do to get ready.
Flush
Cannabis nutrients can leave behind salts and other trace residues that can negatively impact the smell, taste, and overall quality of the final buds. You can clean most of these from your plants a week or so before harvest with a nutrient flush.
To flush, use large amounts of water (or optionally with a flushing solution) to remove leftover nutrients and salts from the soil. Use at least an equal quantity of water to the size of the container. Flushing two weeks before harvest and using only organic nutrients for the rest of flowering can improve the buds flavor and make it smoke cleaner.
Prune Fan Leaves
It’s often easier to remove fan leaves while the plant is still standing, so many farmers snap them off in the weeks before harvest. To do this safely, grab the leaf stalk at the base and pull upwards while snapping the stalk. If you don’t pull upwards, the stalk will pull bark off the stem, and cause extra stress to the plant.
Extended Darkness
Many farmers believe that extending hours of darkness near harvest can improve resin production as the plant believes that the season is almost over, and kicks growth into overdrive. While the science behind this isn’t clear, it doesn’t seem to hurt.
Harvest
This one is easy: cut the plant at the base of the stalk.
Dry
To dry the plant, hang it up. You can hang the entire plant or cut off individual branches. You will remove and manicure the individual buds from the branches AFTER they are dried.
Keep the relative humidity between 30% & 60% and the temperature between 65F & 80F (18C & 26C). Avoid too much airflow to keep the plant from drying too fast.
You can dry right in your tent – hang your plants between 3 and seven days.
If drying takes less than three days, you are drying too fast and want to increase humidity, decrease air-flow, or decrease temperature next time. If drying takes more than seven days, you are drying too slow and will want to reduce humidity, increase air-flow and temperature next time.
When is it dry?
Dry cannabis flowers have the following properties:
The outside of the bud is crispy and dry.
The inside is still moist and supple.
When you press it, it should retake its shape.
The small stems are crispy and snap easily.
The large stems do not yet snap.
What if I let it dry too much?
This is recoverable during the curing phase in most cases, as the cannabis will reabsorb moisture from humidity packs.
What if I I didn’t let it dry enough?
Just let it finish drying. Weed that is packaged wet will always have a funky smell, might grow mold, will smoke poorly, and will generally not be a great experience. Just put these back out to dry.
Is it ready to smoke now?
Kind of. Dried cannabis is technically smokable, but won’t burn as clean, flagrantly, or as smooth as it will after curing. Uncured cannabis can also cause increased anxiety and uncomfortable feelings. Curing your weed correctly will make sure that you get the most out of the time, energy and money you’ve invested in your garden.
Is there an easier way to dry and cure?
Professionally made equipment, including drying racks and curing containers can help. Check out this list for more information.
Cure
The curing phase is when your cannabis will improve its flavor profile and increase potency over a series of natural processes. During this time, you want to keep a stable humidity between 50% and 60% with reduced airflow.
Step 1: Remove and manicure buds from stem.
This is a messy step and your hands will get sticky! Using scissors or shears, cut the buds off the stems and then manicure sugar leaves. How much you focus on making the buds look pretty is up to you. Just make sure you save the shake (stuff you cut off) since it can be used to make edibles and extracts.
Step 2: Put in glass jars.
Put the cannabis into glass jars (1 qt/liter jars work the best). Just drop the manicured buds in, do not pack them into the jar or they will become overly compressed and not cure. Drop a humidity pack in the middle of the jar, and then close the lid.
Step 3: Wait.
Cannabis benefits heavily from curing for the first 6 weeks, and then has diminishing returns. For the first couple of weeks, open the container once or twice a day to let it breath for 5-10 minutes.
Step 4: Smoke!
After curing for at least a few weeks minimum, your cannabis is ready to smoke! Enjoy, you’ve earned it.
How important is the curing step?
Very. If you skip it, your pot will be less potent and more likely to cause anxiety and negative feelings. The temptation to sample is high when the buds look and smell so amazing, but it’s worth the wait. We recommend a full six weeks, but there’s no law against sampling a little along the way.
In this guide, we’ll walk through caring for your marijuana plants during the flowering stage. The flowering stage is the final stage of the plant’s life and begins after darkness lasts longer than 12 hours for photoperiod strains or after a set amount of time for auto-flowering strains. During this phase, the plant will produce sexual organs in an attempt to procreate before dying. Females produce the flowers that we all like to smoke and male plants produce pollen sacs, which aren’t good for anything other than causing the females to produce seeds. If you are growing bud to smoke, you want to remove any males as soon as you identify them.
Primary Objective: The objective during this phase is for your plants produce flowers or buds. At the beginning of flowering, most strains will put on rapid vertical growth that often causes them to double in height.
Optimal Environment: Think late summer and early fall, with cooling temperatures and decreasing humidity. Along the edge of the forests, the adult plants will rustle in the gentle winds as they reach toward the waning sun that shines for less than 12 hours a day. Rains come frequently but with time to dry the soil between. Building large bud structures requires nutrients high in phosphorus and potassium.
Flowering Care
Grow Space
Most strains tend to stretch at the beginning of flower, often doubling in height. Make sure you have ample vertical grow space to account for this.
If you are growing photoperiod strain, you will need to make sure that your grow space can be completely dark for over 12 hours per day. Even a quick flash of light can be enough to interrupt the flowering cycle. Grow tents are ideal for light control, but cabinets or closets work well too.
Provide ample bright lights for under 12 hours per day. Photoperiod plants require at least 12 hours of uninterrupted darkness per day to flower. If the darkness is interrupted often, the plant will leave the flowering and revert to vegging. High powered LEDs or HPS are recommended for the most productive grow. During flowering, you can place the lights closer to the plants than in vegetative growth, but generally keep LEDs at least 12 inches (30cm) away. Learn more about lighting options and schedules here.
Fruity Jack from Philosopher Seeds under LED lights.
Temperature/Humidity
With flowering plants, we are trying to replicate late summer and fall conditions. Ideal temperatures are between 70 and 85F (21C-30C) and should not go above 90F (32C) or below 60F (15C). Flowering plants need less humidity than seedlings or vegging plants. Increased humidity runs the risk of mold, rot, and pests, so keep the relative humidity around 40-45%.
Water/Nutrients
For watering, flowering plants follow the same rule as all other phases: DO keep the soil warm and moist throughout the vegetation phase. DO NOT flood or saturate the medium, since this will prevent the roots from getting enough oxygen. Too much water and the seedling will suffer root and nutrient problems and will eventually fail. Flowering plants are not as resistant to over watering and under watering as vegetating plants.
Flowering plants also need macronutrients for basic building blocks in the budding process. Unlike the vegetation phase, plants in flower do not need as much nitrogen (too much can slow production) but need increased phosphorus and potassium. Flowering plants need micronutrients also, like iron, calcium, zinc, etc. Too many micronutrients can block macro-nutrients. Most nutrients are only available to the plant at specific pH ranges. Using balanced multi-part nutrient systems are the best mechanism to assure your plants get what they need.
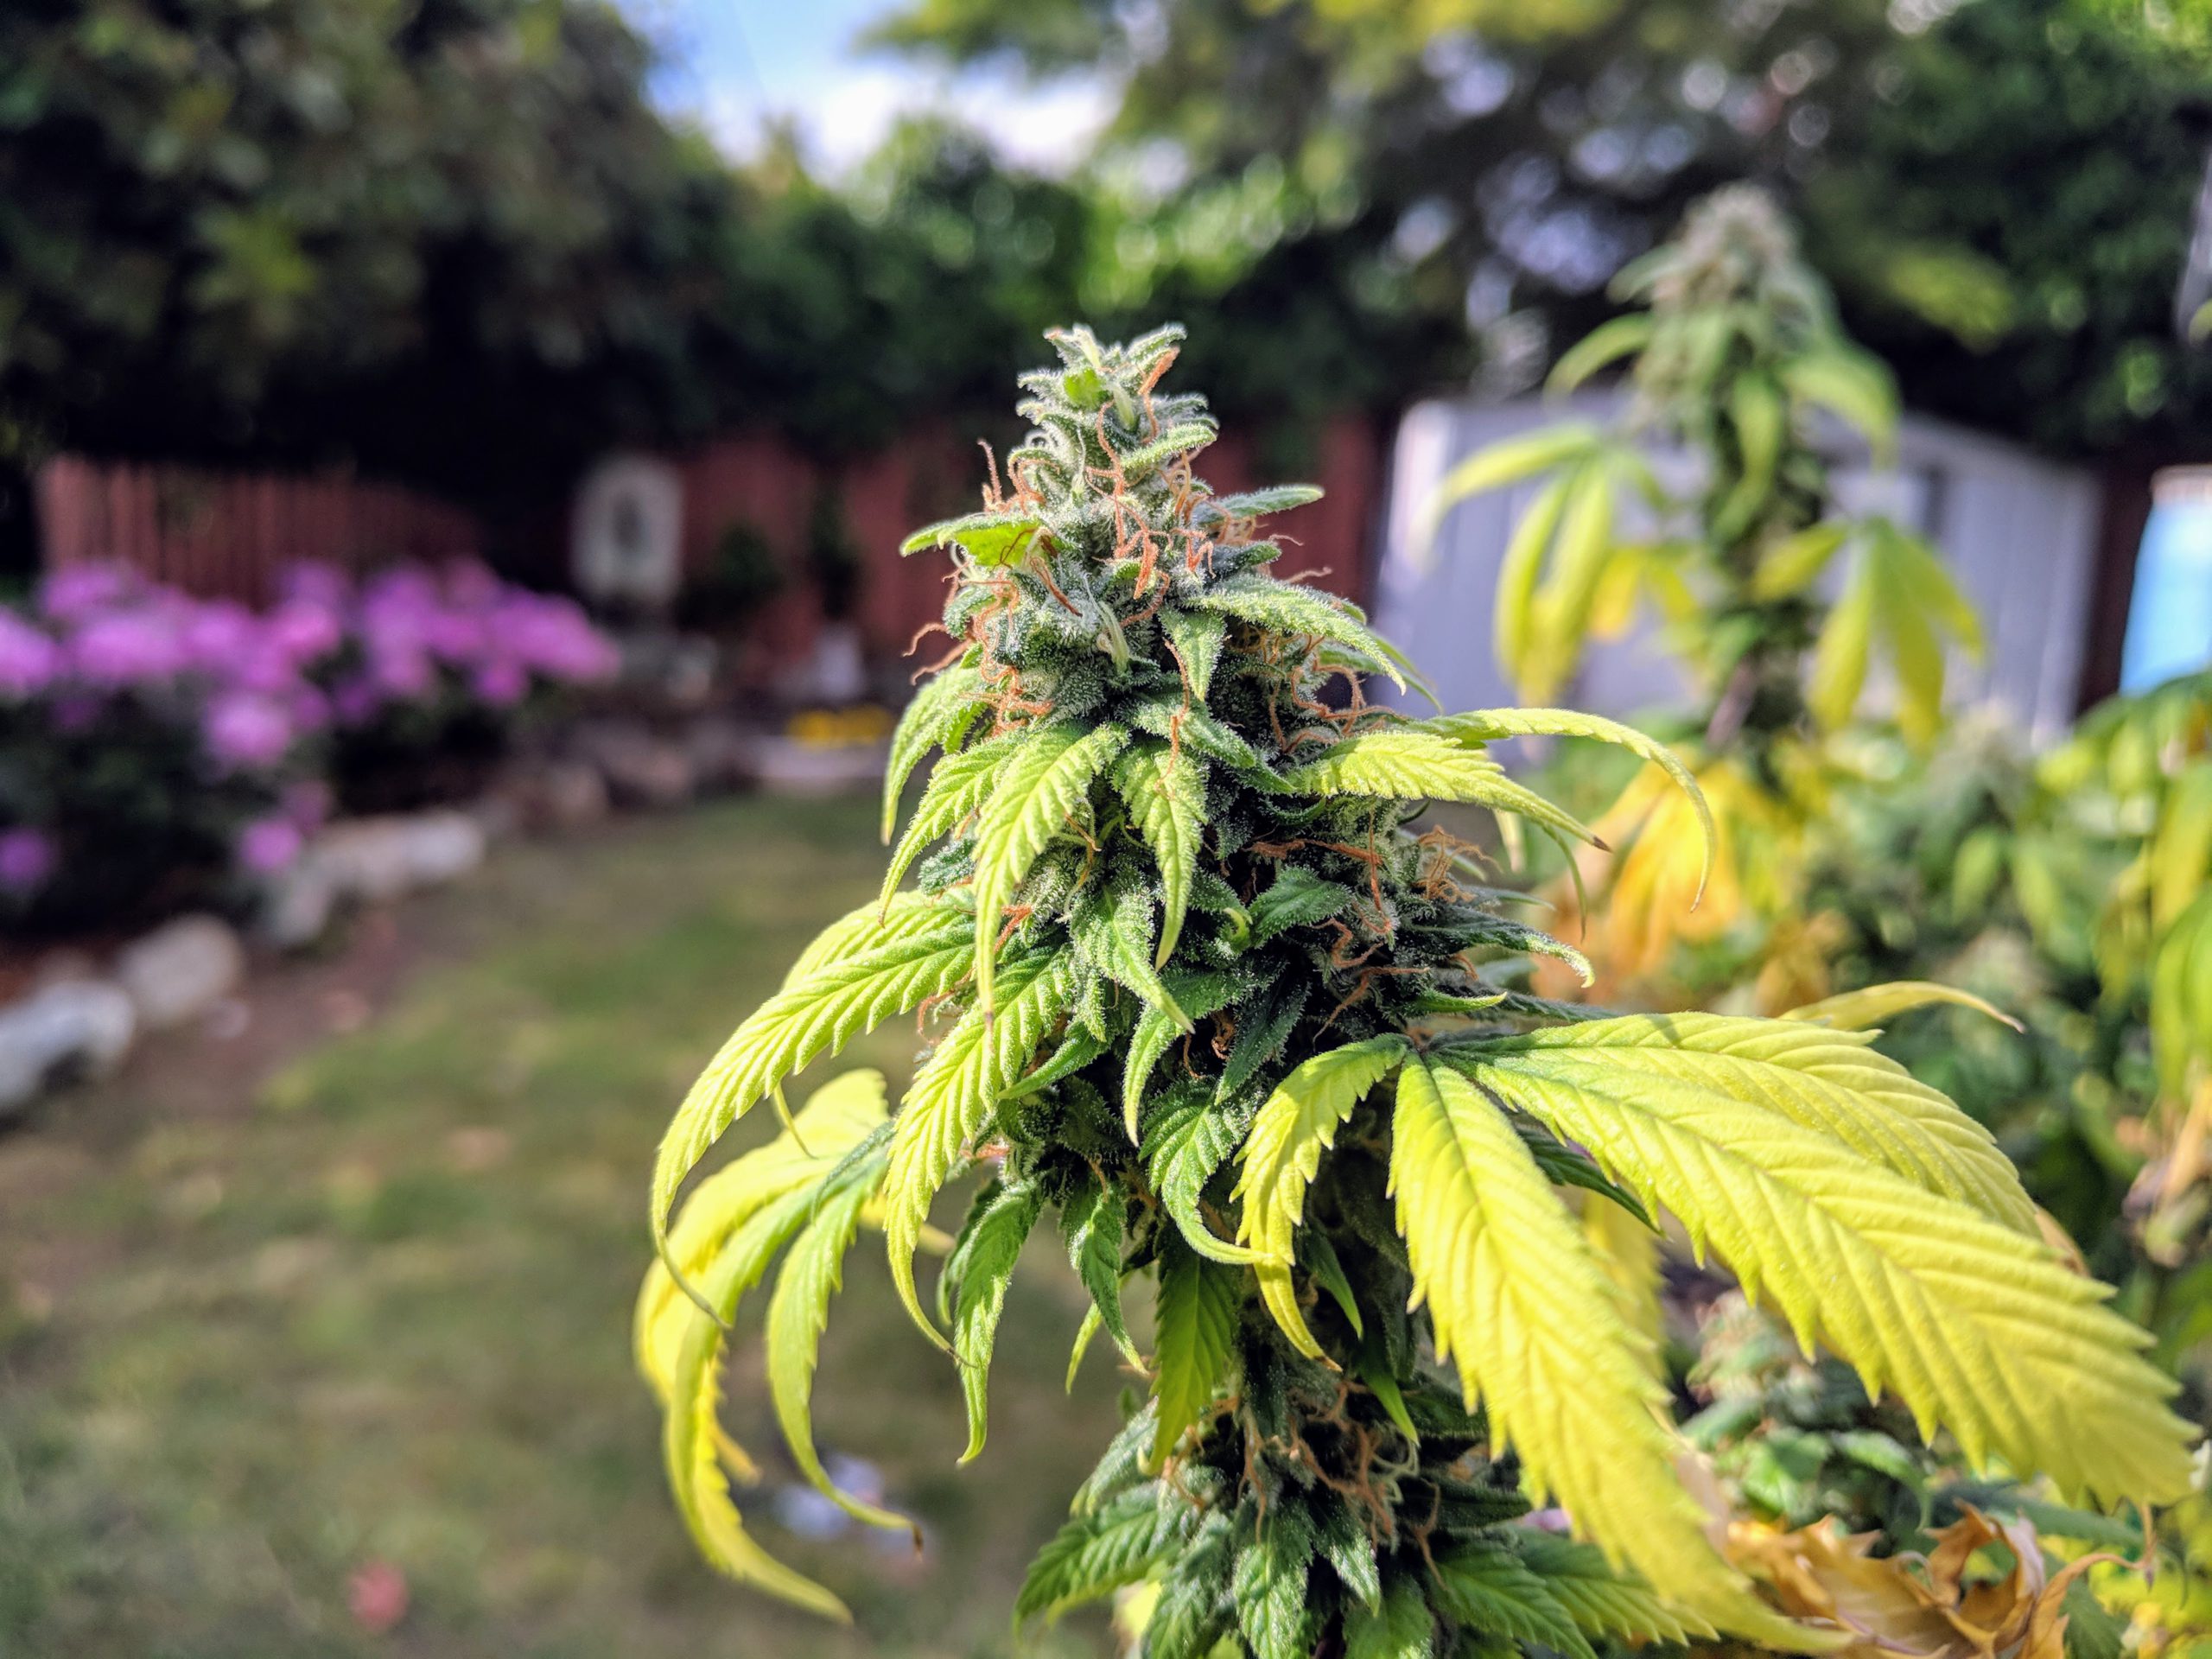
Leaves often turn yellow in late flower as the plant diverts energy to the flower
Pest Control
Plants in the flowering phase don’t recover from pest outbreaks as easily as vegetating plants, so the key to effective pest control is to be proactive before there is an outbreak. Pests thrive in the same conditions as your plants, so it is inevitable that they will find your crop if you don’t take steps to prevent them from establishing a foothold in the first place. Whether it’s mites, mold or whiteflies, there are a few preventative measures that can help you keep your crops safe:
Keep it clean; don’t leave litter, rotting leaves or standing water in your grow space since this provides excellent hiding spots and food sources.
Don’t spray the plants right before lights out; water droplets left on the leaves can encourage mold and mildew.
Keep proper temperature and humidity; too warm and humid and pests will thrive.
Use neem oil treatments at least once a week to make it more difficult for pests to gain a foothold.
Treat outbreaks aggressively
It’s safe to spray neem onto the bud sites. Neem has a strong fragrance, so you might want to avoid using it for the last weeks before harvest.
Cannabis plants should not be transplanted in flower if it can be avoided. Since transplanting is stressful, you should make every effort to have the plant in its final container before starting flowering. If transplanting cannot be avoided, use extreme care in transplanting to minimize stress and damage.
Training & Pruning
Vegetating cannabis grows rapidly and is extremely robust to both high and low-stress training. During the flowering phase though, your plant becomes less robust to stress and any injury can slow growth. As a general rule, you should not cut, injure or perform any other high-stress activity on your flowering plant. After a few weeks in flowering, the plant will become rigid and vertical growth will slow – at which point even low stress training techniques should no longer be used.
Prune your flowering plants selectively. Removing small bud sites from the understory can focus growth on the big buds up top. You can also pull fan leaves that are damaged or excess fan leaves for additional airflow. Always be gentle with your flowering plant and never take too much at one time.
This LSD from Barney’s Farm seeds had multiple toppings and low-stress training before being put into flower.
Is my plant male or female?
Cannabis plants are dioecious plants, which means that each plant (almost) always has either male or female organs. This is important when you’re growing cannabis to smoke because you only want the flowers of the female plant and you don’t want them to be pollinated by male plants. Pollinated flowers produce seeds, which drastically reduces potency and flower yield.
You can tell the sex of a cannabis plant 5 to 14 days after flowering starts by inspecting the growth tips near the plant’s nodes. Female plants begin growing white hairs, or pistols, out of pointy calyx that will eventually form the bud structures.
Male plants will form tiny grapes like pollen sacs, like in the picture below. These should be removed from your garden as soon as possible to avoid pollinating female plants. Male plants almost never produce substantial amounts of THC.
This Cooley from Cizzle is a male – notice the grape-like sacs forming.
When is the flowering phase over?
The flowering phase is over when your buds are ready to harvest. It varies by strain, but generally, your buds will be ready to harvest between 8 to 10 weeks after flowering starts. There are two simple methods for determining when your cannabis plants are ready for harvest:
Most Precise: After a certain percentage of trichomes have turned milky or cloudy Simplest: After a certain percentage of pistils have darkened
Most common problems can be diagnosed by inspecting the leaves.
What’s wrong with my plant?
Sometimes things don’t go the way you planned, and it seems that no matter how careful you are, things are going to go off the rails with cannabis sometimes. Unfortunately, there isn’t a lot of time to correct issues. Mite, mold and other pests can also wreak havoc on your crops, so you need to act quickly.
Nutrient deficiencies are common in flowering plants. Nitrogen deficiency is even normal, as the plant needs much less nitrogen during flowering. Other deficiencies are often caused by pH balancing problems, and not a lack of nutrients in the medium. These are simple to diagnose and easy to correct, but need to be addressed quickly in flowering plants.
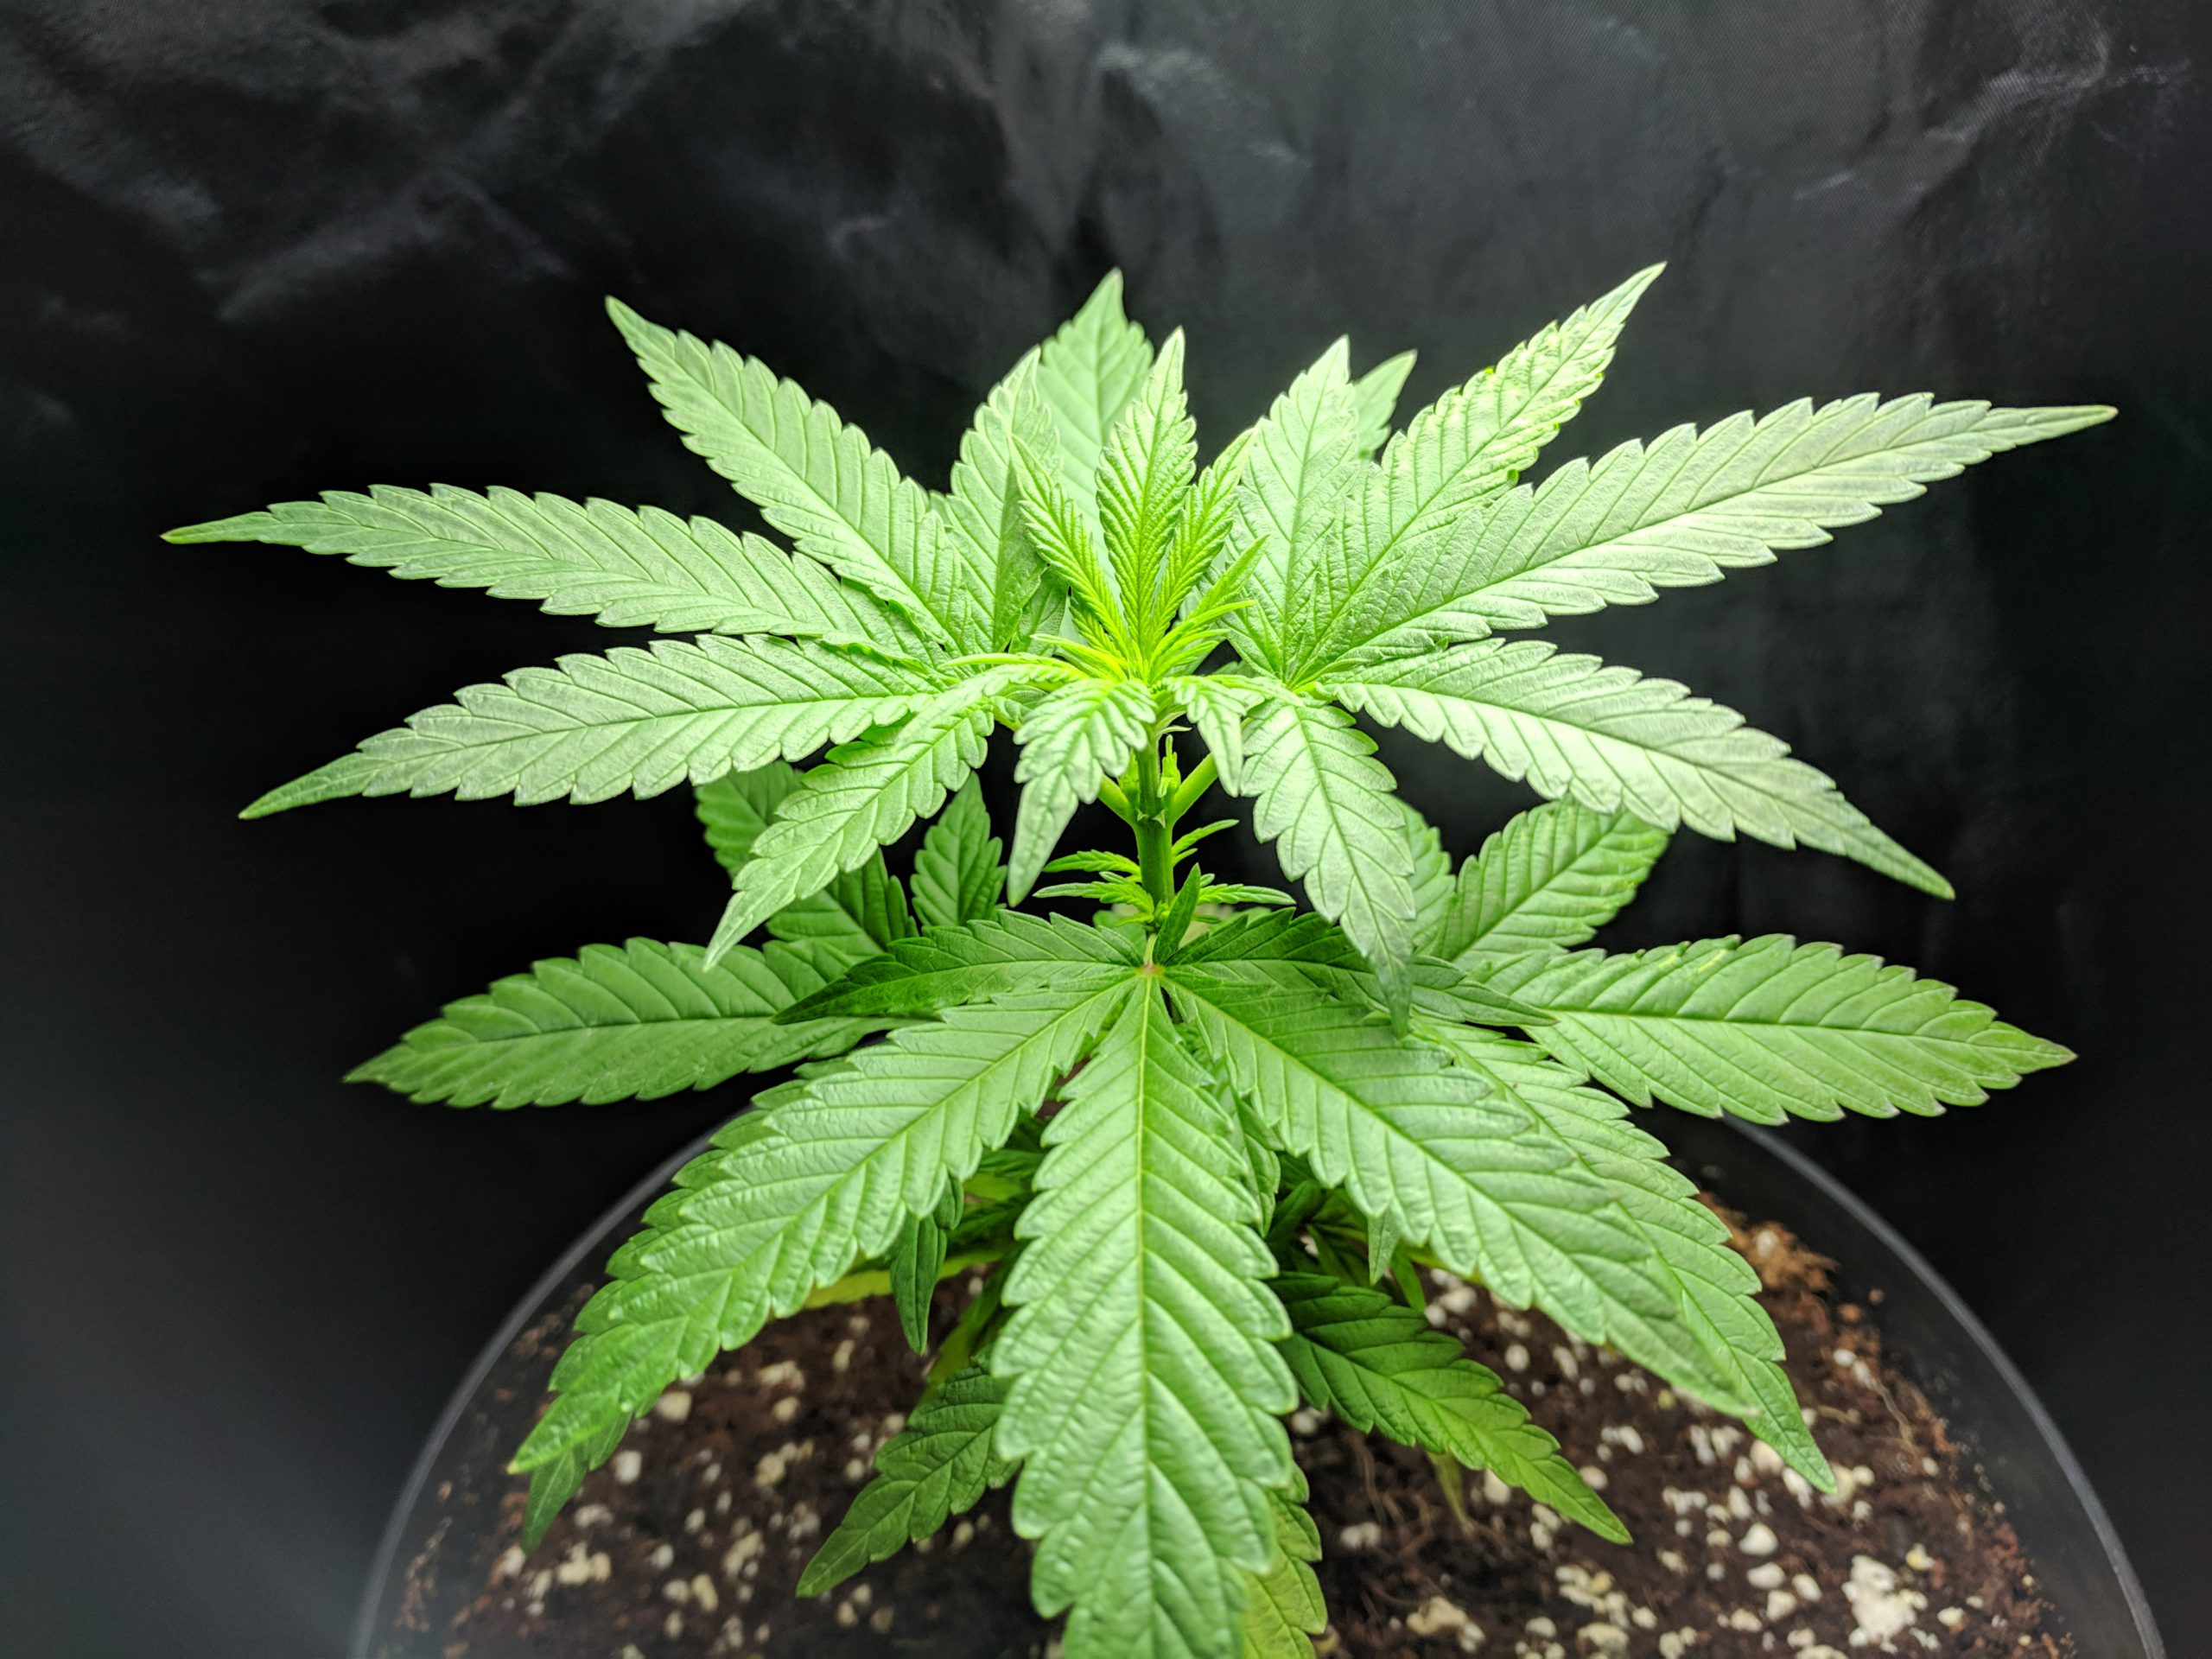
In this guide, we’ll walk through caring for your marijuana plants during the vegetative stage. The arrival of the fully formed seven-point leaves found in mature plants marks the beginning of this phase. The first leaves of a newly-sprouted seedling will have a single point; the next three, then five points; before finally producing the iconic seven-point leaf, which signifies the beginning of the vegetative stage. This phase is where your plant will do a lot of its growth, both vertically and horizontally.
Primary Objective: The objective during this phase is to put on as much plant mass and create as many bud sites as possible while training the plant into the final growth shape before entering flowering. We do this through training, topping and selective pruning. Cannabis plants in the vegetative states are incredibly robust and quickly regenerate from injuries, pests and nutrient deficiencies. Once a plant enters the flowering stage, it becomes much less pliable and robust to manipulation, so use the vegetative state to position your plant to make the most out of flowering.
Optimal Environment: Think late spring through summer, with warming temperatures but decreasing humidity. Along the edge of the forests, the young plants will rustle in the gentle winds as they reach toward the bright sun that shines for 16 to 24 hours a day. Rains come frequently but with time to dry the soil between wettings. The explosive growth needs strong roots to pull nutrients from the fertile soil.
Vegetative Care
Grow Space
There are lots of options for where you grow, and your selection will depend on your goals and constraints.
Outside – Cannabis can spend their vegetative cycle outside during the summer months. Space Bucket – These are self-contained environment-in-a-bucket are perfect for single plant stealth grows. Grow Box – They are a great option for small and stealthy grows for single plant production. You can pick these up premade or make your own or repurpose an old piece of furniture. Closet – A spare closet can make an ideal grow space because they offer good height and are good at keeping light contained. You will need a fan for ventilation in most closets. Grow Tent – Grow tents range in size, from 2’x2′ (.6m x .6m) on up and are great options for all phases on cannabis life. Tents have great ventilation, reflective walls to make efficient use of lighting and they keep light contained to keep your grow stealthy.
Vegetative phase begins after the plant start producing adult leaves.
Lights
Photoperiod strains will enter flowering if dark periods exceed 12 hours, so nights must be kept shorter than 12 hours to keep the plants in vegetative growth. Auto-flowering strains, on the other hand, go into flower a set amount of time after germination.
Farmers describe light cycles as a ratio of light/dark hours. Standard options are 18/6 (18 hours of light followed by 6 hours of dark), 20/4 (20 hours of light followed by 4 hours of dark) and even 24 hours of light without darkness.
While the general rule of thumb is that more hours of light means more photosynthesis which means more growth potential, there are indications that dark periods are essential in plant development – particularly in root growth.
Lighting Options
Sunlight – Vegging your plant in sunlight is a great option – particularly if supplemented with an artificial option. Fluorescent Compact Fluorescent Lights (CFL) and fluorescent tube lights can be great options for vegging plants. They are cheap, burn relatively cool and are readily available. LED – Over the past years, LEDs have overtaken almost all other lighting types for home grows. They are relatively inexpensive to purchase and operate and burn very cool compared to traditional grow lights. In nearly all cases, we recommend LED lighting to other sources. HPS – High-Pressure Sodium lights are incredibly effective lights and have been successfully used to grow amazing buds for decades. They do burn hotter than LEDs, which can cause temperature problems in tents and other confined spaces.
These vegetating plants have been topped several times to make them bushy
Temperature/Humidity
With vegging plants, we are trying to replicate summer conditions. Ideal temperatures are between 70 and 85F (21C-30C) and should not go above 90F (32C) or below 60F (15C). Vegetating plants need less humidity than seedlings since their mature roots can pull ample moisture from the soil. Increased humidity runs the risk of mold, rot, and pests, so keep the relative humidity around 50%. For optimal conditions, start vegging at 60% and lower to 45-50% through vegetation.
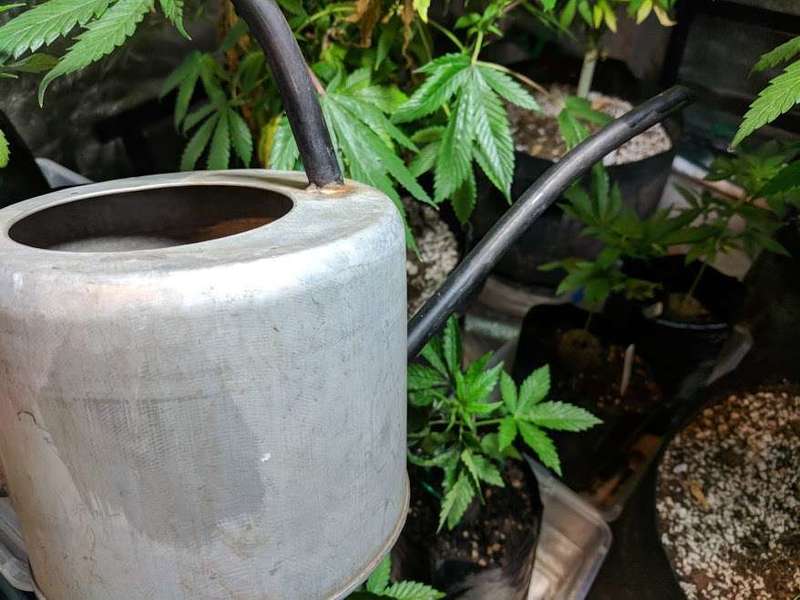
Water/Nutrients
For watering, vegetating plants follow the same rule as all other phases: DO keep the soil warm and moist throughout the vegetation phase. DO NOT flood or saturate the medium, since this will prevent the roots from getting enough oxygen. Too much water and the seedling will suffer root and nutrient problems and eventually fail.
A good rule of thumb is to wait until the top two inches of medium (knuckle deep) is dry before watering again. Another method is to gage from the weight of the bag. If you see the leaves start wilting, you’ve waited too long. Have no fear though; young cannabis plants are amazingly robust.
Vegetating plants need macro-nutrients for basic building blocks in its rapid growth process. During the vegetation phase, nitrogen is essential and phosphorous is less critical – though those roles reverse during flowering. Vegetating plants need micro-nutrients too, like iron, calcium, zinc, etc. Too many micro-nutrients can block macro-nutrients. Most nutrients are only available to the plant at specific pH ranges. Using balanced multi-part nutrient systems are the best mechanism to assure your plants get what they need.
Since nutrient requirements and tolerance can vary by plant, it’s a good idea to calibrate the needs of each plant. Start off with around 1/4th recommended dosage and then gradually increase until you hit the right level. The bottom leaves will begin to yellow if there aren’t enough nitrogen and leaf tips will burn if there are too many nutrients.
The key to effective pest control is to be proactive before there is an outbreak. Pests thrive in the same conditions as your plants, so it is inevitable that they will find your crop if you don’t take steps to prevent them from establishing a foothold in the first place. Whether it’s mites, mold or whiteflies, there are a few preventative measures that can help you keep your crops safe:
Keep it clean; don’t leave litter, rotting leaves or standing water in your grow space since this provides excellent hiding spots and food sources.
Don’t spray the plants right before lights out; water droplets left on the leaves can encourage mold and mildew.
Keep proper temperature and humidity; too warm and humid and pests will thrive.
Use neem oil treatments at least once a week to make it more difficult for pests to gain a foothold.
Treat outbreaks aggressively
Plants in the vegetative state heal faster than plants in the flowering stage, so it’s a good idea to make sure you have pests under control before transitioning to flower.
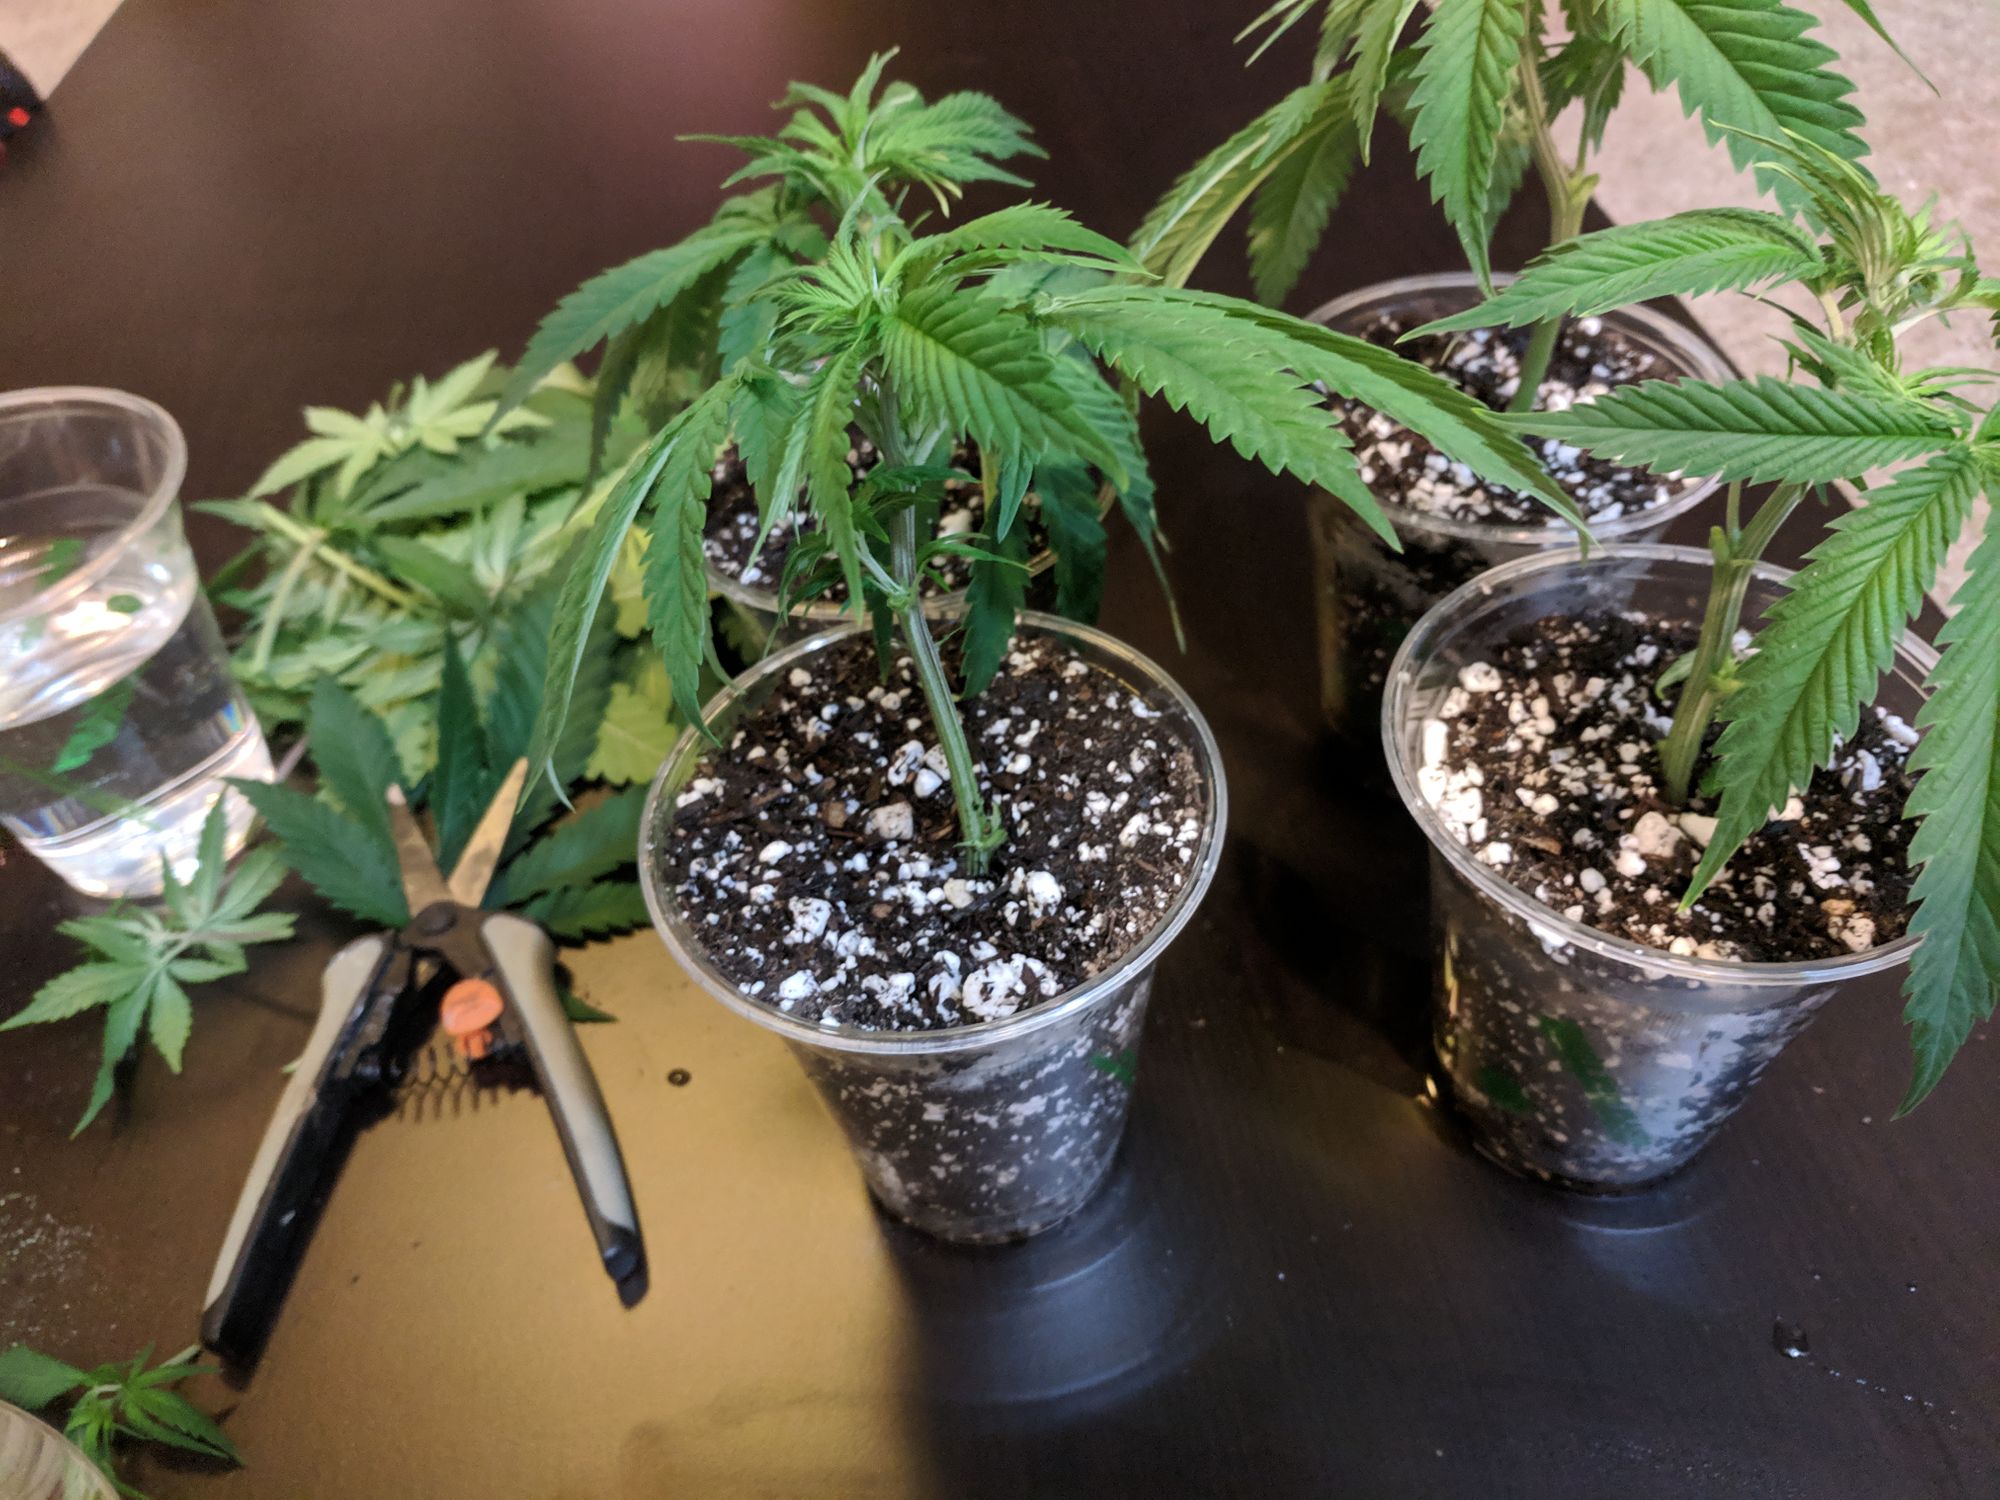
A small plant in a big pot causes problems because it is difficult to get the correct mixture of water and air for the roots. A large plant in a small pot with drastically slow growth. Start plants in an appropriately sized container and then transplant vegging plants as they outgrow their current container. Make sure that they are in their final container before starting to flower.
Vegetating cannabis grows rapidly; we call it weed for a reason! Since our primary objective in the vegetative state is to get into the desired shape, this is the time to get the plant into a shape that will best take advantage of your grow space. There are a variety of techniques available to manipulate vegetating plants.
Why do I want to train and prune?
Cannabis plants naturally grow into a shape similar to a Christmas tree. Some cannabis strains can grow 20 feet (6 meters) in just a few months. Growing plants that size won’t work for most home grows, so we use a variety of techniques to shape the plant to optimize for the space available.
Topping and training during the vegetative phase produces many large buds to increase yield and make better use of indoor lights during flower.
Low-Stress Training (LST): A mechanism for engineering cannabis growth by gentle and persistent manipulation of growing shoots through bending and shaping. It does not involve cutting, breaking, damaging or performing other stressful activities to the plant. The goal of LST is to develop the plant for optimal flower production later in life by continually pulling the tallest vertical branches and securing them to grow horizontally. Training the plant’s side branches to grow horizontally produces a flat canopy to make efficient use of indoor lighting.
Topping & FIM’ing: A mechanism that involves cutting or pinching the growing tips of the cannabis plant to break apical dominance and encourage branching. Apical dominance is when the principal, central stem of the plant is dominant over other side stems. Apical dominance causes cannabis to naturally grow in the traditional Christmas Tree shape with one large bud at the cola and smaller buds on side branches. Its an excellent form for growing cannabis under the sun (large light source far away) but does not work well for indoor lights (a small light source close up). Breaking this dominance allows multiple large colas and a flatter surface area for more massive indoor production. Since topping can stress to the plant, it can slow growth for a few days.
If you are growing an auto-flower with a short veg cycle, you will probably want to skip topping and rely on LST techniques.
Super-cropping: Another HST technique that increases yield and potency and encourages bushier growth. With super-cropping, the main stem is twisted and damaged in a specific way, so that when the plant regenerates it with improve vascular capabilities and some theorize that the stress can cause the plant to produce additional THC as a defense mechanism.
Pruning: Pruning is a hotly debated topic in cannabis circles. Some people claim that it harms the plant to remove fan leaves, and you should instead remove bud sites that aren’t getting enough light instead. We have found that both are helpful: Pruning excess leaves can reduce humidity and improve airflow Pruning branches and bud sites from lower on the plant, where they receive less light and would never develop past the pop-corn size anyway, divert resources back to buds on the top.
If you choose to prune, try to avoid mass pruning as that can cause stress and even shock that will slow the plant’s growth. Instead, remove a few leaves or bud-sites at a time. Look at it as a continuous process throughout the veg state.
When Is The Vegetative Phase Over?
In photoperiod strains, the vegetative stage lasts as long as the plant gets less than 12 hours of uninterrupted darkness per day. In nature, this continues from spring to early fall. Plants will begin the flowering stage after nights lengthen to 12 hours of continuous darkness. Indoor growers can end the vegetative stage and start flowering by setting the light schedule to 12/12 (12 hours of light followed by 12 hours of uninterrupted darkness). Controlling the light cycle allows you to decide, based on space and goals, to determine how long to vegetate your plants.
Autoflowering strains, on the other hand, begin flowering after a set number of days from germination regardless of the lighting schedule. The advantage is that you don’t have to worry about lighting schedules as much, but you also lose some control.
Most common problems can be diagnosed by inspecting the leaves.
What’s wrong with my plant?
Sometimes things don’t go the way you planned, and it seems that no matter how careful you are, things are going to go off the rails with cannabis sometimes. Luckily, vegetating plants are very robust and most common problems are are easy to diagnose and simple to fix.
Nutrient deficiencies are common in vegging plants, especially nitrogen deficiencies. Often caused by pH balancing problems, and not a lack of nutrients in the medium, these are simple to diagnose and easy to correct.
Mite, mold and other pests can also wreak havoc on your crops. Luckily, these are easy to treat in the vegetative state, and there is plenty of time for your plant to recover before you put it into flower – unless it’s an auto-flower.
In this chapter, we’ll cover caring for your cannabis seedlings. The seedling phase begins when the young plant first emerges from the seed and extends for the first few weeks of life. Seedlings are born with a pair of small round leaves called ‘embryonic cotyledons,’ that formed inside the seed. The young seedling uses these leaves to bootstrap photosynthesis and growth processes through the seedling phase, which ends after the plant starts growing adult leaves with 5 and 7 points.
Primary Objective: During the seedling phase, the primary objective is to allow the plant to develop hearty leaves for photosynthesis, healthy roots to slurp water and nutrients and a sturdy stem to support it all. It’s best to let the seedling do its job with minimum disturbance from the grower.
Optimal Environment: Think warm spring days in a humid understory, at the edge of a clearing. The light would be bright, but not too intense, and would shine between 12 and 16 hours a day. The soil would be mostly dry between rains, and temperatures would be between 70°F-80°F (21°C-26°C) with 60-80% humidity. In this environment, the young plant would spend the first weeks of her life developing its first sets of true leaves. The first sets will have one point, the second will have 3 points, the next 5 points, before finally producing the iconic 7-point leaf. Under the soil, the roots will begin spreading throughout the medium, looking to establish a solid base in the thick understory.
Seedlings do well in small containers.
How do I care for a seedling?
Lights
Provide ample light, but not too bright, for over 12 hours per day. Compact fluorescent light, low powered LED, or a window sill would all be ideal sources. There are indications that continuous light, without periods of darkness, can harm the vascular systems of young cannabis plants, so we recommend between 16 and 18 hours of light per day for seedlings.
Temperature/Humidity
With seedlings, we are trying to replicate warm spring conditions. Ideal temperatures are between 70°F and 80°F, and should never drop below 60°F. Seedlings benefit from higher air humidities while the root structures are forming, between 60% and 70% being ideal.
Water/Nutrients
Water should be pH balanced between 5.5 and 6.5. Watering seedlings are simple if you follow these two basic rules:
DO keep the soil warm and moist throughout the seedling phase.
DO NOT flood or saturate the soil, since this will prevent the roots from getting enough oxygen. Too much water and the seedling will ‘damp out’ and will fail.
Young pot seedlings do not need very many nutrients and nutritional content in the growing medium that is high will ‘burn’ their young leaves. Peat plugs have almost no nutrient content, making them ideal mediums for young seedlings. After the first few weeks, you may begin to notice lower leaves yellowing slightly; this is the plant asking for nitrogen. Start off with a light compost tea, or diluted nutrients at ~25% of the recommended dose; then ramp up over the coming weeks. Remember though, if the leaf tips begin to burn that this is a sign that nutrient levels are too high, and to back off a little. Tolerance – or need – for nutrients varies by strains, and even by the individual plant, so you’ll need to use trial and error to find the happy medium.
Pest Control
Seedlings are fairly tender, so avoid using even neem oil on them – never mind strong chemical treatments. For the first weeks, pests should not be a major problem for your seedlings if you follow a few preventative measures that can help you keep your seedlings safe:
Always start your seedlings in a clean, pest-free environment
Keep it clean; don’t leave litter, rotting leaves or standing water in your grow space since this provides pests with hiding spots and food sources.
Don’t spray the plants right before lights out; water droplets left on the leaves can encourage mold and mildew.
Keep proper temperature and humidity; too warm and humid and pests will thrive.
This seedling is almost ready to transplant because the leaves are hanging over the pots edges.
Transplanting
It is best practice to keep plants in a suitably sized container for its current stage. If the container is too big, the plant can’t drink up all the water and will tend to damp out from oxygen deprivation. If the container is too small, the plant can become root bound and stop growing. Start off with small containers for small plants, and transplant up as the plants’ root system fills the container.
Training/Pruning
Young seedlings are tender and under rapid development and shouldn’t be trained or pruned. Droopy seedlings can be propped up with a stake, but otherwise the seedling should be left to grow.
When Is The Seedling Phase Done?
There isn’t a definitive moment: once plants start producing the seven-pointed leaves that we associate with adult cannabis, vegetation will begin.
These plants are producing 5 and 7 point leaves, their seedling days are over!
The plants in the picture above have matured and strengthened, and are beginning to produce five- and seven-point leaves. So far they’ve spent their lives under a soft fluorescent light, with only water and a light compost tea. Now they’re ready to be transplanted to larger containers and are showing early signs of nutrient deficiencies, seen in the yellowing leaves at the base of the plant. All of these signs taken together signal the end of the seedling phase, and the beginning of the adult vegetative stage.
Why is my young seedling drooping?
Most often, a drooping seedling is caused by overwatering, known as ‘damping out.’ Let the medium dry out before watering again, and the young seedling might recover.
How can I get the seedling to grow straight?
Even healthy seedlings often droop or grow crooked. You can quickly correct leaning or drooping plants without stressing the plant by staking it up. Take a small wooden or plastic stake and push it into the soil deep enough to stay upright. Attach gardening wire to the stake and tie the plant upright by enclosing it in a loose loop. This low-stress training method will encourage the young plant to grow upright without harming or damaging it.
Staking seedlings does not stress the plant but encourages straight growth.
Why are my seedlings turning yellow?
The plant isn’t getting enough nutrients. Deficiencies often due to a pH imbalance locking out available nutrients or it could be a lack of available nutrients. Check pH first, but if you plant in with entirely inert mediums, like coco and perlite, add gentle nutrients after the first week.
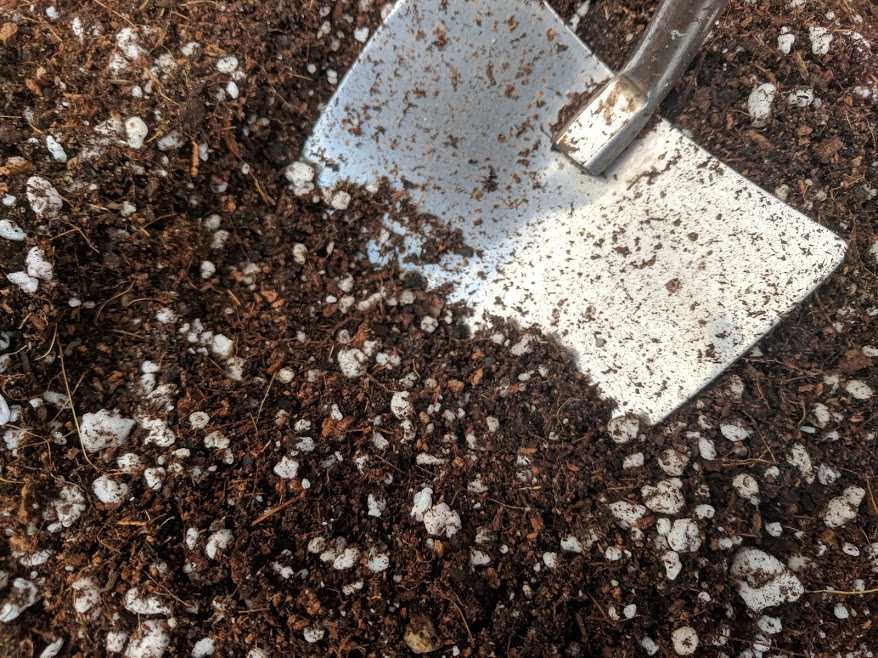
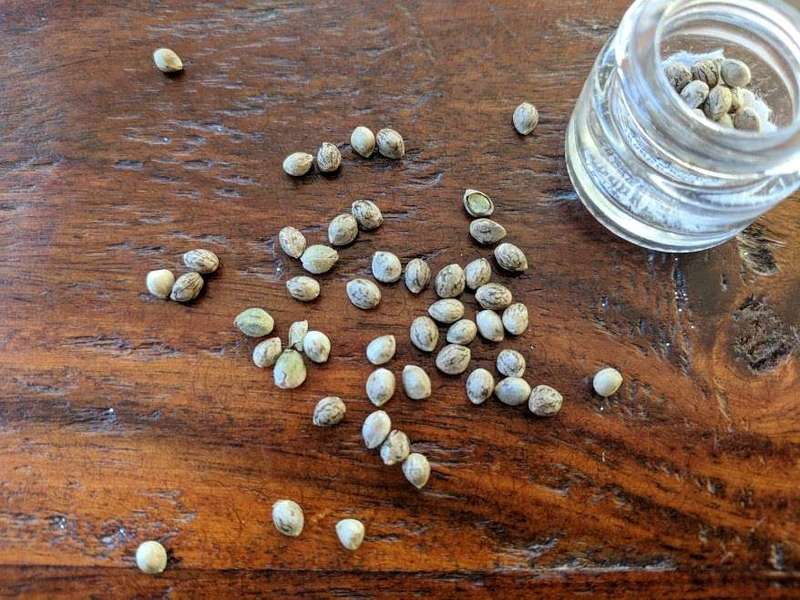
If you are starting with seeds, you’ll have to germinate them to get the grow started. In this chapter, you’ll learn all about the natural conditions that cannabis seeds germinate under and then we’ll show you a failsafe way to germinate your seeds.
This cannabis seedling emerges 3 days after planted directly in soil
What is germination?
A cannabis seed is just an embryonic plant enclosed in a protective shell and germination is the process of reactivation of metabolic machinery of the seed. The outer shell splits apart and the embryonic plant emerges as a seedling. For cannabis seeds, this process takes between 1 and 7 days.
What makes seeds germinate?
Cannabis seeds lie dormant until they meet the right conditions to begin germination. In tropical conditions, cannabis seeds germinate in the warm rains of early spring. The well-drained soil of the forest floor wouldn’t be waterlogged, but it wouldn’t dry out. The ideal temperatures would be between 70°F-80°F (21°C-26°C), with 60-80% relative humidity. These spring seasonal signals tell the embryonic plant contained in the seed that conditions are right to begin its life cycles. These are the same conditions you will emulate to germinate seeds.
What’s the easiest way germinate cannabis seeds?
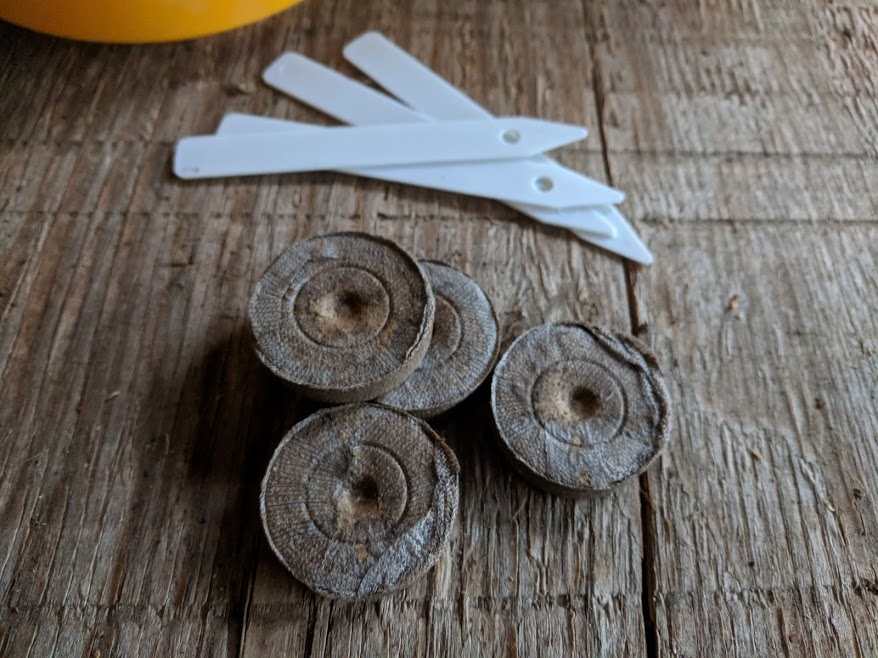
Peat moss pellets are pucks of dried peat moss enclosed in a fine netting. As a mostly inert medium that retains water well, peat moss pellets do a great job of mimicking the natural conditions of spring jungle floor.
What you need
Peat moss pellets – Get them online or at local department/hardware stores – they are widely available. Filtered water – You probably have this in your fridge. pH balance between 5.5 and 6.5. Cannabis seeds – Learn more about cannabis seeds in our guide
Peat Moss pellets swell to 5x their normal volume when flooded with water
Step 1 – Flood the Peat Moss
Peat plugs come dried and compressed, so you need to flood them with water. Use some warm filtered water from your fridge, rainwater, or distilled water that’s pH balanced between 5.5 and 6.5. Add water until the plugs are saturated, then drain the excess water. The plugs will swell 4-5x their original volume.
Step 2 – Insert Seed
Most plugs or pellets have a small hole in the top. Insert the seed between 1/4-1/2″ (6-12MM) deep and lightly cover with an excess medium. All emerging seedlings look identical, and most mature plants look very similar. If you start multiple strains at once, make sure to label them. Plastic plant labels can be fixed to peat moss plugs to identify the plant through its life – adding dates makes it a self-contained record.
Step 3 – Wait for it!
The next few days is mostly a waiting game. Put the pellets in a partially covered container to prevent drying out and follow these two simple rules:
DO keep the pellets warm and moist throughout germination, cannabis seeds germinate best in these conditions. DO NOT flood or over-saturate the pellets after the initial flooding, since this will prevent the roots from getting enough oxygen. Too much water and the seedling will ‘damp out’ and fail.
One easy method to ensure that you get the right amount of water is to use a spray bottle to wet the outside edges. Another is to quickly dip the bottom of the pellets into the water; moisture will wick upwards to the rest of the pellets. Either method will encourage roots to grow outward.
This seedling is emerging with the seed still attached – it will fall off in a a day or so.
Step 4 – Care for it!
As your young seedling emerges from the seed, you’ll notice that it has a set of ‘built-in’ leaves that don’t look a lot like pointy cannabis leaves. These are the cotyledons, and they are there to help the young seedling bootstrap the photosynthesis process. Young seedlings need light right away – but not too bright for the first few days
Keep the peat pellet moist until the seedling is ready to plant in a growing medium, but never saturate the pellet since that can drown the young plant. Add water from the bottom up by dipping the pellet quickly in water. This will promote rapid root growth as the roots will grow down after the water.
When is it time to plant the seedlings? You’ll know when it’s time because roots will be bursting out of the bottom of the peat pellet. Plant the pellet in a solo cup sized container using a quality soil mix. Water without nutrients for the first few weeks.
Optimizations & Alternatives
Germination Heat Mats
Germination heat mats are just like heating pads, but they don’t get as hot and are water resistant. These are especially useful for germinating seeds in colder conditions.
Germination Enclosures
One of the best ways to simulate tropical climates is to use an enclosure to conserve moisture and heat. You can make your own from cheap plastic containers, or buy a special purpose kit made for peat pellets. Used along with a germination heat mat, you can easily set up a tropical jungle climate anywhere.
Yes, you can germinate marijuana seeds in moist paper towels. Just put a damp paper towel down on a plate or other container and spread the seeds around. Add another damp paper towel or fold over the existing towel to cover all the seeds. You will need to keep the paper towels damp at all times throughout the germination process – a spray bottle can really come in handy for that. Covering the seeds with another plate or plastic will prevent it from drying out too quickly, just make sure that there is still some airflow for when the seedling emerges.
After a few days, the seed will crack and the embryonic cannabis plant will start to emerge. Once you see a solid root begin to emerge, you will need to transplant it into your growing medium. While this approach might be slightly faster than the other methods we’ve shown here, we don’t use this method because of the risk to the plant and main root during transplanting.
Can I germinate seeds directly in the growing medium?
That’s how it works in nature and it’s easy to do. Use a solo cup sized container filled with soil or coco and place the seeds about 3/4 inch (~ 2cm) deep. Keep the medium moist but not wet until you see the seedlings emerge between 3 and seven days later. The reason we recommend peat moss over directly planting in soil is that it is easier to control moisture levels in peat plugs due to the texture and qualities of peat. Experienced growers often sew directly into the growing medium.
Many farmers use rock wool cubes for starting clones and germination, particularly hydroponic growers. While these work well and are economical, they come with drawbacks. We recommend that new growers begin with peat pellets.
How long does it take to germinate?
From the time that you place your seed into the germination medium, you should start to see the emerging seedling within 2-5 days. Cannabis seeds germinate faster when they are kept at the correct temperatures, between 70°F-80°F (21°C-26°C), with a 60-80% relative humidity. Cooler temperatures will slow the germination process or stop it altogether. Germination is usually complete, and the plant is a young seedling within seven days. If you warm the seedlings with a heat mat, they can emerge in as little as 24 hours.
Should I germinate with nutrients?
Germinating plants don’t need any nutrients; it can burn their new leaves and roots. That’s why it’s best to grow seeds in an inert medium, like peat moss pellets or a paper towel. Young seedlings don’t need nutrients until they are a few weeks old.
Do cannabis seeds need light to germinate?
Not really, but they need light within the first day or so of emerging from the seeds, so it’s a good idea to germinate with a light source. Light sources also help increase the temperature, helping the germination process. Sunlight, fluorescent or low powered LED grow lights are all great options.
What if the seed gets stuck on the seedling?
They usually loosen and come off after a day or two. If it doesn’t come off, you can try to separate them. The easiest method is to find the direction of the crack and use a pair of tweezers to ‘help’ the seed continue cracking. Be careful that you don’t clamp the seed down or you can clip the folded embryonic leaves.
Often people think of cannabis gardens as a prohibition-era back room or basement utilitarian affair. It doesn’t have to be that way though, if you happen to live in one of the areas that have legalized cannabis cultivation, you can incorporate the plants into your life and into your existing gardens – it is a beautiful and robust plant.
There are many options for where to grow, and your choice will mostly depend on your needs and what’s practical. You’ll want to consider stealth, available space, how much you want to grow. Be creative and use or modify spaces you already have – as long as they meet the basic rules of a good growing space.
What makes a good grow space?
In the sections that follow we’ll cover the pros and cons of the different grow space options, but there are a few rules that are common over all the possibilities:
Good ventilation – Without proper ventilation, the air in your grow space will become very humid and hot and lead to mold, disease, and stress. A good grow space is well ventilated to make it easy to exchange fresh air.
Heat control – Cannabis likes the same temperature ranges as you do; too hot or too cold and the plant shuts down. Therefore, a good grow space keeps temperatures between 65F (18C) and 80F (27C) and never less than 60F(15C) and never more than 90F (32C). Cannabis can take more extreme temperatures, but these ranges are good targets for indoor production.
Light Control – Traditional photoperiod cannabis strains need over 12 hours of uninterrupted darkness in a 24-hour cycle to flower. Even a quick sweep of light can cause the plant to stop flowering. A good grow space for photoperiod strains can be completely blacked out.
Vertical Space – Cannabis can get tall, from 1′ all the way to 20′ (6.6m) tall, depending on the strain. You will need to select a strain that will fit into your space and use topping and training to make the most efficient use of your space and lights. Remember that lights hang down at least 1 foot (0.3M), and you will need to keep at least the same amount between the lights and canopy. A good grow space is at least 2′ (.6M) taller than the top of your plant after it’s done growing.
What options are there?
Outside – Cannabis is often grown outside and is an excellent option if available to you. The sunshine is free and the open air is great for growing cannabis. Make sure you are aware of local regulations.
Space Bucket These are self-contained environment-in-a-bucket are perfect for single plant stealth gardens.
Grow Box – They are a great option for small and stealthy grows for single plant production. You can pick these up premade or make your own or repurpose an old piece of furniture.
Closet – A spare closet can make an ideal grow space because they offer good height and are good at keeping light contained. You will need a fan for ventilation in most closets.
Grow Tent – Grow tents range in size, from 2′ x 2′ (.6m x .6m) on up and are great options for all phases of cannabis life. Tents have great ventilation, reflective walls to make efficient use of lighting and they keep light contained to keep your grow stealthy.
Farmers often use multiple methods throughout the plant’s lifecycle. For instance, you might veg in a space bucket, but move to a grow tent for flower, or veg in the sunlight and finish under lights.
This cannabis plant is being grown outside.
Growing Marijuana Outside
Cannabis grows great outside in most places that people live, so it will probably work where you live too. You will need to select a strain that grows well in your region and environment. Cannabis loves sunshine, so make sure to place it in an area that gets plenty of sun. If you keep it in a container, you will be able to move it around as the sun angle changes to optimize its light intake. If you plant it directly into the ground, cannabis plants can grow very large.
The major issue with growing outside is that growing cannabis is illegal in many localities. Check your local laws and be sure to stay in compliance.
Pros: The light is free and on its own timer. Cons: Growing outside isn’t very stealthy, and you won’t have any light control.
Growing Marijuana in a Space Bucket
Space buckets are made by connecting a couple of five-gallon buckets to form a tube. Install 3 or 4 lights in the lid and cut holes in the side of the bucket for additional lights and fans. Add as many buckets as you want for extra height. In the end, you’ll have a self-contained grow tube.
You probably have a lot of the stuff you need to build a space bucket already: The major drawback here is that you will be extremely space constrained and will likely need to train all but the smallest strains.
Pros: Growing in a bucket is very stealthy and a reasonably efficient way to grow. Buckets also have excellent light control. Cons: Buckets are space constrained, and 3 or more 23 watt CFLs in a small area heats up very quickly. You will need to have plenty of ventilation and select a strain that does well in small spaces.
Growing Marijuana in a Grow Box
Grow boxes are self-contained cabinets meant to grow plants from start to finish. You can make your own from an old cabinet, lights, and fans.
You can also buy turnkey solutions complete with lights and hydroponics kits. These make for perfect small stealth grows, but are expensive.
Pros: Grow boxes are stealthy, self-contained and have excellent light control and a great for space-constrained gardens. Cons: You’ll need to proactively keep your plant the right size through topping and pruning.
Growing Marijuana in a Closet
Closets can make great grow spaces if you have a spare one available, just add lights and a small fan, and you’re ready to go.
Pros: You probably already have one, so there isn’t an up-front cost. If your closet has a door, they are stealthy and have good light control. Cons: Closets don’t always have proper ventilation and can be space constricting.
Grow tents provide optimal conditions for cannabis inside.
Growing Marijuana in a Grow Tent
Grow tents are specially made ‘tents’ with canvas on the outside and a mylar coating on the inside to reflect light on the plants. Lights are hung from bars on the ceiling, and fans can be placed at ventilation openings.
Tents use blackout zippers to fasten the doors, and most vents can be velcroed, zipped, or cinched shut for complete ‘blackout’ light control. Tents come in a variety of sizes to suit your space. Make sure the tent has a metal frame and quality metal connectors.
Pros: Grow tents are efficient and have the best ventilation and light control of any option. Cons: Grow tents can take up a lot of space.
No matter where you grow, ventilation and temperature control are key to a successful grow. Remember that cannabis plants like the same conditions as you. If it’s too hot or cold for you, it will be too hot or cold for your plant. Similarly, if it’s too humid or dry for you then it will be the same for your plant.
In general, you will want to keep your grow space between 70°F-80°F (21°C-26°C) throughout the plant’s lifetime. Relative humidity ranges decrease throughout the plant’s life cycle, with seedlings being between 60-80% and full flowering plants being between 40-45% relative humidity.
Too Hot: The easiest way to decrease heat is to increase the ventilation in your grow space, and the easiest way to increase ventilation is to add fans and vents. Box fans are a good option, but compact duct fans work the best in tents. In cases where lighting is causing heating issues, try replacing it with modern LED options that will burn cooler.
Too Cold: If it’s too cold, turn on a heater. Heating pads specially produced for gardening will keep the roots warm. Incandescent bulbs don’t really help your plants grow, but they burn fairly hot and can be used to supplement heat.
Too Dry: Add a humidifier; you can pick up very cheap units at your local drug store. Decreasing ventilation and airflow can also help, but that will also cause increased heat.
Too Humid: The easiest way to decrease humidity is to increase ventilation. Decreasing temperature can lower relative humidity.
We use these duct fans for our tents – a 6 inch fan work well for 4×4 tents and 4 inch fans for smaller tents.
Fans are the best way to control heat and humidity for indoor grows.
How do I keep pests out?
No matter where you grow, keeping a clean grow space is a great preventative measure against pests. Keep old vegetative matter off the ground, and don’t leave standing water. Make sure to completely clean and disinfect between grows to prevent disease or pest holdover. In the end, pests will probably find your crop, and you will need to be proactive to make sure that they have as little impact as possible. See the section on pest control for more information.
Keep it clean
No matter where you grow, keeping a clean grow space is a great preventative measure against pests. Keep old vegetative matter off the ground, and don’t leave standing water. Make sure to completely clean and disinfect between grows to prevent disease or pest holdover.
What do we recommend?
We recommend what works best for your setup and needs. Be creative; it’s common to start seedlings and veg outside or in a small cabinet and then move to the tent for the flowering stage. The most important things are that your space has good airflow and temperature and humidity control.
If stealth and space are your biggest concerns, we recommend a grow box.
Next up: Learn about lights
There’s no shortage of options, and the best decision for you depends on many factors. You’ll want to consider heat control and balance cost to purchase and cost to operate when you make y our selection. Our guide will walk you through the options and help you make a clear selection.